Easy Royal Icing Pumpkin Cookies
This post may contain affiliate links. Please read my disclosure policy.

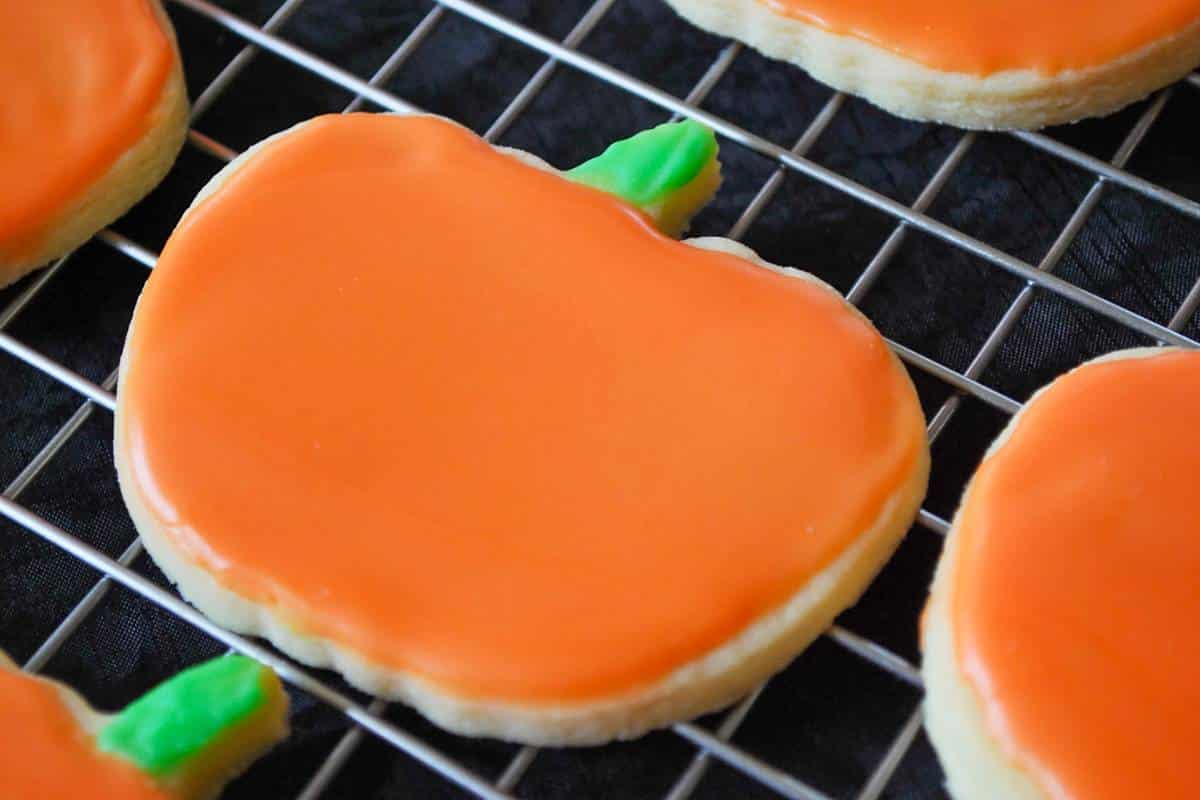
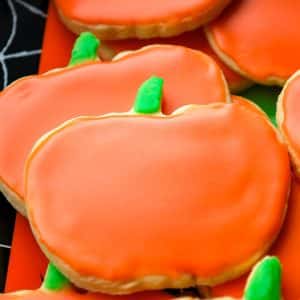
Make soft, cut-out sugar cookie dough from scratch, perfect for making festive pumpkin-shaped sugar cookies decorated with easy royal icing! This beginner-friendly recipe makes about 18 frosted cookies, depending on the size of your cookie cutter. Betcha can’t eat just one!

After trying many frosted sugar cookie recipes, this one, inspired by the butter queen Paula Deen, is the winner! You can use it to create cookie shapes for any occasion, but my kids and I love using it to make these not-so-scary Halloween pumpkin cookies!
No exaggeration; the dough itself produces the utmost PERFECT sugar cookie. Imagine a thick, smooth exterior, slightly crisp edges, and a soft, pleasantly chewy bite with luxuriously sweet and creamy flavor.
As for the royal icing recipe, I consider it royal icing for beginners because you don’t need to hassle with the eggs or meringue powder used in traditional recipes. Instead, you’ll use confectioners’ sugar and milk to create a sugar cookie frosting that dries to a hard, shiny finish!
Why you’ll love this recipe
- Adapted from Paula Deen’s decorated sugar cookies. Though I made minor changes to her recipe, it’s not surprising that Paula knows what it takes to make frosted cut-out cookies that are practically perfect!
- Fuss-free frosting. It’s easier to make than classic royal icing recipes because there are no eggs or meringue powder to fuss over. This recipe results in a sugar cookie glaze that hardens regardless.
- Tender, buttery, and delicious. Once cooled, these pumpkin cookies are firm to the touch with a rich, fluffy bite -just as a soft-baked sugar cookie should be!
- Family fun. This is a reliable cut-out cookie dough recipe to cut into any fun Halloween shape, bake, and let the kids unleash their creativity decorating with royal icing, sprinkles, and so on.
Ingredients you’ll need
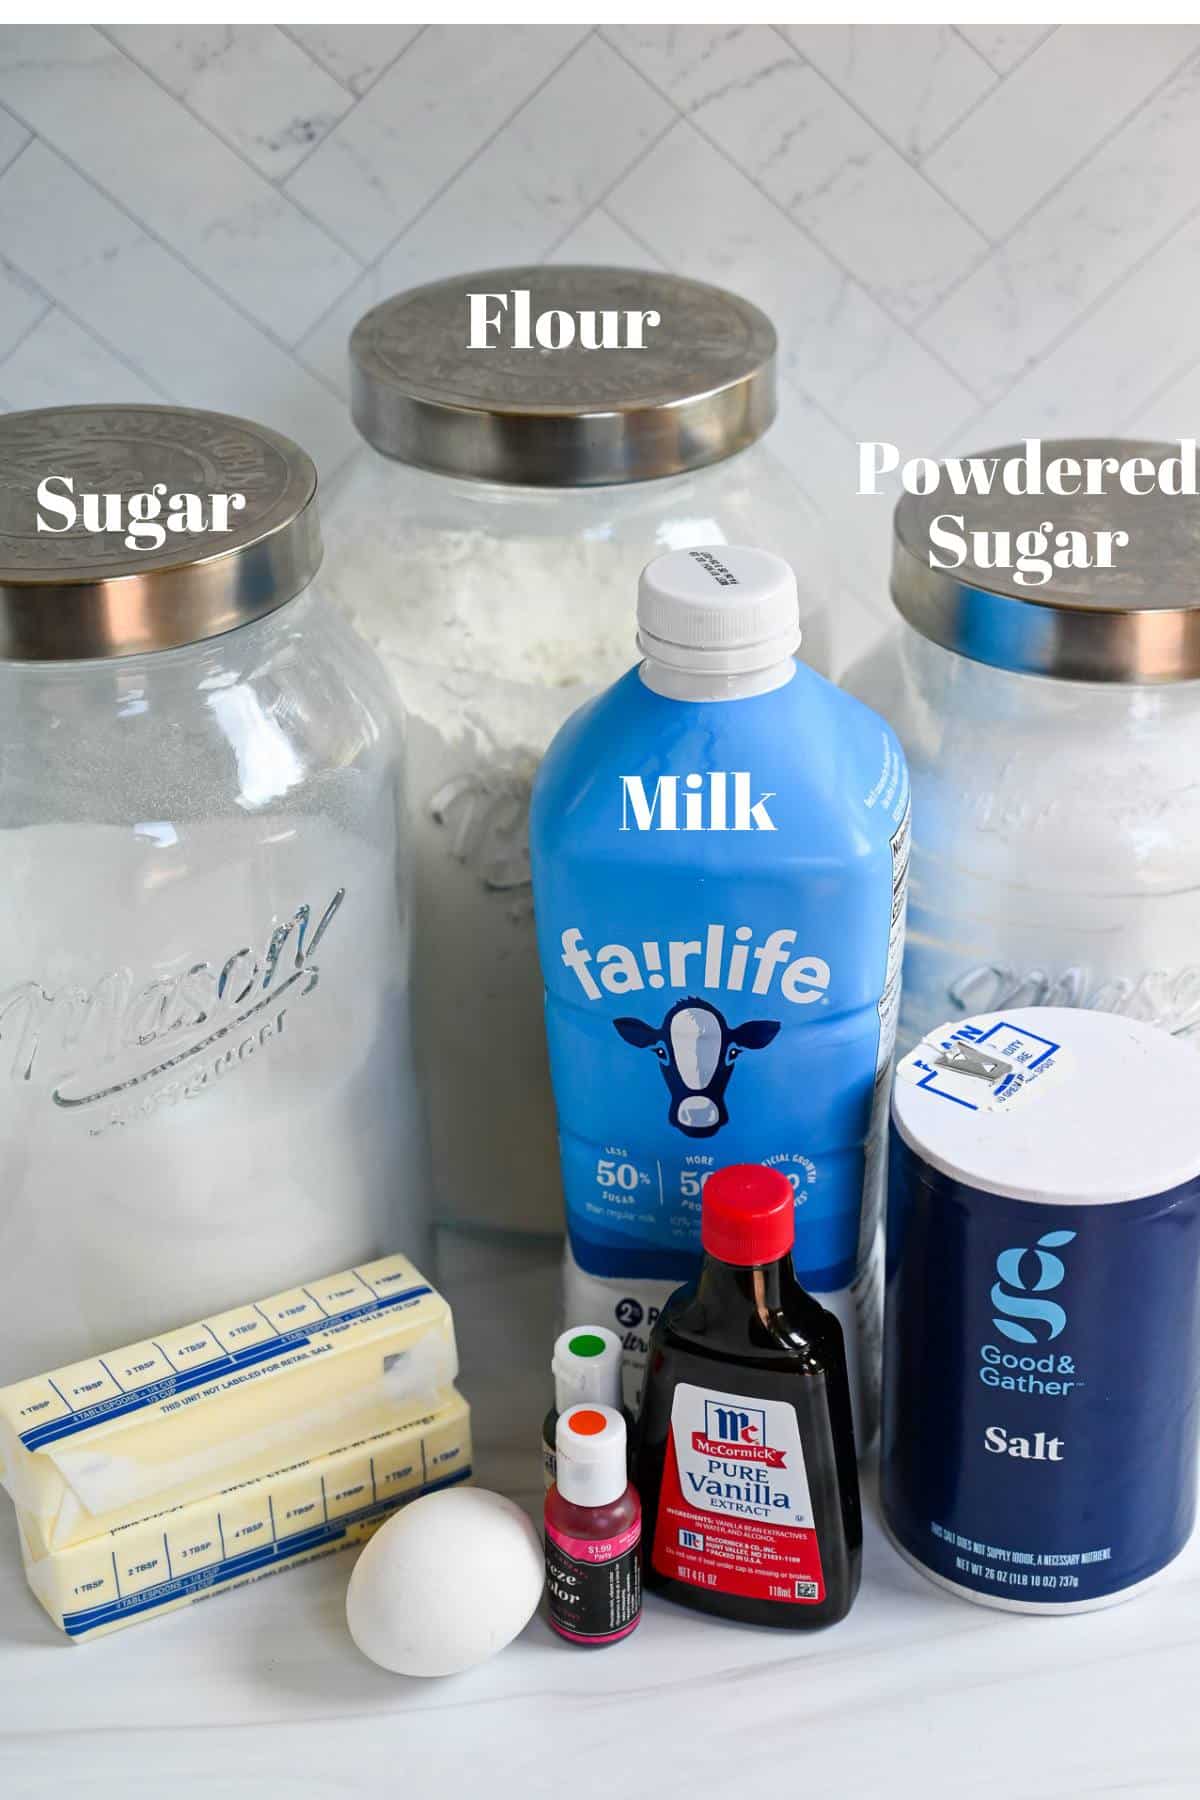
For the cookies:
- Unsalted butter. Softened butter contributes moisture and helps bind the ingredients while giving the cookies a rich, creamy mouthfeel.
- Sugar. It provides sweetness and helps create a slightly crispy caramelized exterior during baking.
- Egg. It helps strengthen the dough, leading to sugar cookies with a soft yet slightly chewy interior.
- Vanilla extract. It adds rich, aromatic flavor and helps balance the sweetness. You can also use equal parts vanilla extract and almond extract here.
- Flour. It serves as the main structural component. I used sifted, unbleached all-purpose flour, as that’s what Paula Deen’s sugar cookie recipes call for. Most importantly, don’t skip the sifting!
- Salt. A small amount of salt amplifies the sweetness.
For the royal icing:
- Confectioners’ sugar. Also known as powdered sugar, it has a fine, powdery texture that dissolves easily to create a smooth, glossy surface that hardens as it dries.
- Milk. It helps achieve the desired consistency while maintaining the icing’s ability to dry and harden.
- Food coloring. To dye the icing a vibrant pumpkin color (or any color you like).
How to make pumpkin cookies
Step 1: Mix wet ingredients. Cream the butter and sugar in the bowl of an electric mixer at medium speed. Add the egg and vanilla and mix well.
Step 2: Add dry ingredients. Combine the flour and salt in a separate bowl, then add the mixture to the wet ingredients while mixing on low speed.
Step 3: Chill cookie dough. Cover the dough with plastic wrap and place it in the refrigerator for 30 minutes.
Step 4: Prepare for baking. Preheat the oven to 350℉, and line a cookie sheet with a slipmat or parchment paper.
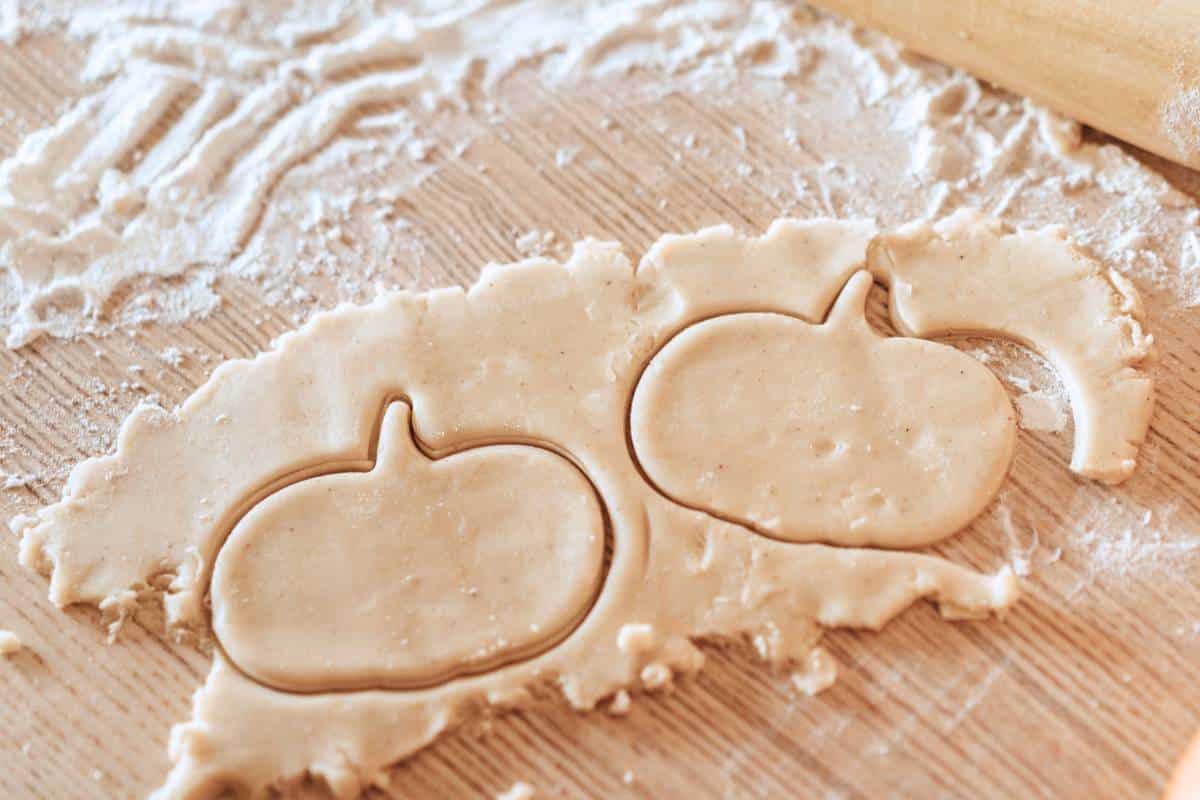
Step 5: Cut cookie dough. Roll the dough to a ¼-inch thickness on a lightly floured surface, and cut it into pumpkins (or any spooky shape) with cookie cutters. Re-roll the excess dough and repeat until all is used.
Step 6: Bake and cool. Place the cookies on the prepared cookie sheet and bake until the edges begin turning golden but not brown (8-10 minutes). Transfer to a wire rack and let cool while you prepare the royal icing.
How to make royal icing
Step 7: Sift sugar. Sift the powdered sugar into a large bowl.
Step 8: Add milk and food dye. Add the milk and food coloring, and stir until the icing is thick enough to stick to the back of a spoon but smooth enough to spread.
Step 9: Adjust consistency. If the mixture is too thick, stir in a splash of milk -and if it’s too thin, mix in a bit more powdered sugar.
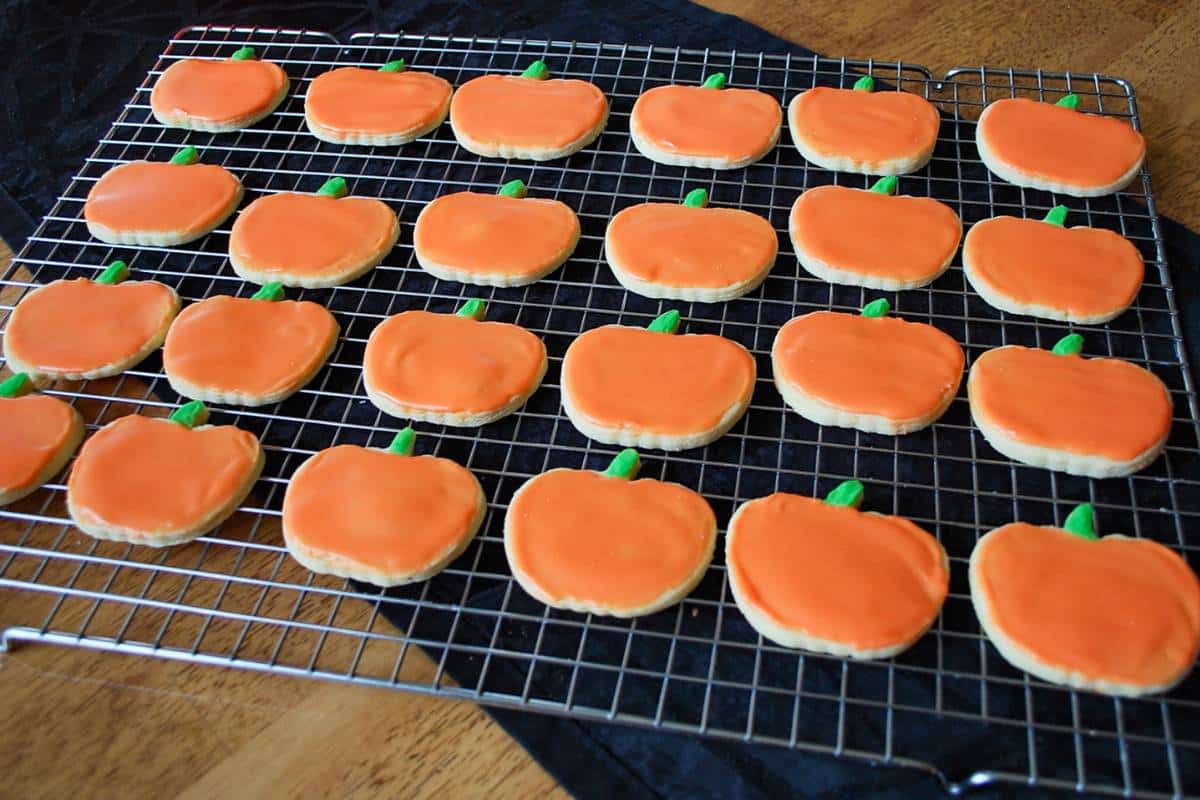
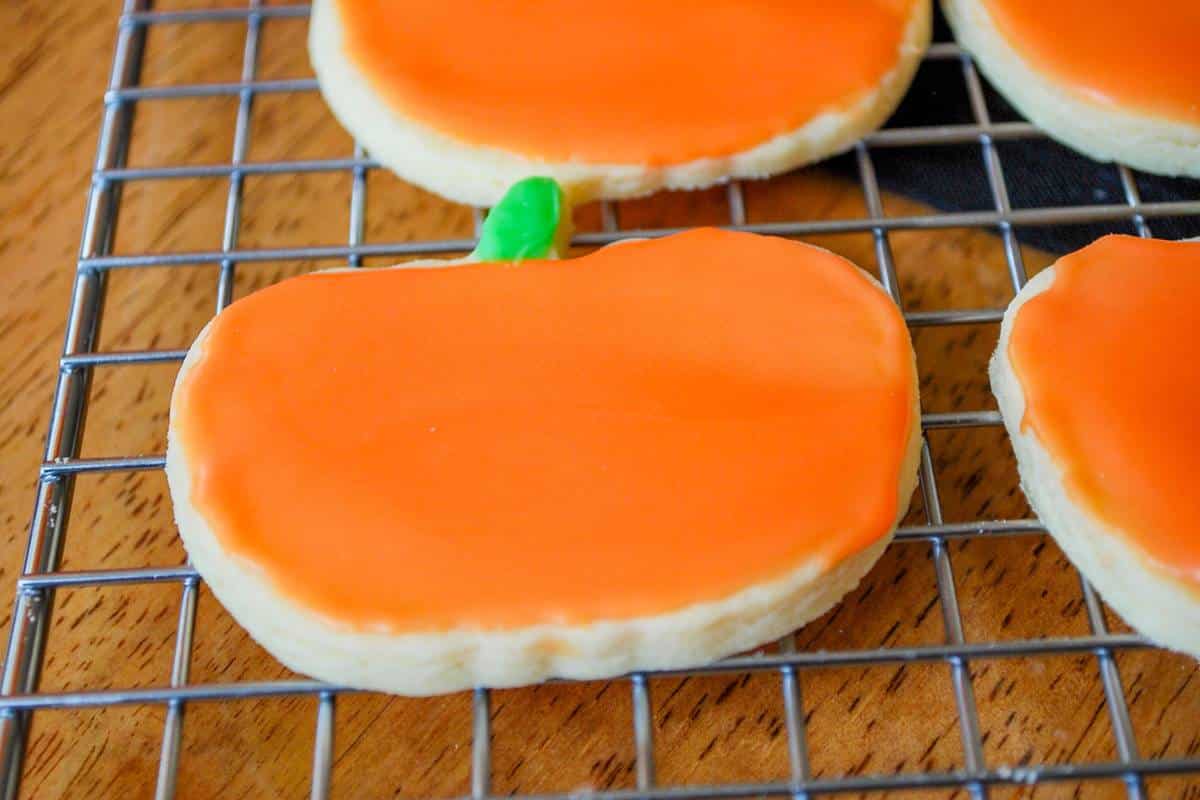
Step 10: Decorate and let dry. Spread the icing on the cooled sugar cookies and let them sit until the icing hardens.
Baking tips
- Be sure to soften the sticks of butter at room temperature before using them so they’re easier to cream with the sugar.
- Never scoop flour directly from the bag. Instead, spoon it into the measuring cup and level it off with a butter knife to achieve accurate measurements.
- Do not overmix! Mix the dough just until the ingredients are combined, as overmixing can lead to tough cookies.
- Chill the dough in the refrigerator for at least 30 minutes before using it. This makes the dough easier to roll and cut and helps it hold shape during baking. Before baking, you can also briefly chill the cut-out cookies on the cookie sheet.
- Bake cookies of similar size on the same baking sheet if you’re using multiple cookie cutters. This ensures they bake evenly.
- Let the cookies cool on a wire rack before decorating. This ensures the cookies retain their crisp exterior and the icing retains its thick, glossy viscosity instead of melting.
Icing tips
- Don’t skip sifting the sugar! To achieve a smooth royal icing texture, there mustn’t be any lumps!
- The icing should be thick enough to spread easily with a knife and harden to a smooth finish. I always add a bit more milk to get the texture just right.
- Add food coloring drop by drop until the desired color is achieved. Gel or paste colors work well without altering the icing consistency.
- Give the icing a few hours to fully set and harden before stacking and storing the cookies to avoid smudging.
- If decorating with more than one frosting color, allow the first color to dry before applying a second color so the colors do not bleed.
Variations
Switch up the shape – I use a Pumpkin Cookie Cutter, but you can cut any shape. This Wilton Halloween Cookie Cutter Set, for instance, includes 18 spooky shapes, including a witches’ hat, broom, cauldron, black cat, ghost, candy corn kernel, and so on.
Frost with fondant – You’ll love how easy the royal icing is to work with, but you can also achieve a pretty pumpkin cookie with rolled fondant. Just cut the rolled fondant with the same cookie cutter and “glue” it to the cookie with water, corn syrup, or edible glue.
Storing instructions
Storing frosted cookies: Once the icing has completely dried, stack the cookies in an airtight container, with parchment paper or wax paper between each layer, and store them at room temperature for up to a week or in the freezer for up to 3 months.
Storing royal icing: Transfer extra icing to an airtight container and cover it with plastic wrap directly touching the surface to prevent air exposure. Store the container in the fridge for up to a week. Bring it back to room temperature and re-stir before using it again.
FAQ
To make orange icing to decorate pumpkin cookies, you can use orange gel or liquid food coloring (or a blend of red and yellow) to achieve a deep shade of pumpkin-y orange.
The 15-second rule refers to a test used to test the “flooding” consistency, which is ideal for filling in larger areas of cookies with a smooth finish.
Dip a toothpick or knife into the icing and lift it out, allowing the icing to fall back into the bowl. As it falls, count the seconds it takes for the surface to become smooth again. If it becomes smooth within approximately 15 seconds, then it’s ready to use.
More Halloween recipes for kids
- Halloween Cake Pops
- Cheesy Pretzel Witches Broomsticks
- Apple Monster Mouths
- Halloween Smoothie
- Bubbly Witches Brew
- Monster Sloppy Joes
- Owl Cupcakes with Oreos
If you loved these royal icing pumpkin cookies, I would be so grateful if you could leave a 5-star 🌟 rating in the recipe card below. I love reading your comments and feedback!
Stay posted on my latest cooking adventures through social media @ Instagram, Pinterest, and Facebook. Also, don’t forget to tag me when you try one of my recipes!
Easy Royal Icing Pumpkin Cookies
Ingredients
- For the cookies:
- 1 cup unsalted, butter at room temperature 2 sticks
- 2/3 cup sugar
- 1 whole egg
- 2 tsp vanilla extract can use 1/2 almond extract & 1/2 vanilla
- 2 1/2 cups unbleached all-purpose flour sifted (don’t skip the sifting!), plus more for dusting the work surface
- 1/2 tsp salt
- For the Icing:
- 1 1/2 cups confectioners’ sugar
- 2 tbsp milk I always add a bit more until the texture is right, if you use food coloring then you can use a little less extra milk
- A few drops of food coloring optional
- *Icing should be thick enough to stick to the back of a spoon but smooth enough to be spreadable.
Instructions
- Cream butter and sugar in the bowl of an electric mixer on medium speed.
- Add in the egg and vanilla.
- In a separate bowl, combine the flour and salt, then stir into the butter mixture with the mixer on low.
- Cover dough with plastic wrap and refrigerate for 30 minutes.
- Preheat oven to 350 degrees.
- Line a cookie sheet with a silpat mat or parchment paper.
- On a floured surface, roll out the dough to a 1/4 inch thickness and cut into your desired shapes with cookie cutters.
- Place the cookies on the prepared pan and bake for 8-10 minutes, until the edges are starting to turn golden, but not brown.
- These cookies are supposed to not look done when you take them out, but they should be firm and set.
- They will have a soft texture when cooled if they do not bake too long.
- Transfer to a wire rack and cool while you prepare the icing.
- To make the icing, sift the sugar into a bowl, add the milk and food coloring (if using) and stir.
- If mixture is too thick, add a little more milk.
- If mixture is too thin, add a little more sugar.
- This is simple to adjust to get the right consistency.
- Spread icing on cookies when they are completely cooled. The icing will set when they are completely dry.
Notes
Icing Tips:
- Don’t skip sifting the sugar! To achieve a smooth royal icing texture, there mustn’t be any lumps!
- The icing should be thick enough to spread easily with a knife and harden to a smooth finish. I always add a bit more milk to get the texture just right.
- Add food coloring drop by drop until the desired color is achieved. Gel or paste colors work well without altering the icing consistency.
- Give the icing a few hours to fully set and harden before stacking and storing the cookies to avoid smudging.
- If decorating with more than one frosting color, allow the first color to dry before applying a second color so the colors do not bleed.
Nutrition

- BBQ Meatloaf Muffins (High-Protein, Gluten-Free) - July 15, 2026
- Crispy Steak and Egg Breakfast Burritos - June 14, 2026
- Toasted Reuben Wrap Sandwich - May 20, 2026
Great recipes!!
Have you tried flavoring the icing with pumpkin spice?
Hi John! I haven’t tried that, but it’s a great idea!
Thank you Emily! Bree, I bet you are a great baker! I blame it on the recipe. 😉
Those are SUPER cute! Loving the little pumpkins 🙂
These are beautiful! I have attempted sugar cookies only once and they were a big fail. I am a terrible baker 😉
Thank you ladies! 🙂
Amee, these cookies are perfect! I’m always looking for fun projects to make with the kids. These are now on “the list!” Pinned.
Wonderful cookies Amee! I am going to give these a try. The pictures look gorgeous!