Mini Biscoff Cheesecakes (High Protein!)
This post may contain affiliate links. Please read my disclosure policy.

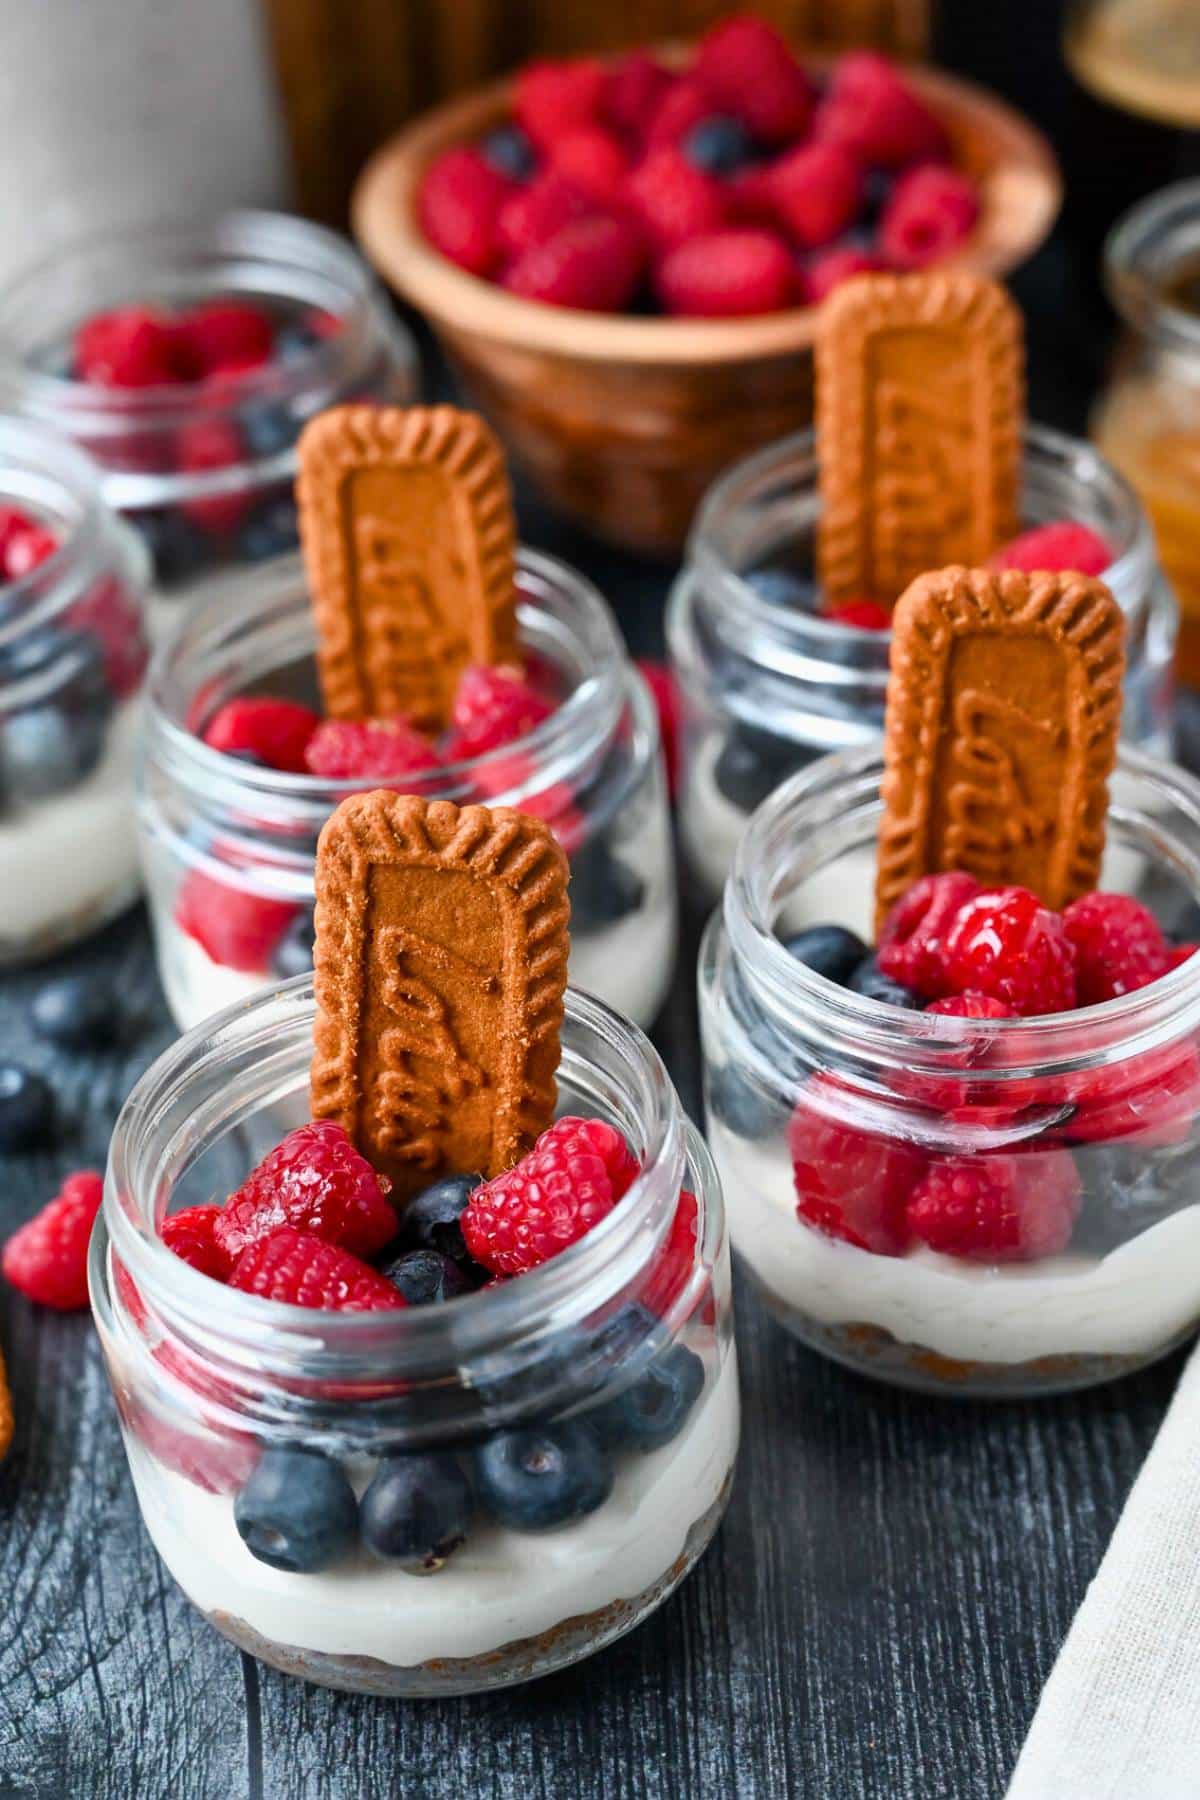
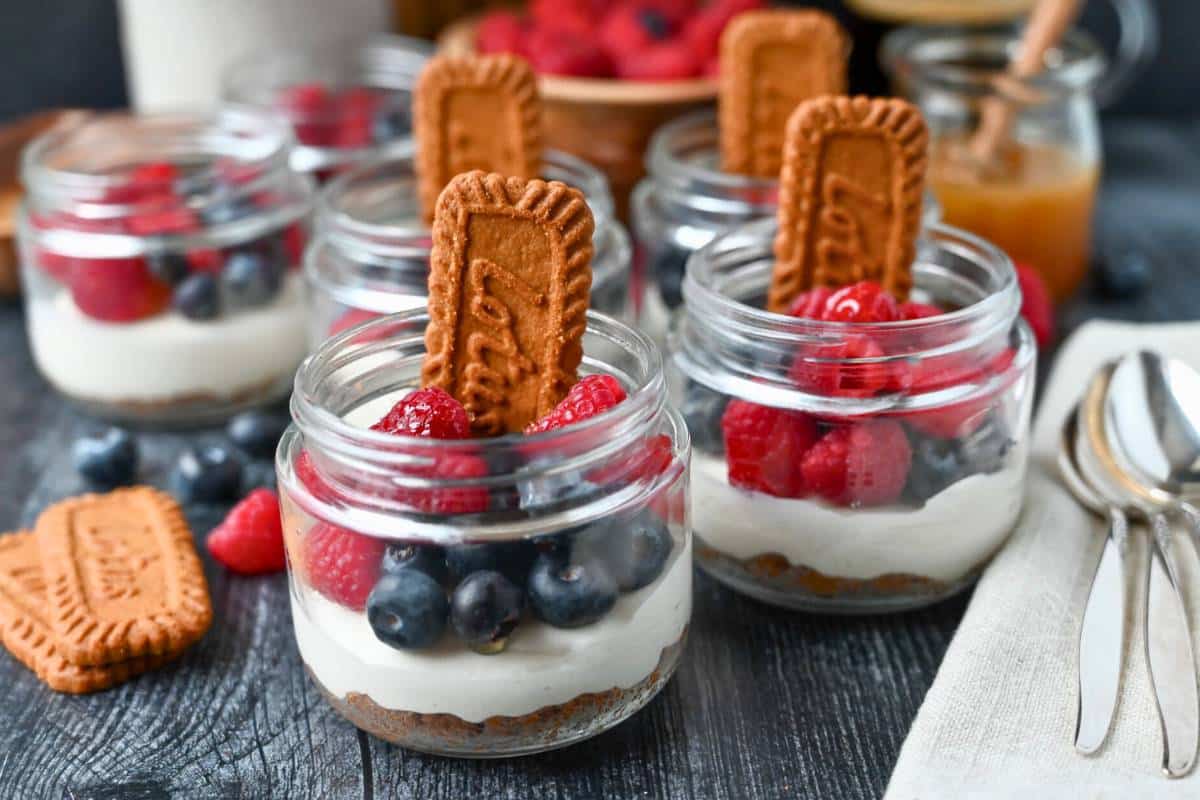
This recipe for Mini Biscoff Cheesecakes layers a buttery Biscoff cookie crust and a foolproof no-bake classic filling into individual jars. Creamy, perfectly portioned, and packed with protein, these individual jars are great for meal prep!
Joining the ranks of my High Protein Biscoff Overnight Oats is another protein-packed sweet treat starring the beloved Biscoff cookie. This time, I drew inspiration from the viral Japanese cheesecake, but I wanted something that tastes more like classic cheesecake without ever turning on the oven. The result? Mini Biscoff cheesecakes with the flavor and that classic cheesecake texture we all know and love.
Imagine a buttery, finely crushed Biscoff cookie crust paired with a silky, New York-style cheesecake filling made from cream cheese, cottage cheese, skyr (or Greek yogurt), and a touch of gelatin to help it set perfectly. It’s very similar to my No-Bake Protein Cheesecake recipe, but delivered in convenient single servings. Instead of a traditional graham cracker crust, they’re made with a 2-ingredient no-bake Biscoff cookie crust.
The assembly couldn’t be simpler: just layer the crust and filling into small jars, pop them in the fridge, and let them chill. When they’re set and ready, top them with fresh berries, a drizzle of honey or Biscoff spread, or anything else your heart desires. That said, if you’re looking for a high-protein cheesecake jar recipe to prep once and enjoy all week, seriously, this is it!
Why You’ll Love this Recipe
- High protein. Each jar packs an impressive amount of protein, making it a dessert you can feel good about.
- Tastes like the real deal. Creamy, rich, and perfectly set, the filling delivers the classic cheesecake experience without compromise.
- No-bake and foolproof. Unlike traditional cheesecakes, these are set in the fridge – no oven needed.
- Perfectly portioned. Individual jars make it ideal for meal prep or to share without worrying about slicing and storing a large cheesecake.
Ingredients You’ll Need
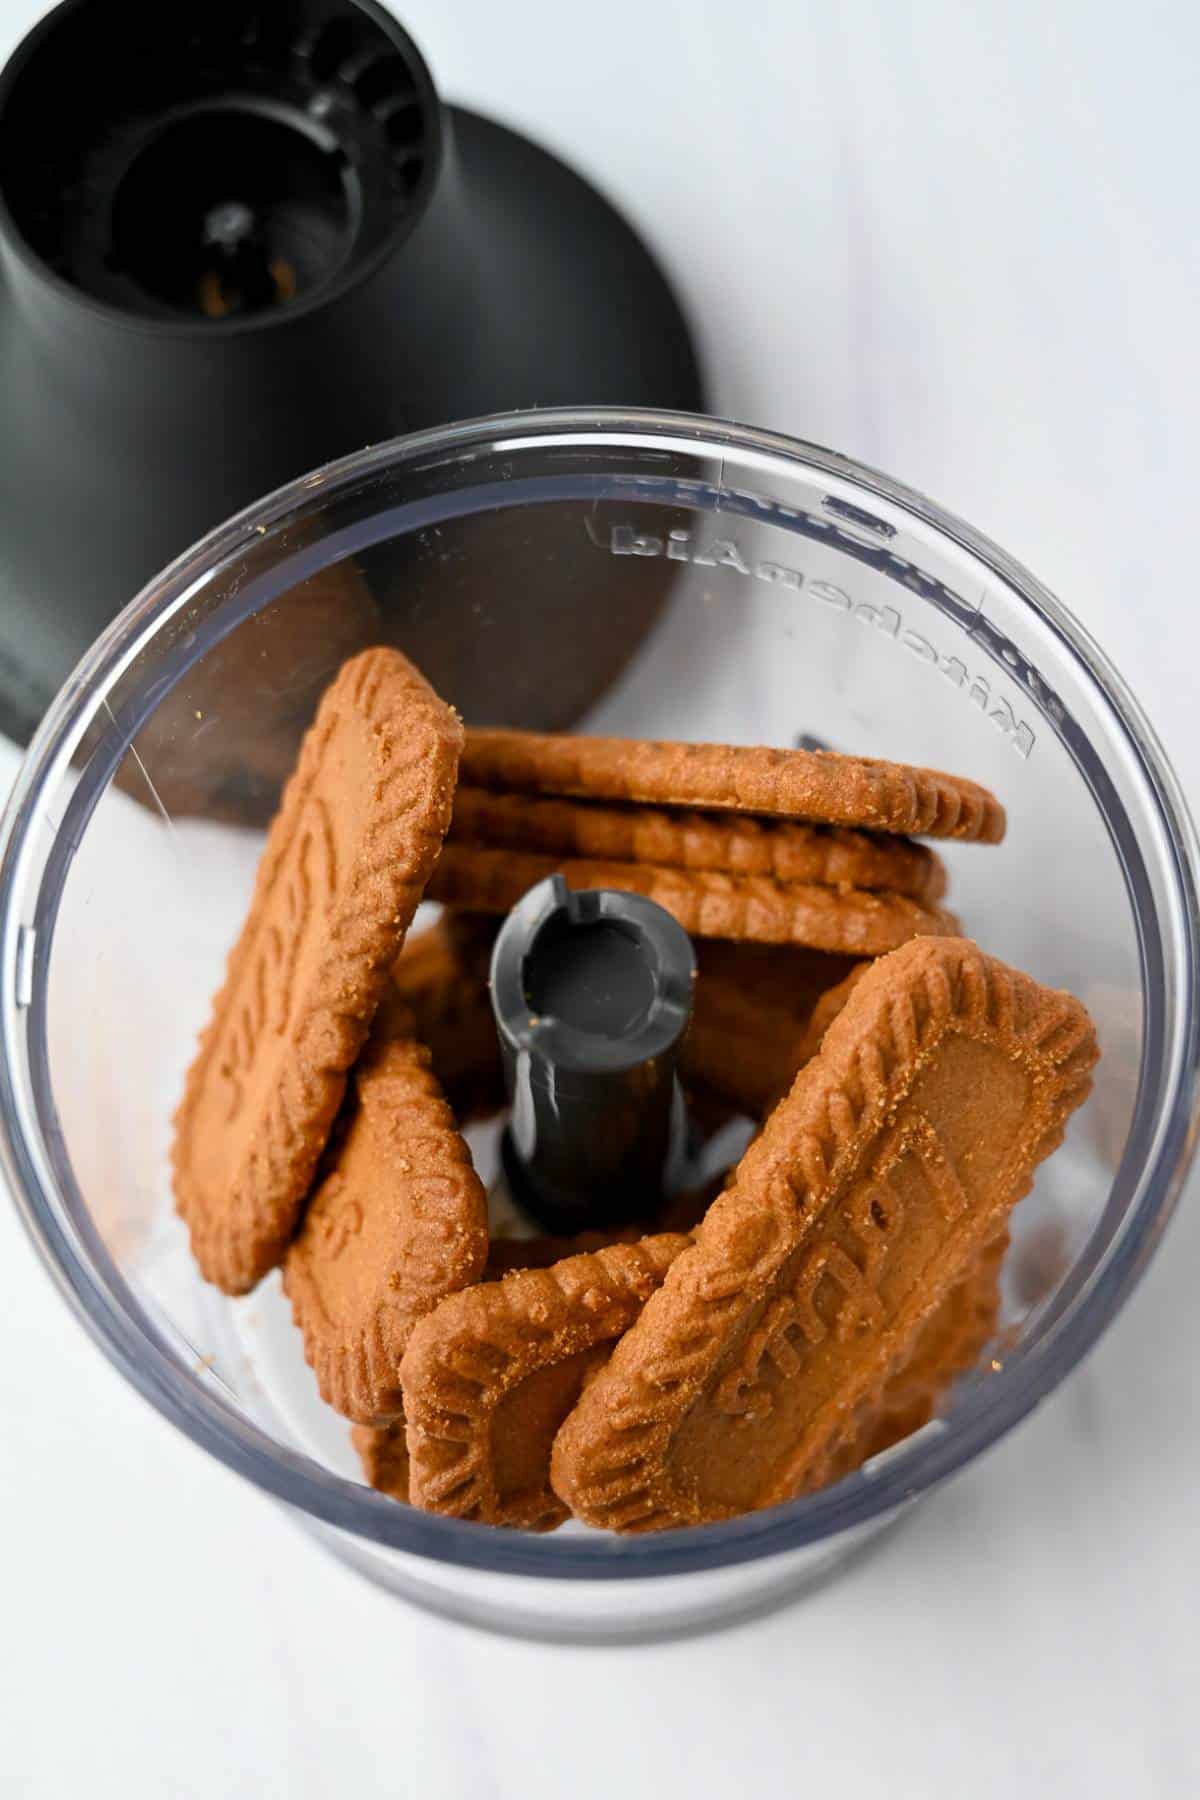
- Biscoff cookies. These form the base of the crust. They’re already sweet and deeply flavored, so there’s no need to add sugar to the crust.
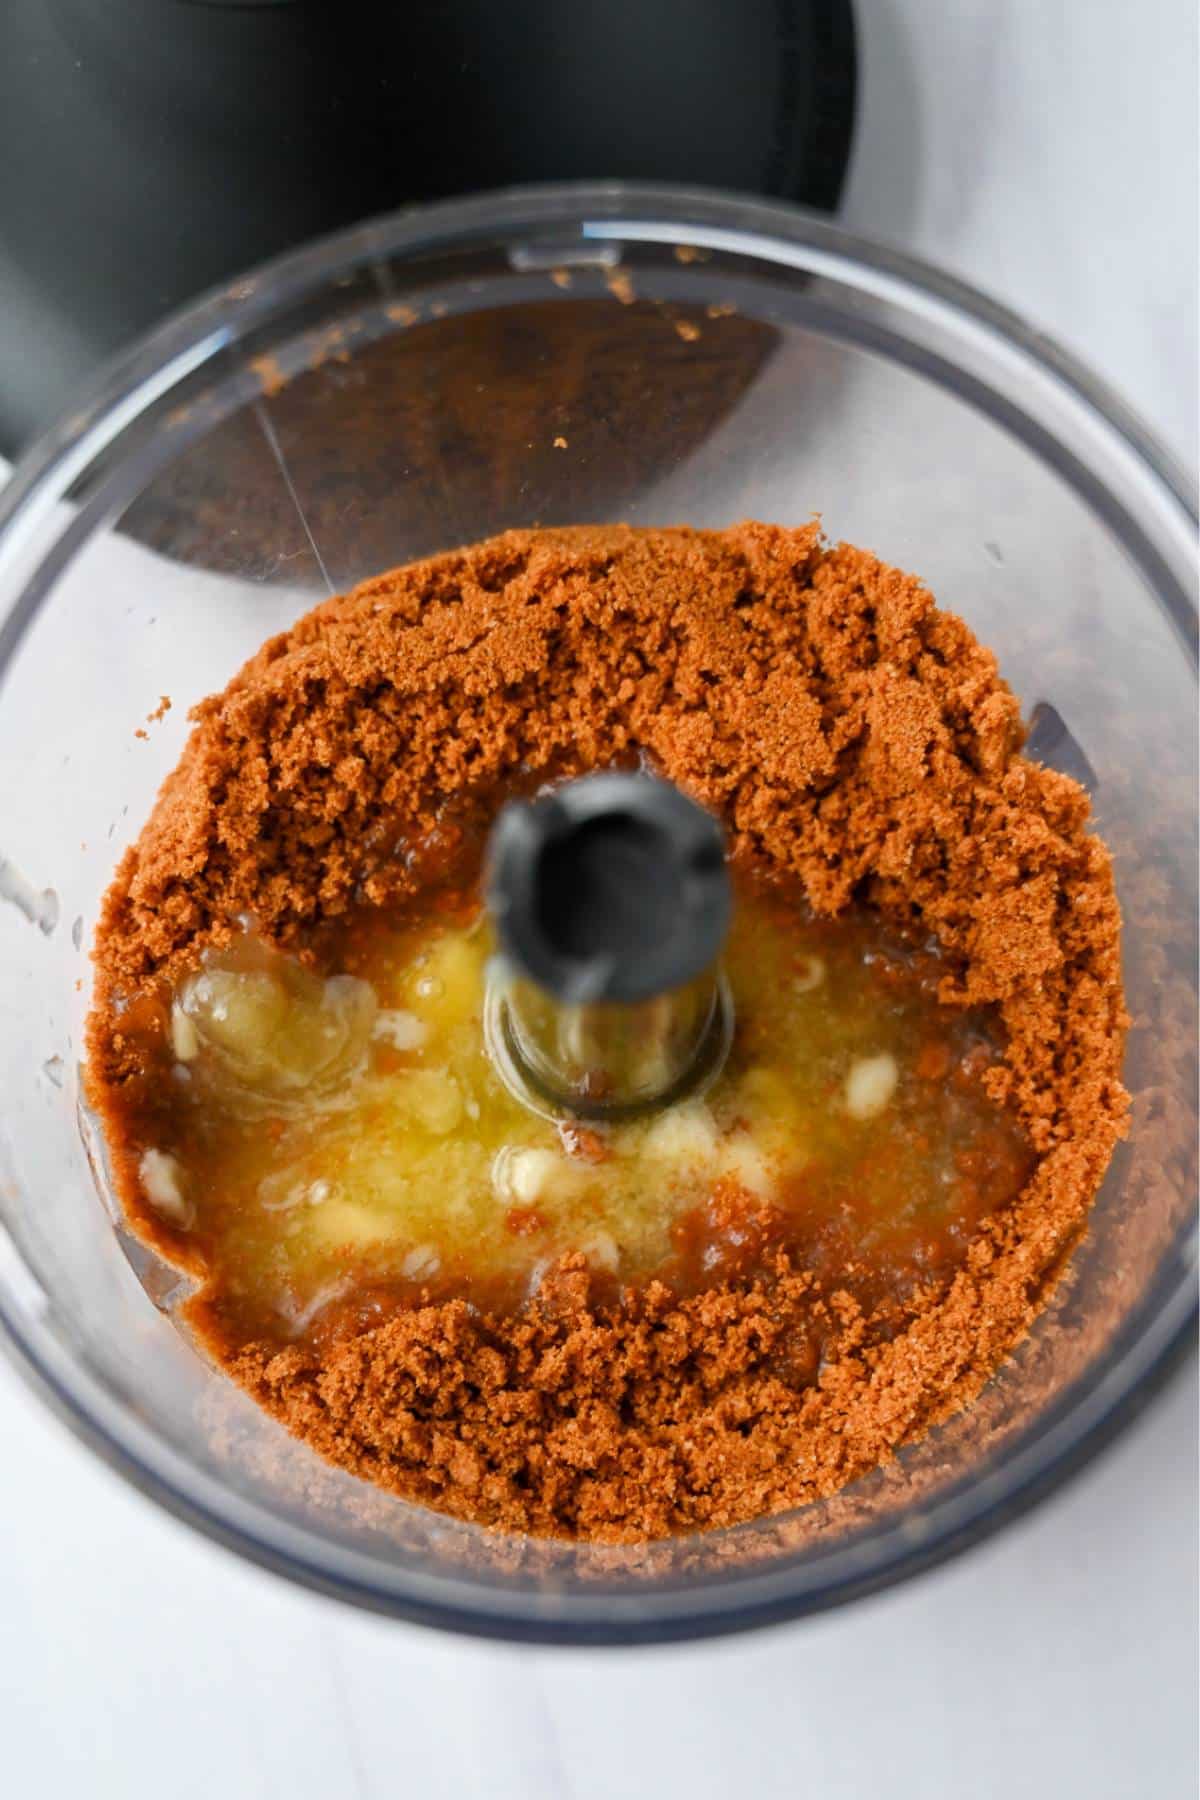
- Butter. Melted butter binds the cookie crumbs together and gives the crust its rich, slightly indulgent mouthfeel. Just make sure to let the butter cool slightly before adding it so it incorporates evenly.
- Unflavored gelatin. This is the unsung hero that allows the filling to set cleanly while keeping that classic creamy cheesecake texture.
- Water. Water is used solely to bloom and dissolve the gelatin before adding it to the filling mixture.
- Cream cheese. Low-fat, softened cream cheese keeps things lighter while delivering that tangy richness we’re after. Let it come to room temperature before mixing; cold cream cheese is the fastest way to end up with lumps, and no one wants lumpy cheesecake.
- Yogurt. Low-fat skyr or low-fat Greek yogurt both work beautifully here, adding protein, creaminess, and a subtle tang. Note that Greek yogurt is slightly thicker and creamier, while skyr is even higher in protein with a cleaner, more neutral flavor.
- Cottage cheese. This significantly boosts protein content while contributing to a creamy texture. I highly recommend Good Culture here, and using a stick blender to whip it right in the container before adding it for that authentic cheesecake feel.
- Sweetener. For sweetness, I’ve tested this recipe with both Splenda Sugar Blend and high-quality maple syrup, and both work great. Splenda keeps things lower calorie and more neutral, while maple syrup adds a subtle warmth that complements the Biscoff. Honey is a nice swap here, as well.
- Vanilla extract. A small amount of vanilla extract is where that familiar cheesecake flavor really comes into play. This is one place where quality matters: use real vanilla, not imitation.
- Toppings. Finishing each jar with fresh berries and a drizzle of honey or Biscoff spread is optional but highly encouraged. If you’re using Biscoff, a quick 10-15 seconds in the microwave will loosen it for a perfect drizzle consistency.
How to Make Mini Biscoff Cheesecake Jars
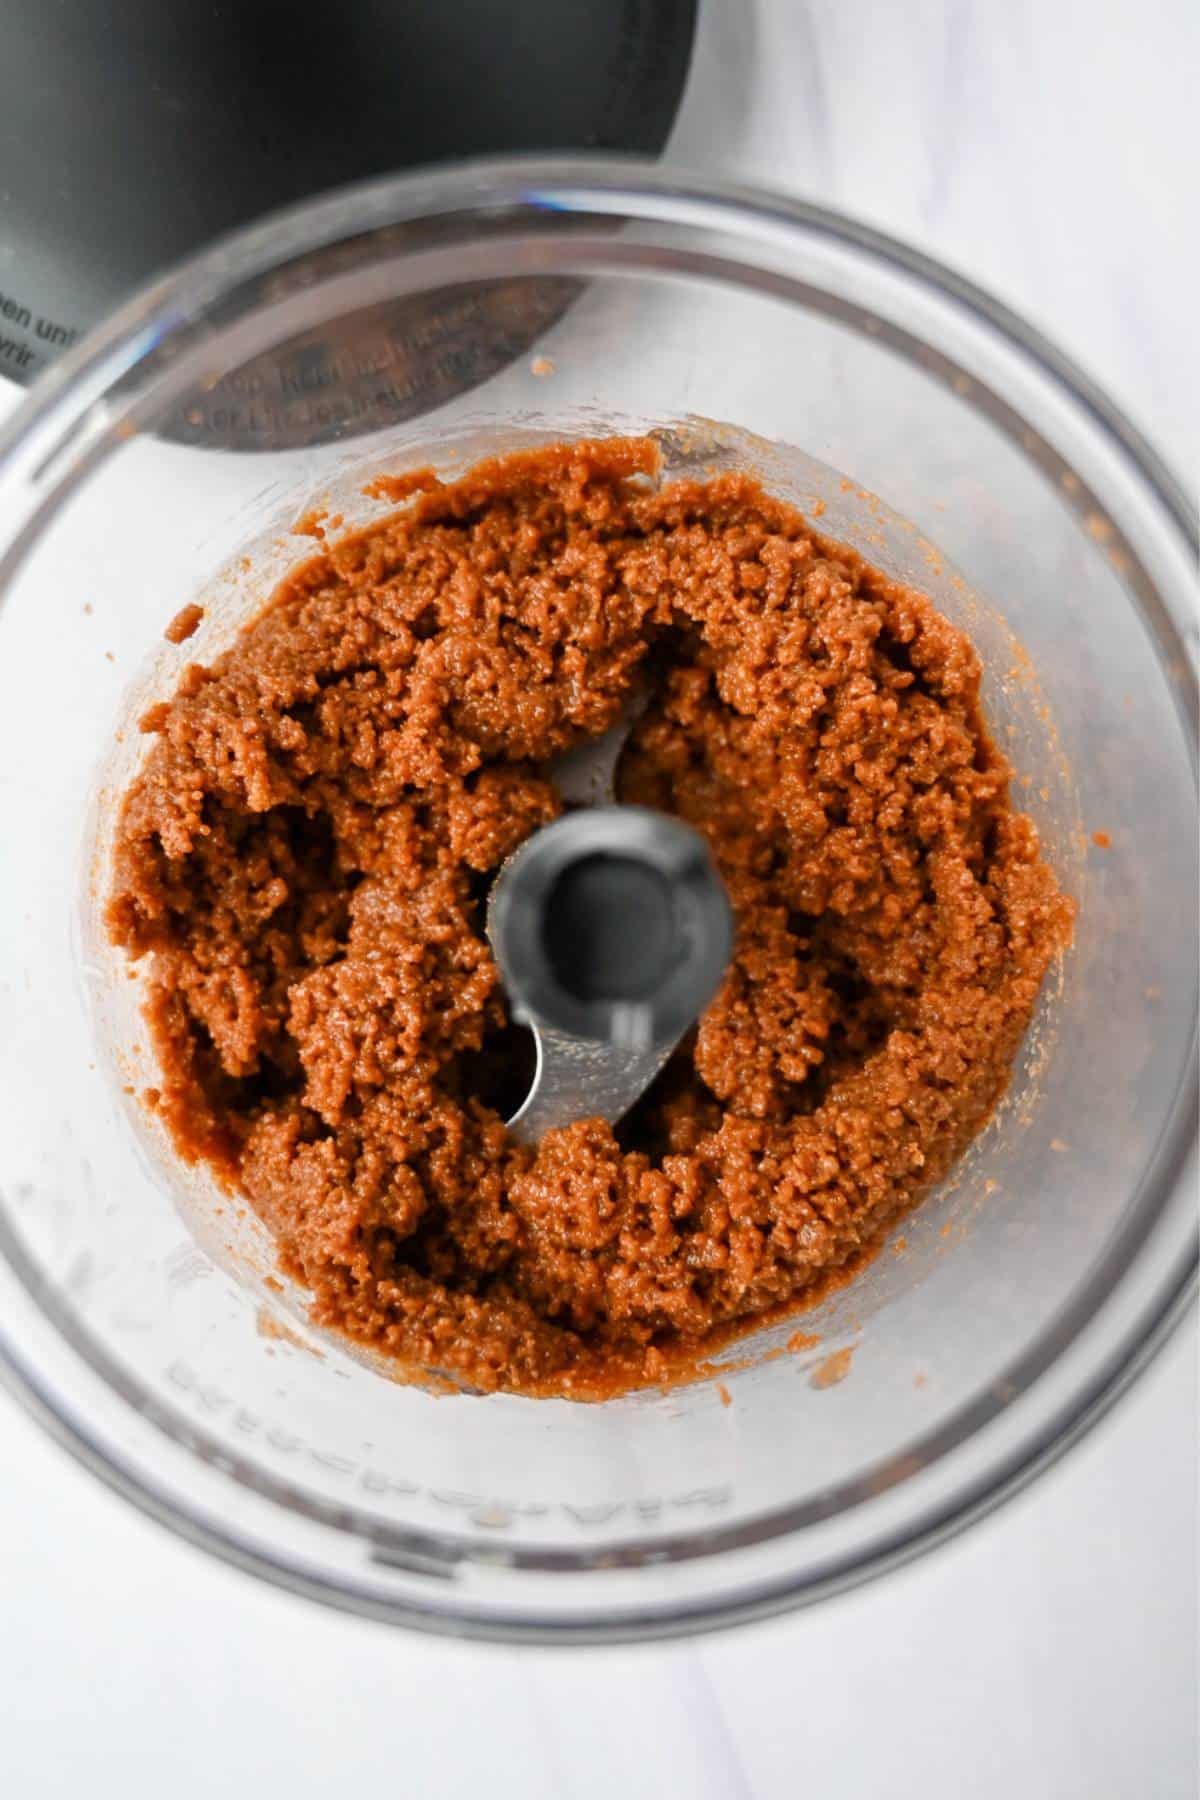
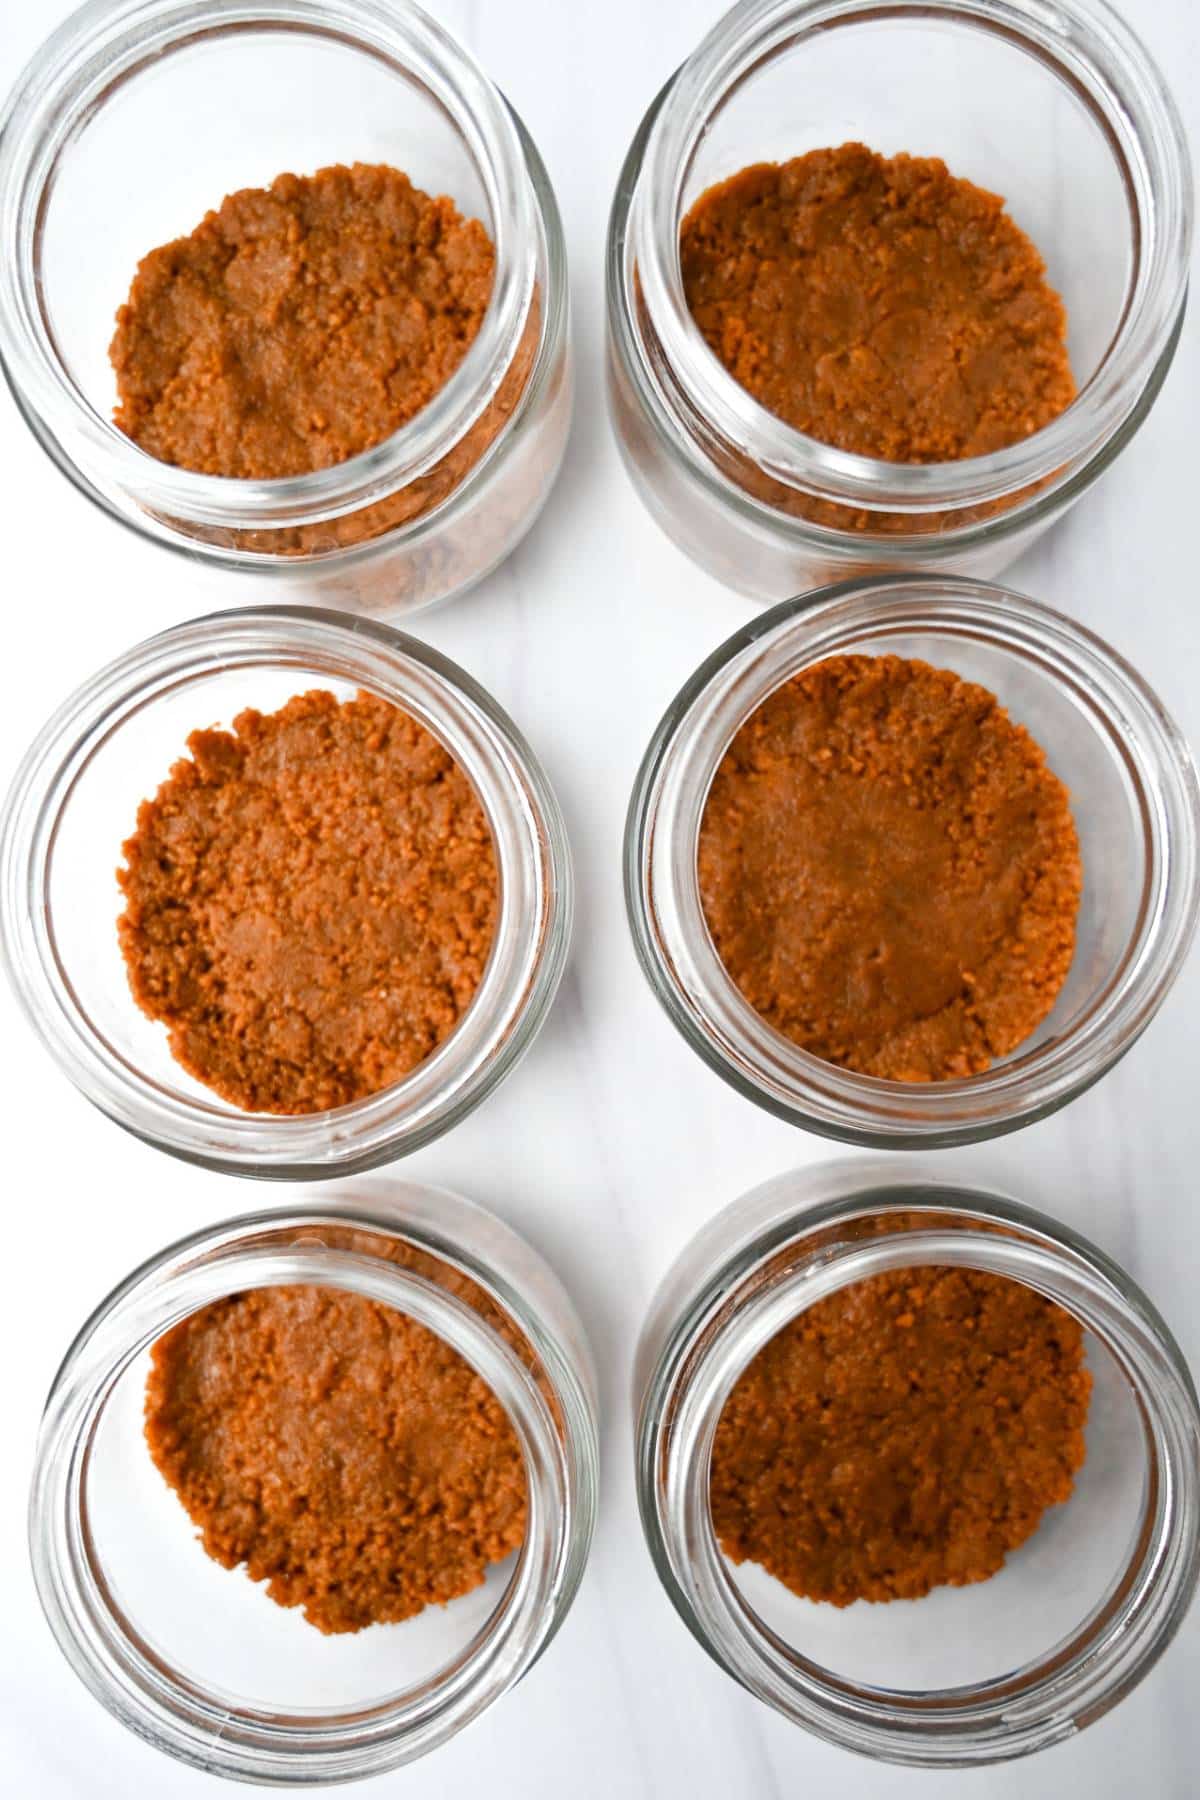
Step 1: Prepare the crust. Add the cookies to a food processor and blitz until finely ground. Drizzle in the melted butter until it comes together, then firmly press into jars. Chill while you prepare the filling.
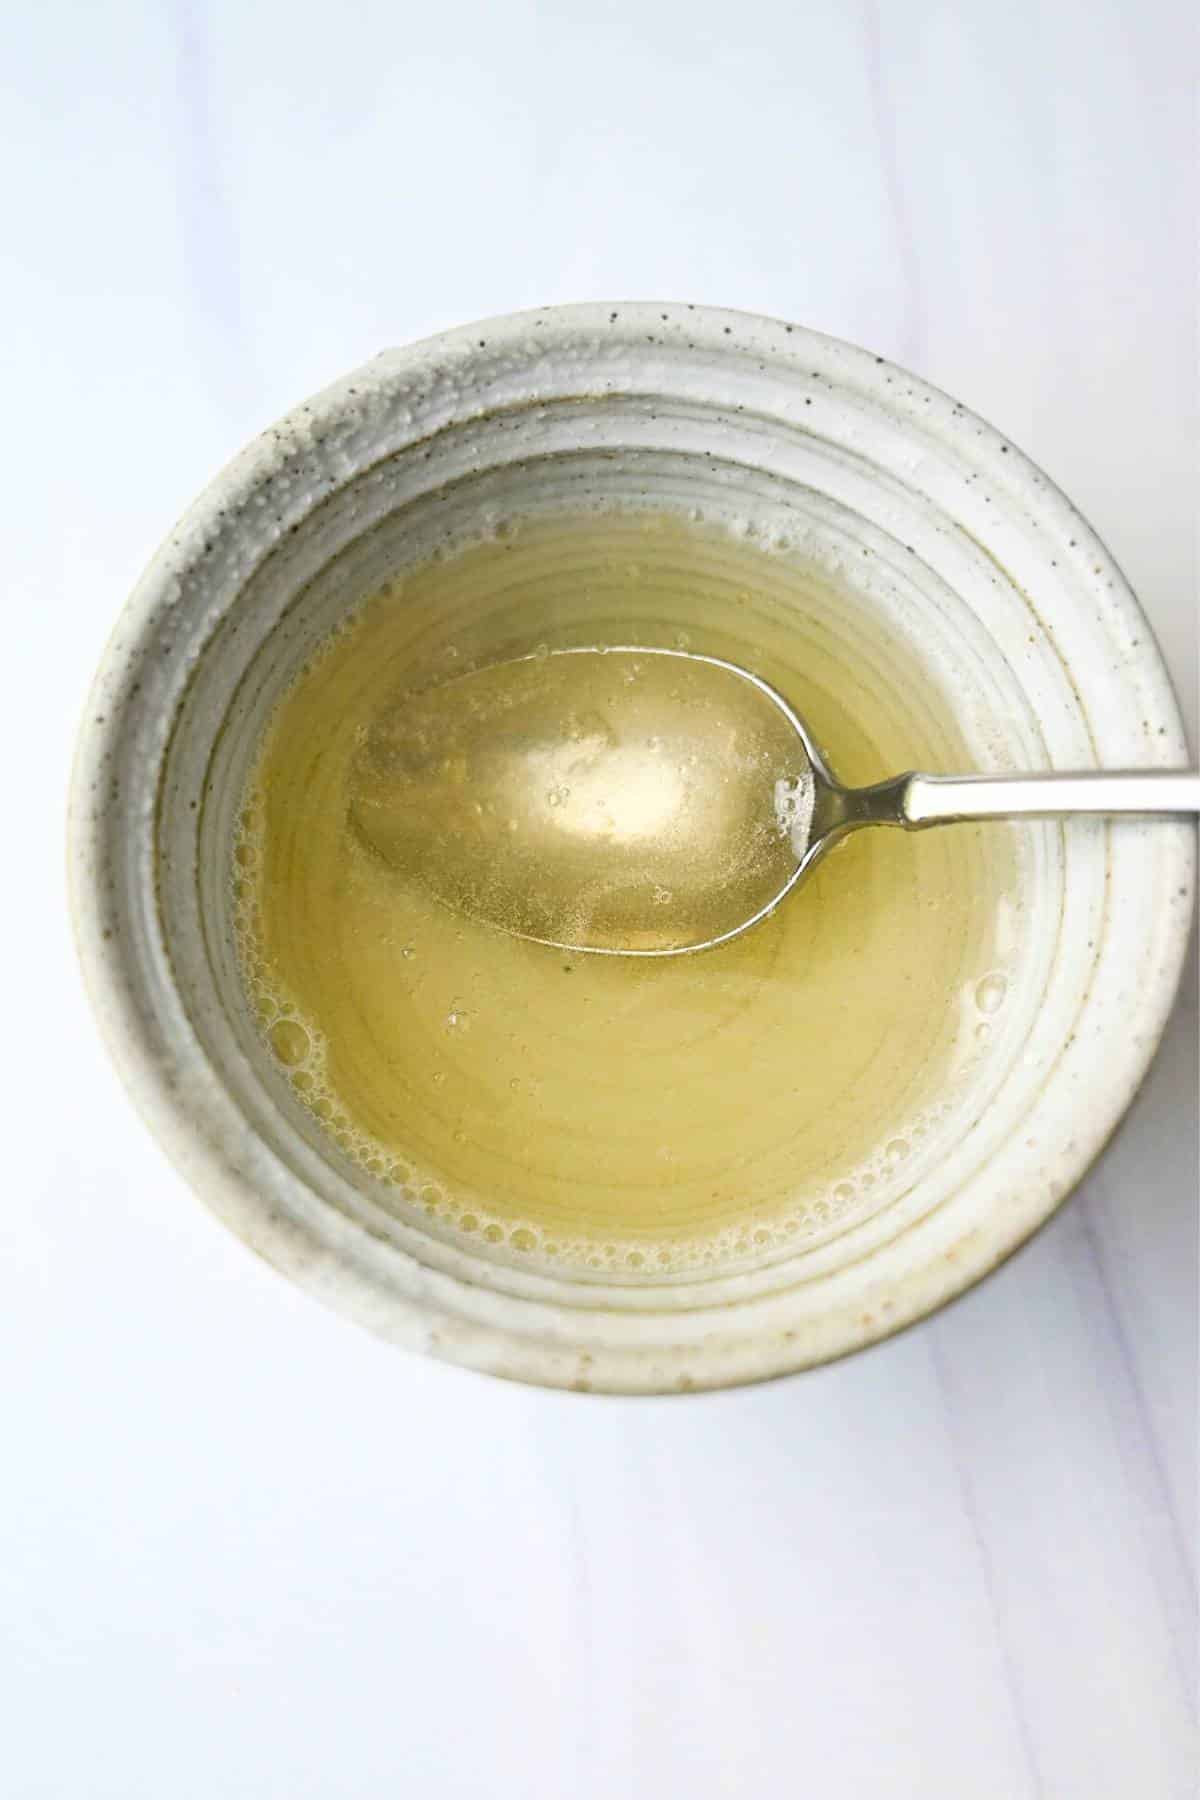
Step 2: Bloom the gelatin. Pour the gelatin over ¼ cup of water and let it sit undisturbed for about 5 minutes. Once bloomed, microwave for 15-20 seconds until fully dissolved, then stir and set aside.
Step 3: Mix the filling. In the bowl of a stand mixer, use the whisk attachment to beat the cream cheese, yogurt, whipped cottage cheese, sweetener, and vanilla until silky-smooth, scraping down the bowl as needed.
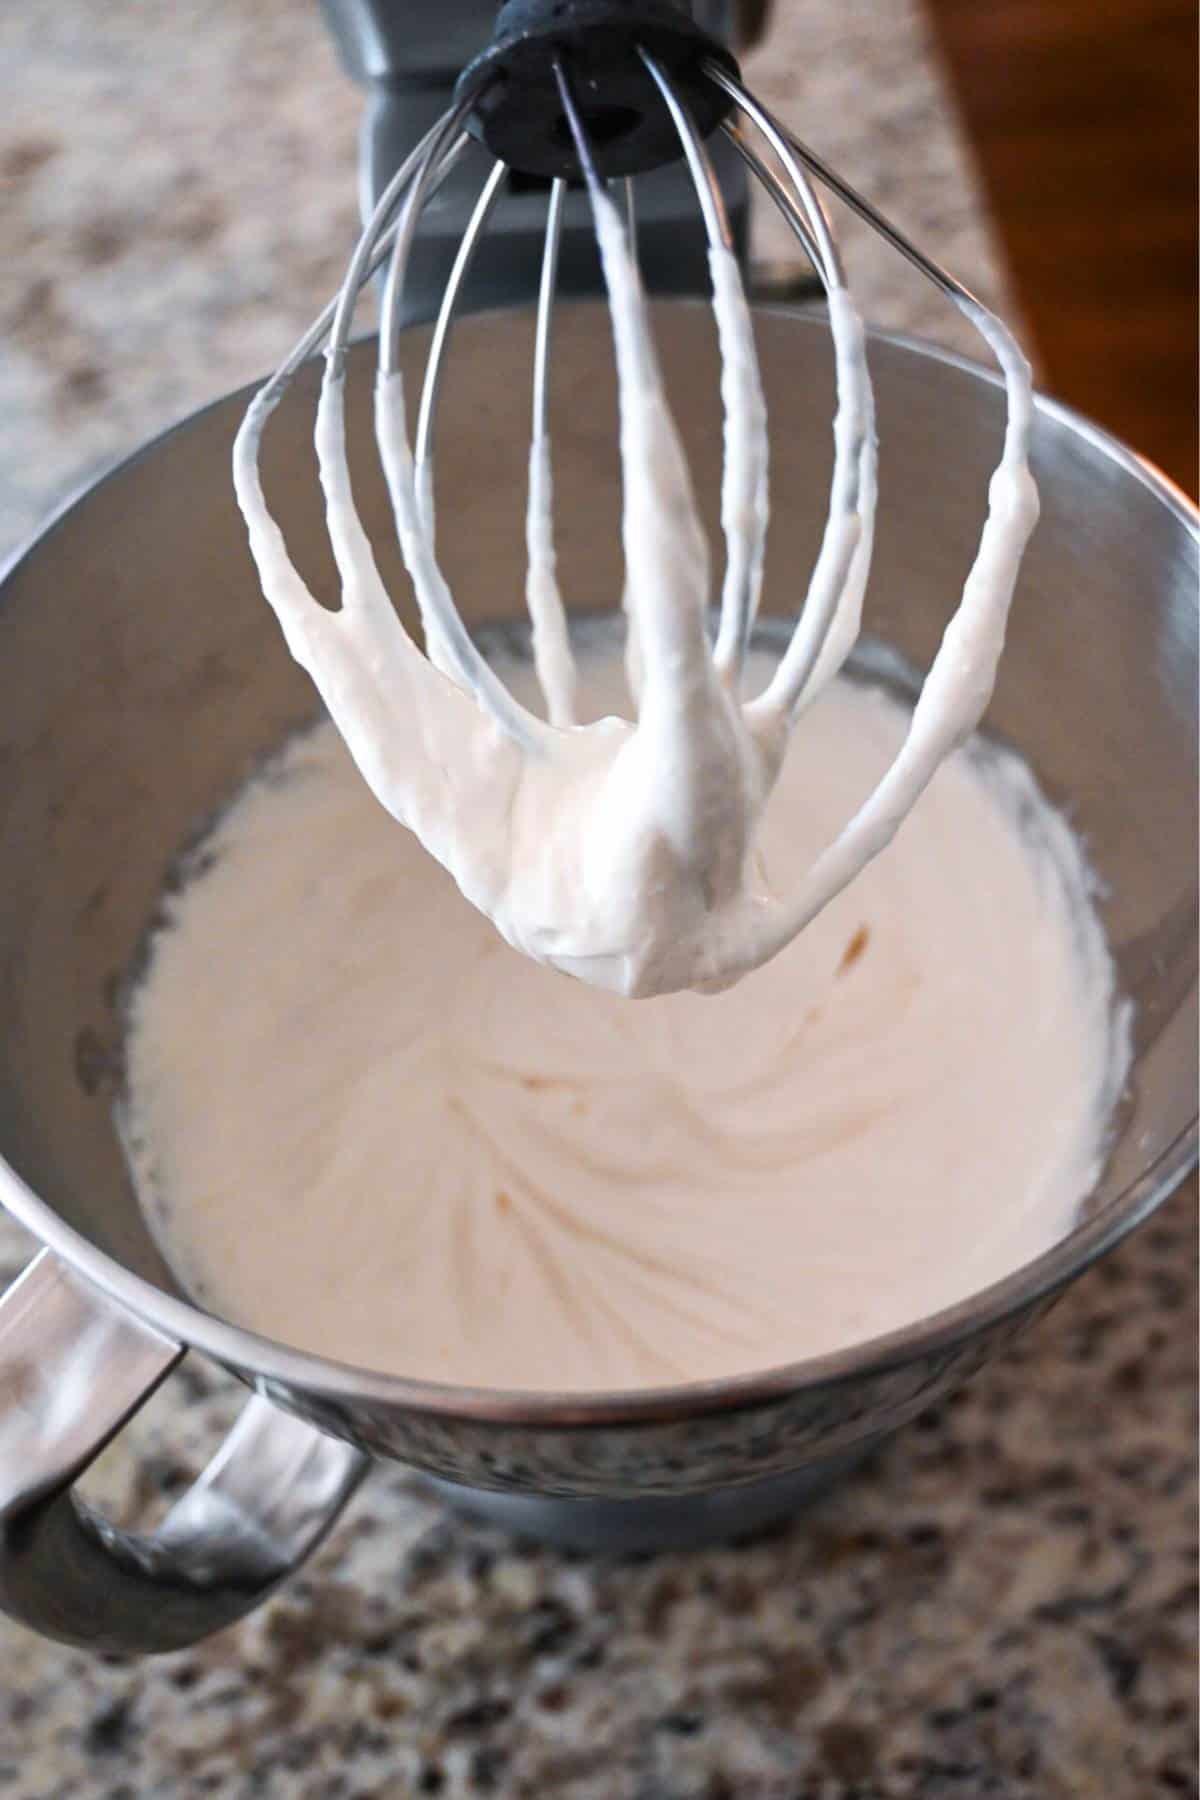
Step 4: Emulsify the gelatin. With the mixer running on low, slowly stream in the dissolved gelatin until fully incorporated.
Step 5: Fill and set. Divide this mixture evenly between the prepared jars, and refrigerate for at least 6 hours (overnight is ideal).
Step 6: Finish with toppings. Just before serving, top each cheesecake jar with fresh berries, a drizzle of honey, or Biscoff spread. Grab a spoon and enjoy!

Recipe tips and FAQs
- Blitz the cookies until they’re very finely ground. Larger chunks won’t compact properly and can cause the crust to crumble. In comparison, a fine crumb creates a sturdy, bakery-style crust.
- Aim for a “wet sand” texture. Add just enough melted butter so the crumbs look damp but not shiny and hold their shape when pressed – too little and the crust won’t hold, too much and it’ll feel greasy.
- Don’t rush blooming the gelatin. This step fully hydrates the gelatin, ensuring it dissolves smoothly rather than clumping. Let it sit undisturbed for the full 5 minutes before heating it just until warm and fluid, not hot or bubbling.
- Take the extra minute to thoroughly whip the cottage cheese before adding it. This step is crucial for achieving that classic cheesecake texture without any curds or unpleasant graininess.
- Slowly streaming the bloomed gelatin while mixing helps emulsify it. Once incorporated, the filling should look glossy, smooth, and slightly looser than traditional cheesecake.
Variations
Think of this mini protein cheesecake recipe as a blank canvas: the technique stays the same, but the rest is totally up to you. Here are some ideas:
- Lighten up the crust– You can go completely crustless and turn these into straight-up high-protein cheesecake jars, or swap the Biscoff cookies with Simple Mills Honey Cinnamon Sweet Thins. You’ll need twice as many sweet thins since they are smaller.
- Swirl in sweetness – Before placing the jars in the fridge, swirl a spoonful of Biscoff spread, berry jam, or lemon curd into the filling for a marbled look and extra indulgent flavor.
- Chocolate version – Add a tablespoon or two of cocoa powder to the filling and use chocolate graham crackers for the crust. Top with sliced strawberries and a drizzle of melted dark chocolate.
- Top it your way – Instead of whole berries and Biscoff spread, you could spoon a refined-sugar-free fruit compote over the top (think wild blueberry lemon, raspberry, blackberry, or cherry), plus a dollop of whipped cream for good measure.
While about 6 hours will do the job, for the best results, chilling them overnight is ideal. This allows the gelatin to set fully and the flavors to meld, resulting in a firmer, creamier filling.
Each mini cheesecake contains approximately 14 grams of protein.
Yes. Full-fat cream cheese, yogurt, or cottage cheese will work and create an even richer texture. The protein content will vary slightly, but the recipe itself remains the same.
Storing and Freezing
Storing: These mini Biscoff cheesecakes are perfect for meal prep or entertaining. You can make them 3 to 4 days in advance and store them covered in the refrigerator until ready to serve. For the best texture, add your toppings just before serving. I love using these 8-oz jars with lids!
Freezing: They also freeze surprisingly well in freezer-safe containers without toppings for up to 1 month. Thaw overnight in the refrigerator before serving. The texture may be slightly firmer, but still creamy and delicious!
More High-Protein Dessert Recipes
- Peanut Butter Protein Cookies
- Fudgy Protein Brownies with M&Ms
- Protein Rice Crispy Treats
- Protein Tiramisu
- Edible Protein Cookie Dough
If you love these High-Protein Cheesecake Jars, I would be so grateful if you could leave a 5-star 🌟 rating in the recipe card below. I love reading your comments and feedback!
Stay posted on my latest cooking adventures through social media @ Instagram, Pinterest, and Facebook. Also, don’t forget to tag me when you try one of my recipes!

Mini Biscoff Cheesecakes
Equipment
- parfait dishes or glass jars with lids I use the wide-mouth 8-oz jars so there's room for topping with berries. Parfait dishes work great here, too.
Ingredients
- 12 Biscoff cookies
- 4 tbsp butter melted
- .25 oz unflavored gelatin (1 packet)
- ¼ cup water
- 8 oz low-fat cream cheese softened to room temp
- 1 cup low-fat plain skyr *or plain Greek yogurt
- 1 cup Good Culture cottage cheese whipped *I use a stick blender and blend it right in the container
- ¼ cup Splenda sugar blend *or ⅓ cup good-quality maple syrup or honey
- 2 tsp vanilla extract
- Optional topping: fresh berries and/or drizzle of Biscoff spread
Instructions
- Place the cookies into a food processor and blitz until finely ground. Drizzle in the butter and process until combined. The texture should be similar to wet sand. Divide the crust mixture between the jars or dessert dishes and press down to compact. Refrigerate the jars to chill the crust while you make the filling.
- Bloom the gelatin in ¼ cup of water and let it sit for 5 minutes, then warm for 15-20 seconds in the microwave until dissolved. Stir and set aside.
- In a large bowl, beat the cream cheese, Skyr (or Greek yogurt), whipped cottage cheese, sweetener, and vanilla until smooth and creamy. *I use the whisk attachment on my stand mixer.
- Slowly beat in the gelatin mixture, pouring in a thin stream, until combined.
- Divide the cheesecake filling evenly between the jars. Chill for at least 6 hours, preferably overnight, until firm and set.
- Top with fresh berries (I use the 8-oz jars so I have room for this) and drizzle with a little honey or melted Biscoff spread, if desired.
Notes
- Blitz the cookies until they’re very finely ground. Larger chunks won’t compact properly and can cause the crust to crumble. In comparison, a fine crumb creates a sturdy, bakery-style crust.
- Aim for a “wet sand” texture. Add just enough melted butter so the crumbs look damp but not shiny and hold their shape when pressed – too little and the crust won’t hold, too much and it’ll feel greasy.
- Don’t rush blooming the gelatin. This step fully hydrates the gelatin, ensuring it dissolves smoothly rather than clumping. Let it sit undisturbed for the full 5 minutes before heating it just until warm and fluid, not hot or bubbling.
- Take the extra minute to thoroughly whip the cottage cheese before adding it. This step is crucial for achieving that classic cheesecake texture without any curds or unpleasant graininess.
- Slowly streaming the bloomed gelatin while mixing helps emulsify it. Once incorporated, the filling should look glossy, smooth, and slightly looser than traditional cheesecake.
Nutrition

- Spicy Tuna Crispy Rice Salad - March 18, 2026
- Toffee Brownie Tart - March 9, 2026
- High-Protein Tortilla Egg Bake - March 4, 2026