Greek Braised Kale with Pine Nuts
This post may contain affiliate links. Please read my disclosure policy.

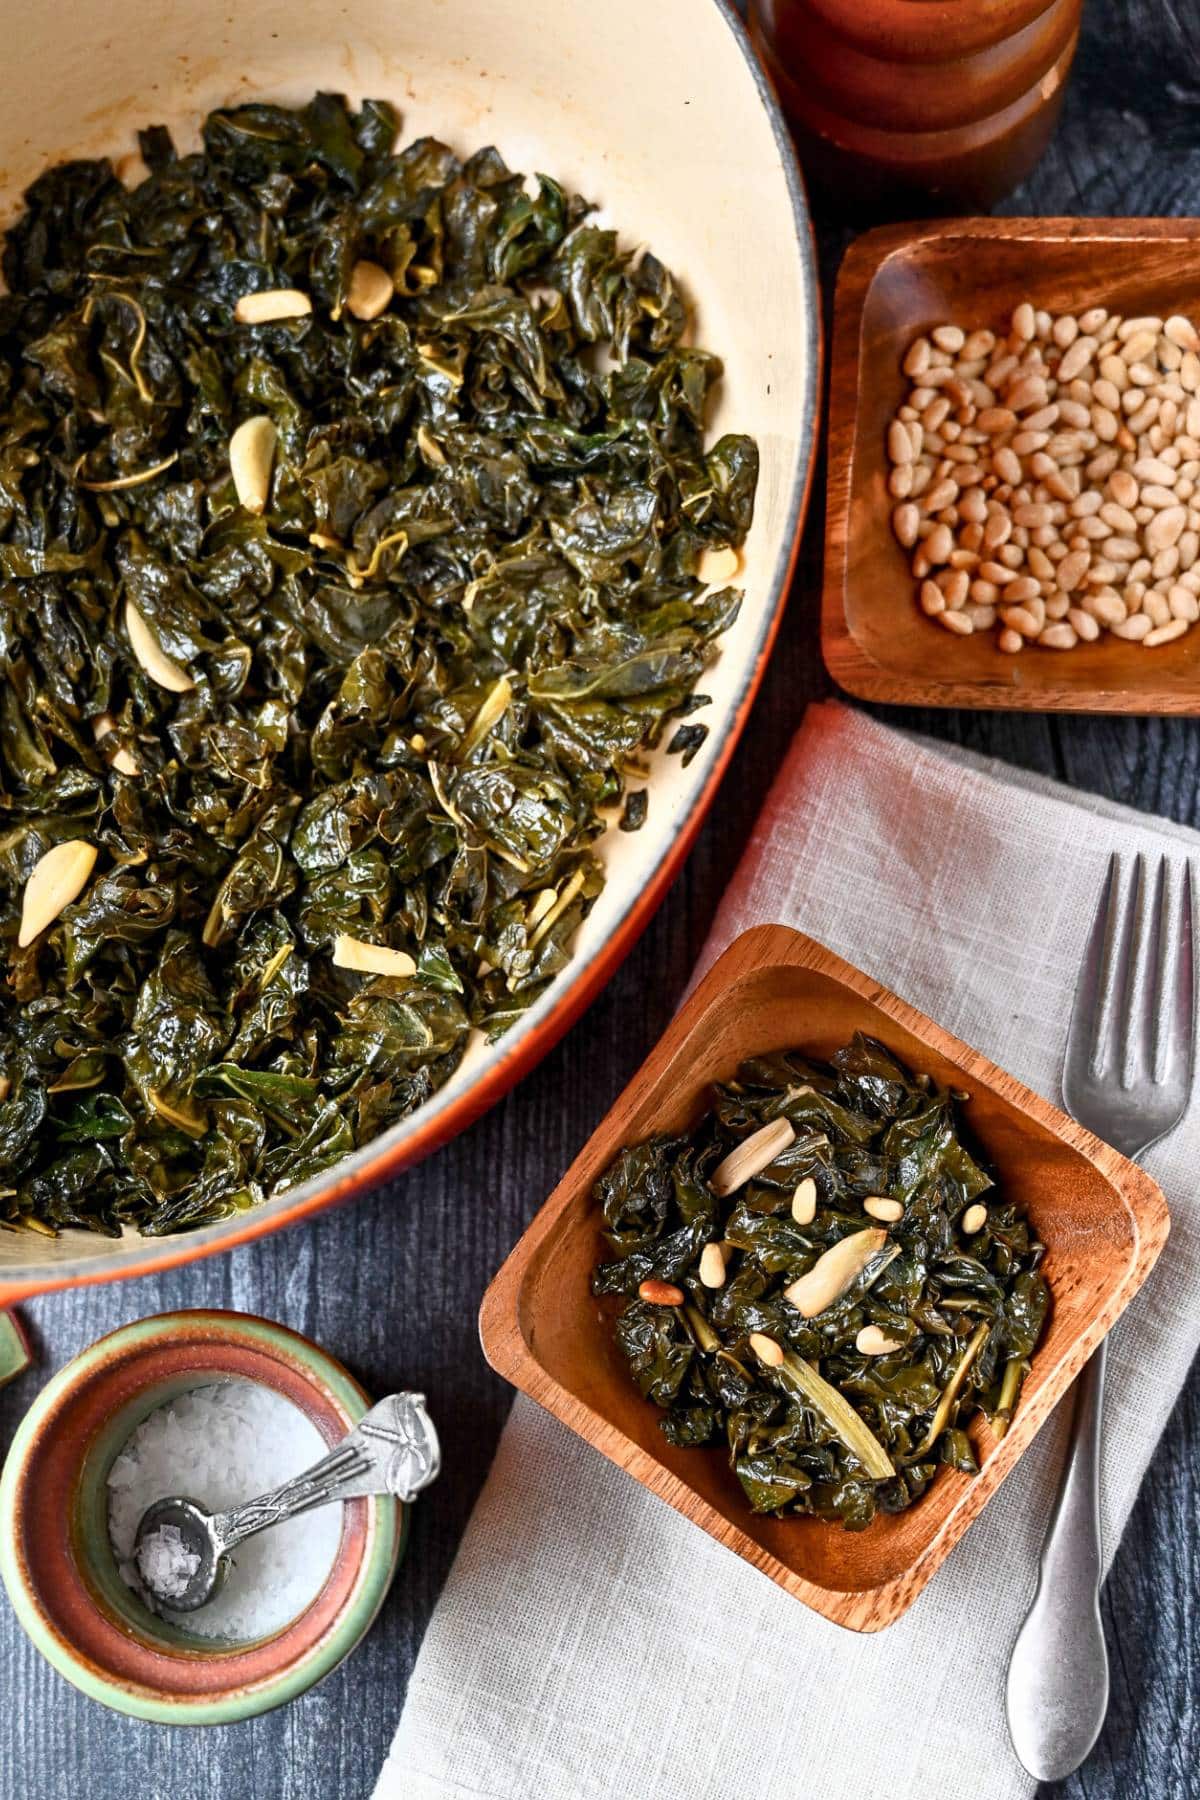
This easy Greek Braised Kale recipe cooks greens with olive oil, garlic, lemon, and broth, then finishes them with toasted pine nuts for a flavorful Mediterranean-inspired side dish.
The inspiration for this kale recipe comes from an outstanding side dish I once ordered at Kyma, a Mediterranean seafood restaurant in Atlanta. I’ve been thinking about those tender, garlicky greens ever since, so naturally I had to come up with my own version.
The secret to these flavorful greens? Braising. By cooking the kale slow and steady, the leaves and stems stay tender and silky, never mushy, while developing a deep, savory flavor.
What makes this version undeniably Greek-style is the combination of aromatic garlic and zesty fresh lemon juice, plus toasted pine nuts for a contrasting nutty crunch that takes the dish from simple to just plain delicious.
While Kyma paired their version with Lavraki (Greek sea bass), this is one of those side dishes that make sense with almost any protein –chicken, pork, salmon, steak, lamb, you name it! Once you’ve tried this braised kale, you might also want to give my Braised Sweet-and-Sour Kale or Braised Collard Greens with Bacon a whirl for more cozy, comforting greens done right.
Why You’ll Love this Recipe
- Easy to make. Despite looking and tasting sophisticated, this dish comes together with only a few simple steps and ingredients.
- Satisfying alternative to raw kale. Braising tenderizes kale and tames its natural bitterness, so you’ll actually want to eat your greens!
- Greek-inspired flavors. Garlic and fresh lemon juice make the greens lively and aromatic, while toasted pine nuts add crunch and a rich, nutty dimension.
- Perfect for leftovers. Braised kale tastes even better the next day as the flavors deepen, and it stores and reheats beautifully.
Ingredients You’ll Need
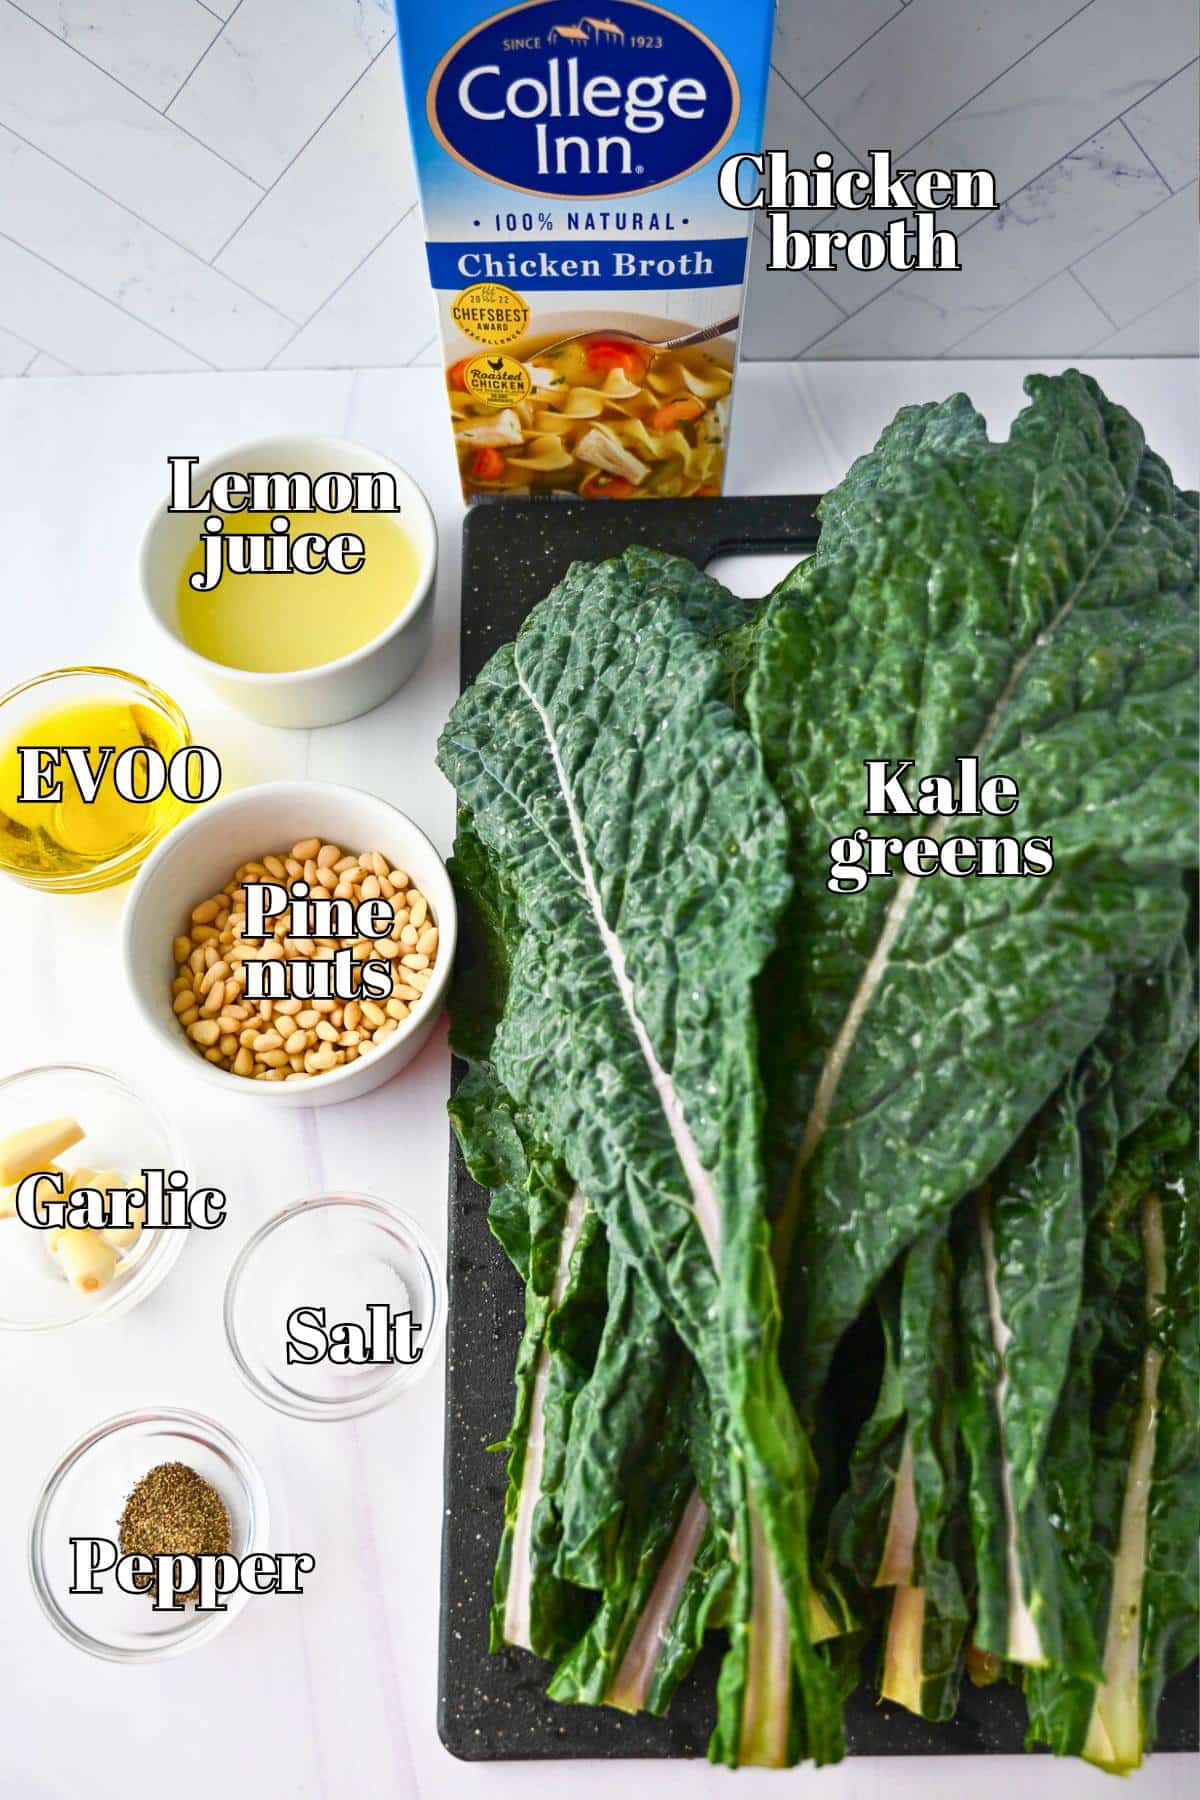
- Olive oil. I use a high-quality, cold-pressed Greek olive oil to set the stage, but any good extra-virgin olive oil will work.
- Garlic cloves. I like distinct golden slivers throughout the greens, so I thinly slice several fresh cloves, but if you prefer a milder garlic presence, you can mince them instead.
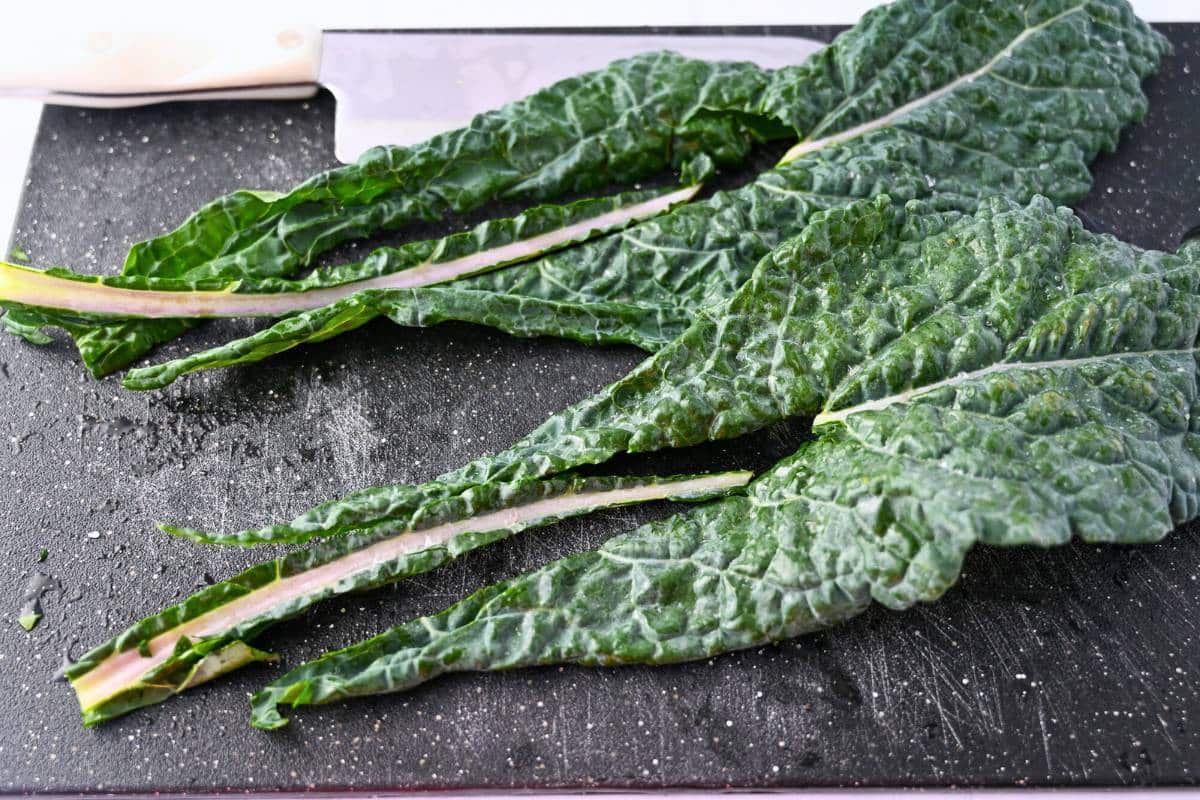
- Kale. Lacinato (Tuscan) kale is best for braising, but Red Russian kale and Curly kale work too. Be sure to cut any tough stems into roughly 1-inch pieces and keep the leaves roughly bite-sized.
- Broth. This is the necessary moisture we need to braise the greens without boiling them to death. I use chicken broth here, but vegetable broth works just as well for a vegan version.
- Seasoning. Sea salt and freshly ground black pepper go a long way, enhancing the natural bitterness of the greens and adding subtle warmth.
- Lemon juice. Freshly squeezed lemon juice is key. The acidity wakes everything up while leaning into those bright Greek-inspired flavors. Bottled juice just doesn’t pack the same punch.
- Pine nuts. I finish the dish with toasted pine nuts for a little crunch and richness that contrasts perfectly with the tender, silky greens.
How to Braise Kale

Step 1: Bloom the garlic. Heat the olive oil in a large Dutch oven or heavy-bottomed pot over medium heat until shimmering but not smoking. Add the garlic and cook, stirring constantly, until lightly golden and fragrant.
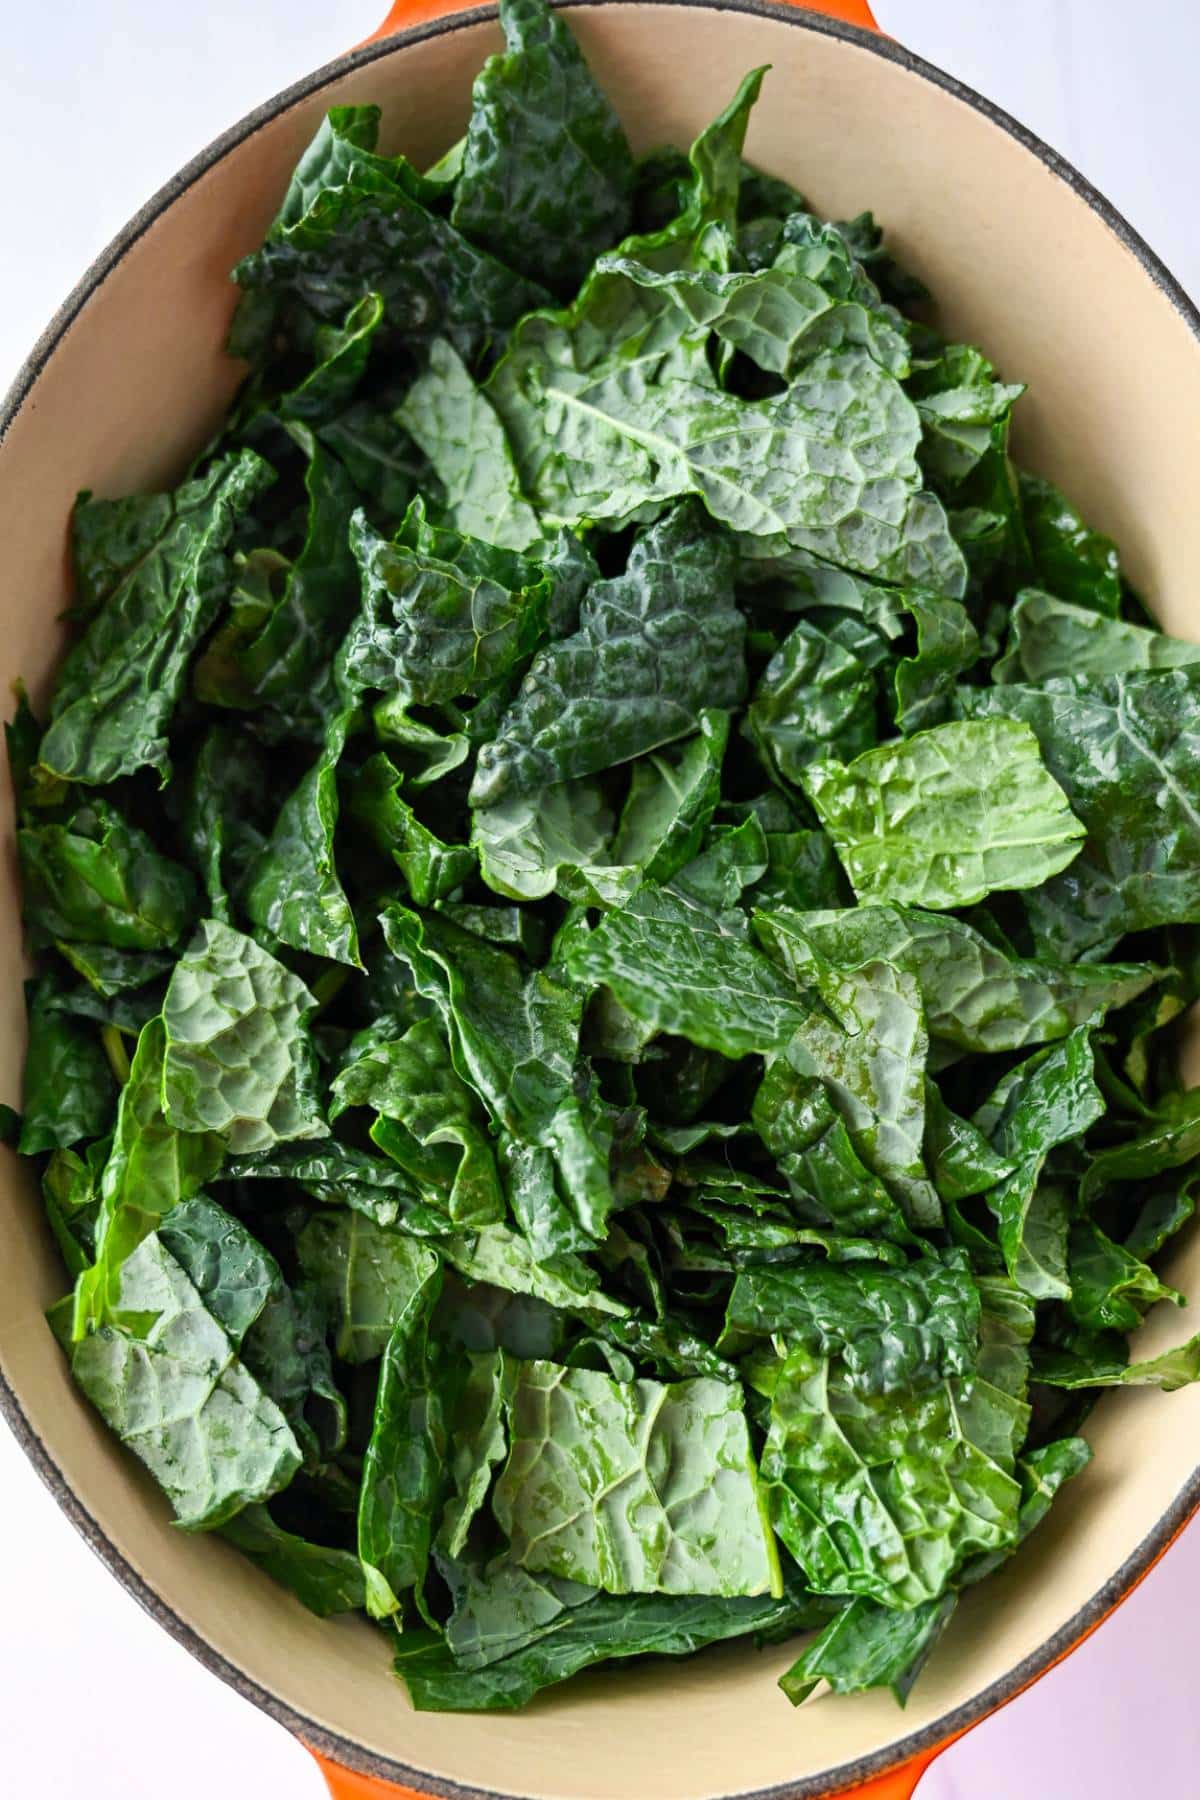
Step 2: Add the kale, liquid, and seasonings. Add the kale to the pot in several batches if needed, stirring well between additions to coat the leaves in the oil. Pour in enough broth to come about 1/4 to 1/2 inch up the side of the pot. Season generously with salt and freshly ground black pepper, then add the lemon juice.
Step 3: Steam the greens. Cover the pot and steam for 10 to 15 minutes, stirring occasionally, until the greens are fully wilted and starting to soften.
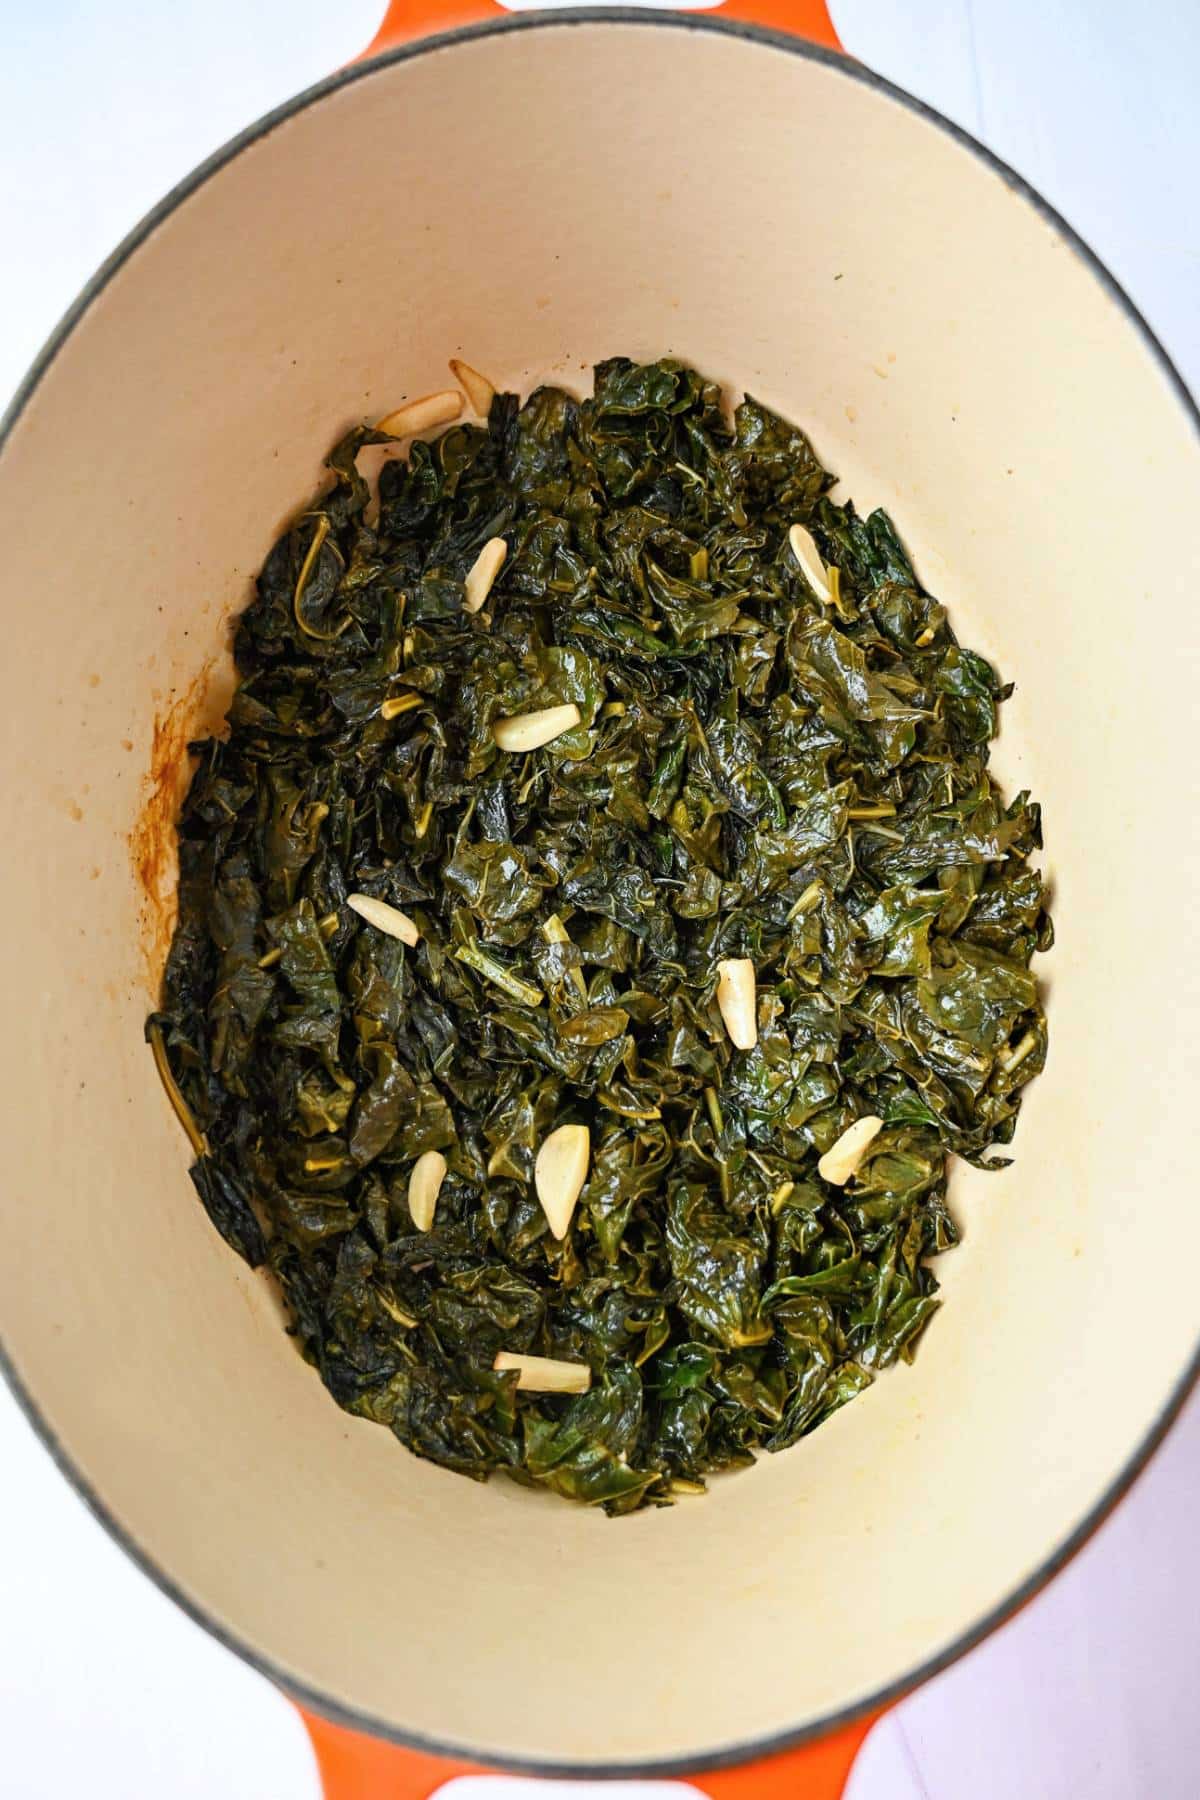
Step 4: Braise the greens. Remove the lid and continue cooking uncovered for another 10 to 15 minutes, stirring occasionally, until the stems are tender and most of the liquid has evaporated.
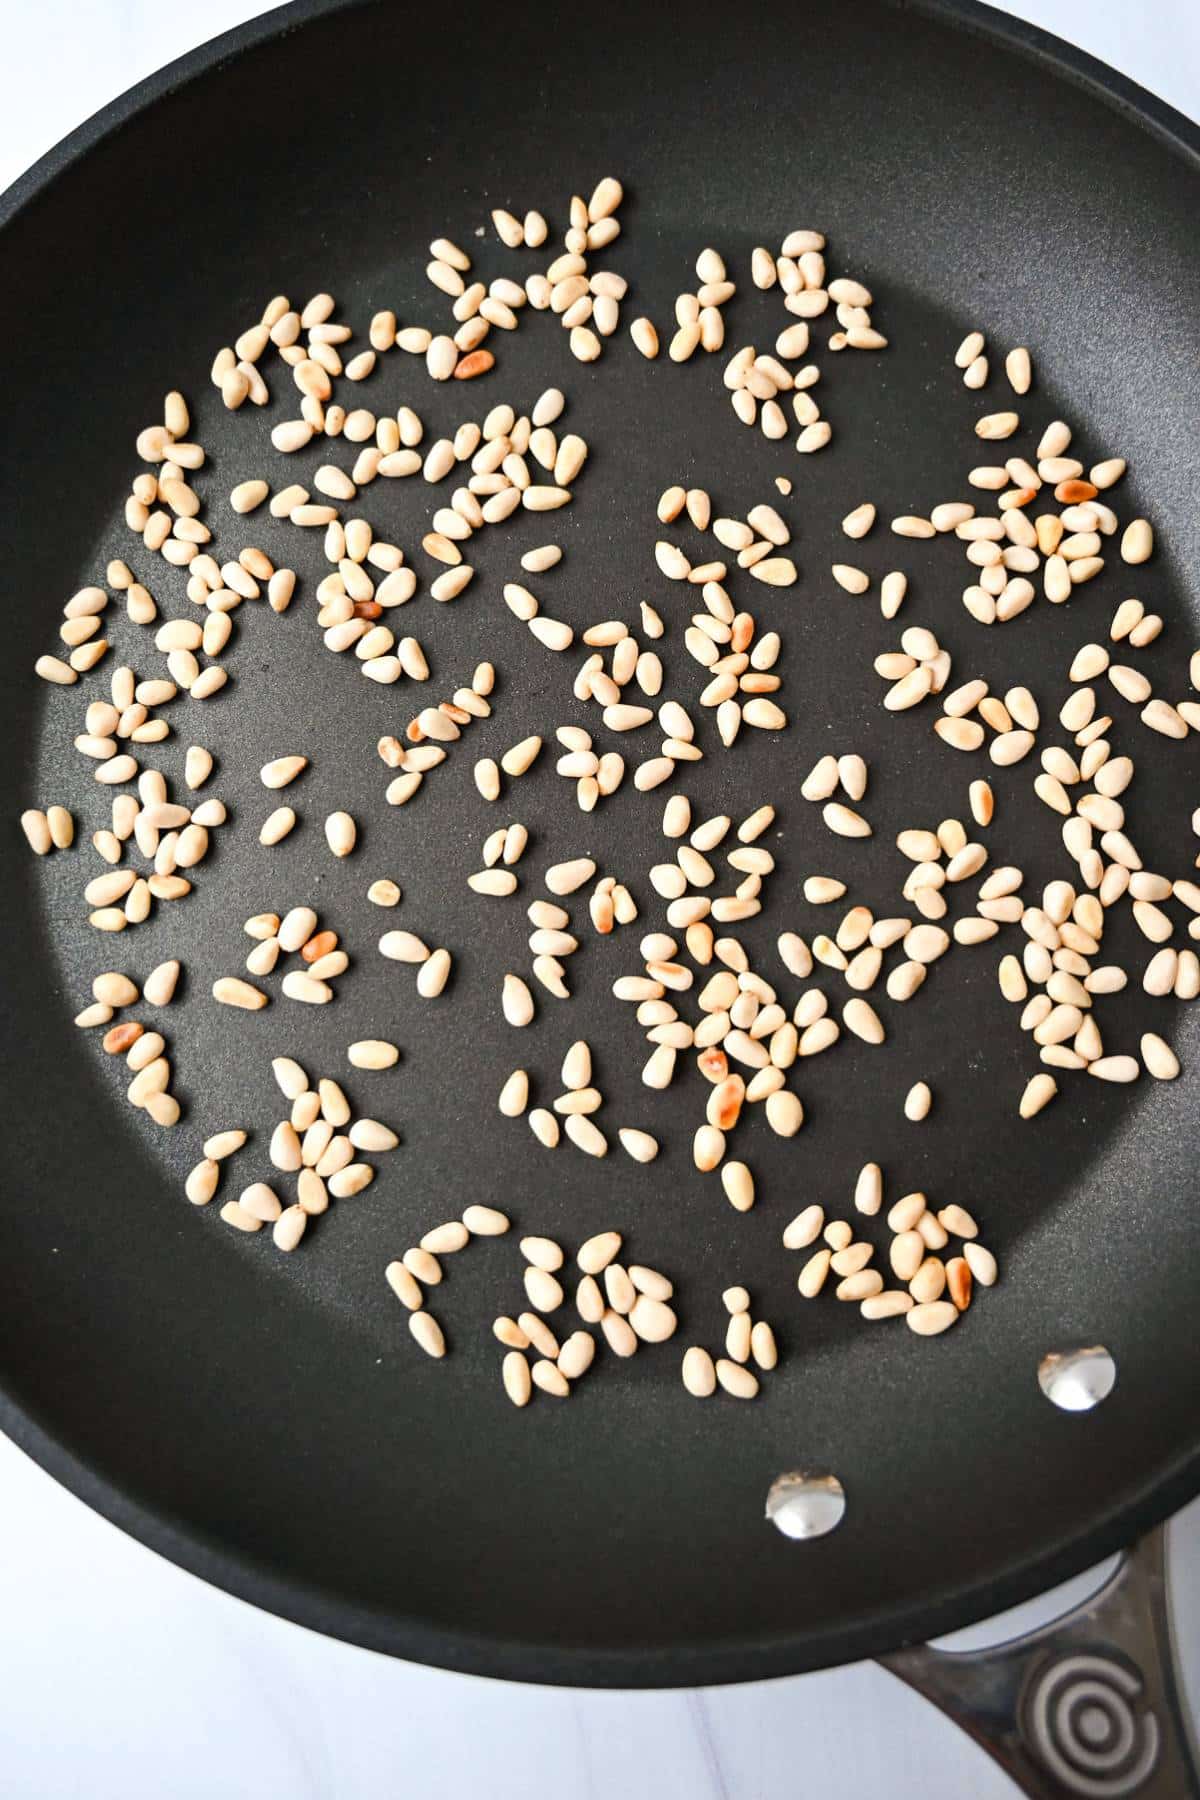
Step 5: Toast the pine nuts. Meanwhile, place a dry skillet over medium heat. Add the pine nuts and toast them for a few minutes, shaking the pan often, until they’re lightly golden. Immediately transfer them to a bowl and set aside.
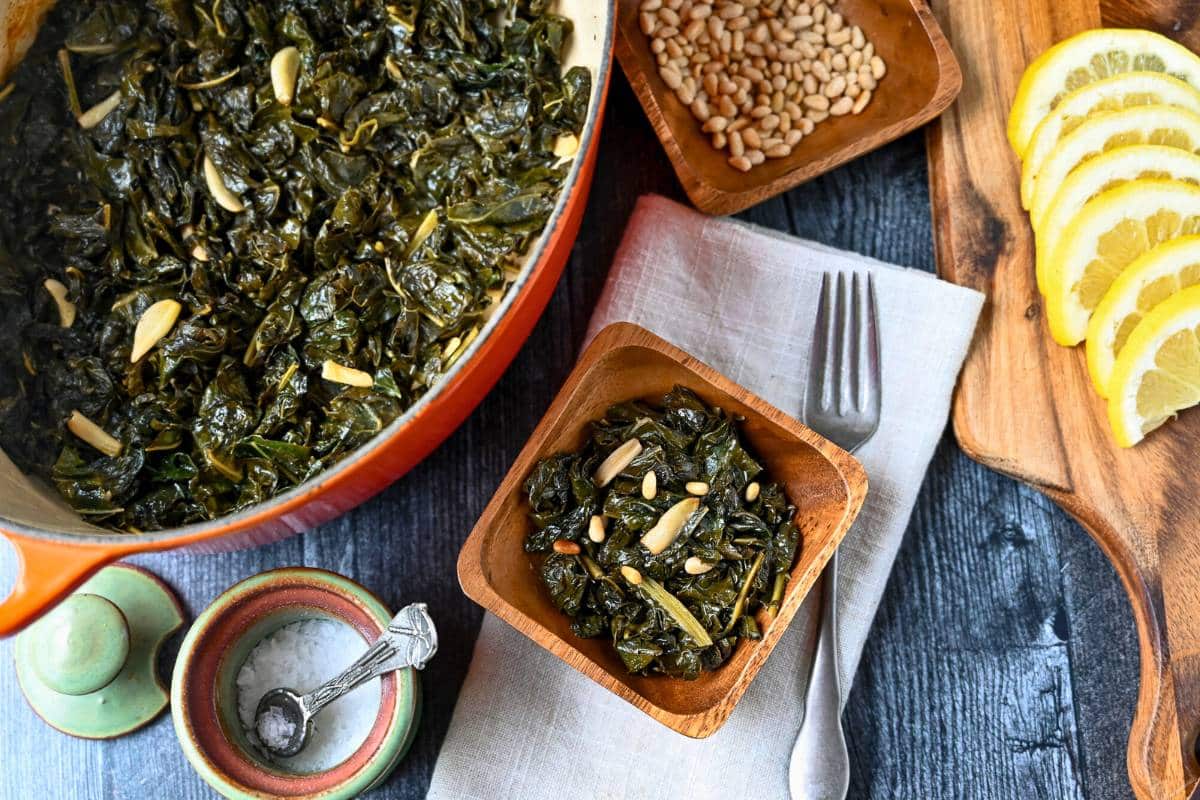
Step 6: Serve. Taste and adjust the seasoning if needed, then sprinkle the toasted pine nuts on top and enjoy!
Recipe Tips and FAQs
- Keep a close eye on the garlic. Garlic can go from sweet and mellow to burnt and bitter in a matter of seconds. Keep the heat at medium and stir constantly for the best results.
- Don’t be afraid to pile the kale high. Leafy greens always look like way too much at first, but once they hit the heat, they will quickly wilt and settle into the pot. Trust the process!
- You may not need all the broth. You only need enough to create steam, about 1/4 to 1/2 inch in the bottom of the pot. Remember, too much liquid will boil the greens rather than braise, leaving them soggy rather than silky.
- Low and steady wins the race. Keep the heat moderate so the greens soften gently without scorching. If the pot looks dry too quickly, add a splash more broth and keep going.
- Braised kale should look almost overcooked by the end. That deep tenderness is what transforms kale from chewy and bitter into rich, savory, and comforting. If the stems aren’t tender yet, keep cooking.
Make It Your Own
Once you understand the basics of braising kale, the customization possibilities are endless:
- Swap the greens – This technique works beautifully with other dark leafy greens like collards, mustard greens, or even a mix of whatever looks good. Just adjust the cooking time slightly depending on how thick the leaves and stems are.
- Swap the nuts – Pine nuts can be pricey. Fortunately, chopped almonds, walnuts, or pistachios all work well. No matter which nuts you choose, toast them in a dry skillet first. Trust me, future you will be happy you did this.
- Add bacon – If you want a little smoky richness, start by cooking chopped bacon in the Dutch oven until crisp. Scoop it out with a slotted spoon and use the rendered fat in place of some of the olive oil, then stir the bacon back in at the end. Pancetta or diced leftover ham would be great here, too.
- Lean into the lemon – For another layer of freshness that pairs beautifully with the tender greens, finish the dish with an extra squeeze of lemon juice or a little freshly grated lemon zest.
- Elevate the aromatics – Adding finely chopped onion and/or a pinch of red pepper with the garlic is a small tweak that makes a big difference, adding more savory depth and a little kick to the dish.
Kale is best when braised in two stages: first, covered for 10 to 15 minutes to wilt the leaves fully; then, uncovered for another 10 to 15 minutes, or until most of the liquid has evaporated, the stems are tender, and the leaves look very soft, almost overcooked. If it still feels chewy, kale is forgiving, so keep cooking until it softens.
When cooked properly, braised kale is not bitter. The combination of olive oil, gentle heat, broth, and lemon helps mellow the natural bitterness and brings out its savory, slightly sweet side. For a sweeter, mild kale variety, go with Red Russian kale.
This lemony, garlicky kale fits right in basically wherever you need a hearty, healthy green on the plate, especially Mediterranean-inspired mains like my Greek Chicken Stew, Mediterranean Steak, or Greek Halibut. It also pairs well with Herb-Roasted Chicken, Grilled Pork Tenderloin, and Grilled Salmon.
Storing and Freezing
Storing: Braised greens keep well in an airtight container in the refrigerator for up to 4 days. If you ask me, leftovers taste even better. Just reheat them gently on the stovetop over medium-low heat, adding a splash of broth if they look dry.
Freezing: Once the greens cool completely, you can freeze them in an airtight container for up to 2 months, and thaw them overnight in the refrigerator before reheating. Just know that the texture will soften further during the process.
More Easy Vegetable Side Dish Recipes
- Roasted Potatoes and Broccoli
- Roasted Green Beans
- Air Fryer Roasted Carrots
- Sriracha Roasted Cauliflower and Sweet Potato
- Parmesan Grilled Asparagus
If you love this Braised Garlic Lemon Kale recipe, I would be so grateful if you could leave a 5-star 🌟 rating in the recipe card below. I love reading your comments and feedback!
Stay posted on my latest cooking adventures through social media @ Instagram, Pinterest, and Facebook. Also, don’t forget to tag me when you try one of my recipes!
Greek Braised Kale with Pine Nuts
Ingredients
- 3 tbsp extra virgin olive oil
- 5 cloves garlic slivered
- 1½ lbs Lacinato (Tuscan) kale roughly chopped & hard stems removed- can swap with Red Russian kale or Curly kale -Do not use baby kale!
- ½-1 cup chicken broth *start with ½ cup and only add more if needed
- 4 tbsp fresh squeezed lemon juice
- salt and pepper to taste
- ¼ cup pine nuts *see notes for other garnish options
Instructions
- Heat the olive oil in a large Dutch oven or heavy-bottomed pot over medium heat until shimmering but not smoking. Add the garlic and cook, stirring constantly, until lightly golden and fragrant.
- Add greens, in several batches, stirring to coat with the oil.
- Add enough broth to cook greens without scorching (about ¼ to ½ inch deep), you may have a little broth left over.
- Season generously with salt and freshly cracked pepper, then add lemon juice and cover.
- Steam for 10 minutes, stirring occasionally until all greens are wilted and soft.
- Remove lid and braise for 10-15 minutes until stems are tender and liquid is almost all evaporated. Greens should almost look overcooked.
- Meanwhile, place a dry skillet over medium heat. Add the pine nuts and toast them for a few minutes, shaking the pan often, until they’re lightly golden. Immediately transfer them to a bowl and set aside.
- Garnish with toasted pine nuts before serving. I sprinkle a few on top and serve the rest on the side.
Notes
- Keep a close eye on the garlic. Garlic can go from sweet and mellow to burnt and bitter in a matter of seconds. Keep the heat at medium and stir constantly for the best results.
- Don’t be afraid to pile the kale high. Leafy greens always look like way too much at first, but once they hit the heat, they will quickly wilt and settle into the pot. Trust the process!
- You may not need all the broth. You only need enough to create steam, about 1/4 to 1/2 inch in the bottom of the pot. Remember, too much liquid will boil the greens rather than braise, leaving them soggy rather than silky.
- Low and steady wins the race. Keep the heat moderate so the greens soften gently without scorching. If the pot looks dry too quickly, add a splash more broth and keep going.
- Braised kale should look almost overcooked by the end. That deep tenderness is what transforms kale from chewy and bitter into rich, savory, and comforting. If the stems aren’t tender yet, keep cooking.
Nutrition

- One-Pan Lemon Shrimp and Orzo Skillet - April 6, 2026
- Easy Bean Corn Salsa Dip - April 1, 2026
- Spicy Tuna Crispy Rice Salad - March 18, 2026
It would have been nice to have had a reference to the pine nuts in the instructions.
Hi Roberto! I will be sure to add the instructions on how to toast the pine nuts in the recipe card. I do this in a dry skillet for a few minutes until they become fragrant and lightly golden. I appreciate the feedback. They are added as a garnish before serving.
Thank you Bree! Emily, they worked great together. I love toasted pine nuts!! 🙂
Ooh, pine nuts and kale is a very yummy combo!
How creative-love it!