Oatmeal Carmelitas (Gluten-Free)
This post may contain affiliate links. Please read my disclosure policy.
Prepare to indulge in these Gluten-Free Oatmeal Carmelitas, a decadent treat featuring layers of oats, salted caramel sauce, chocolate, and pecans! Perfect for after-school snacks, bake sales, or any time you need a delicious gluten-free dessert!
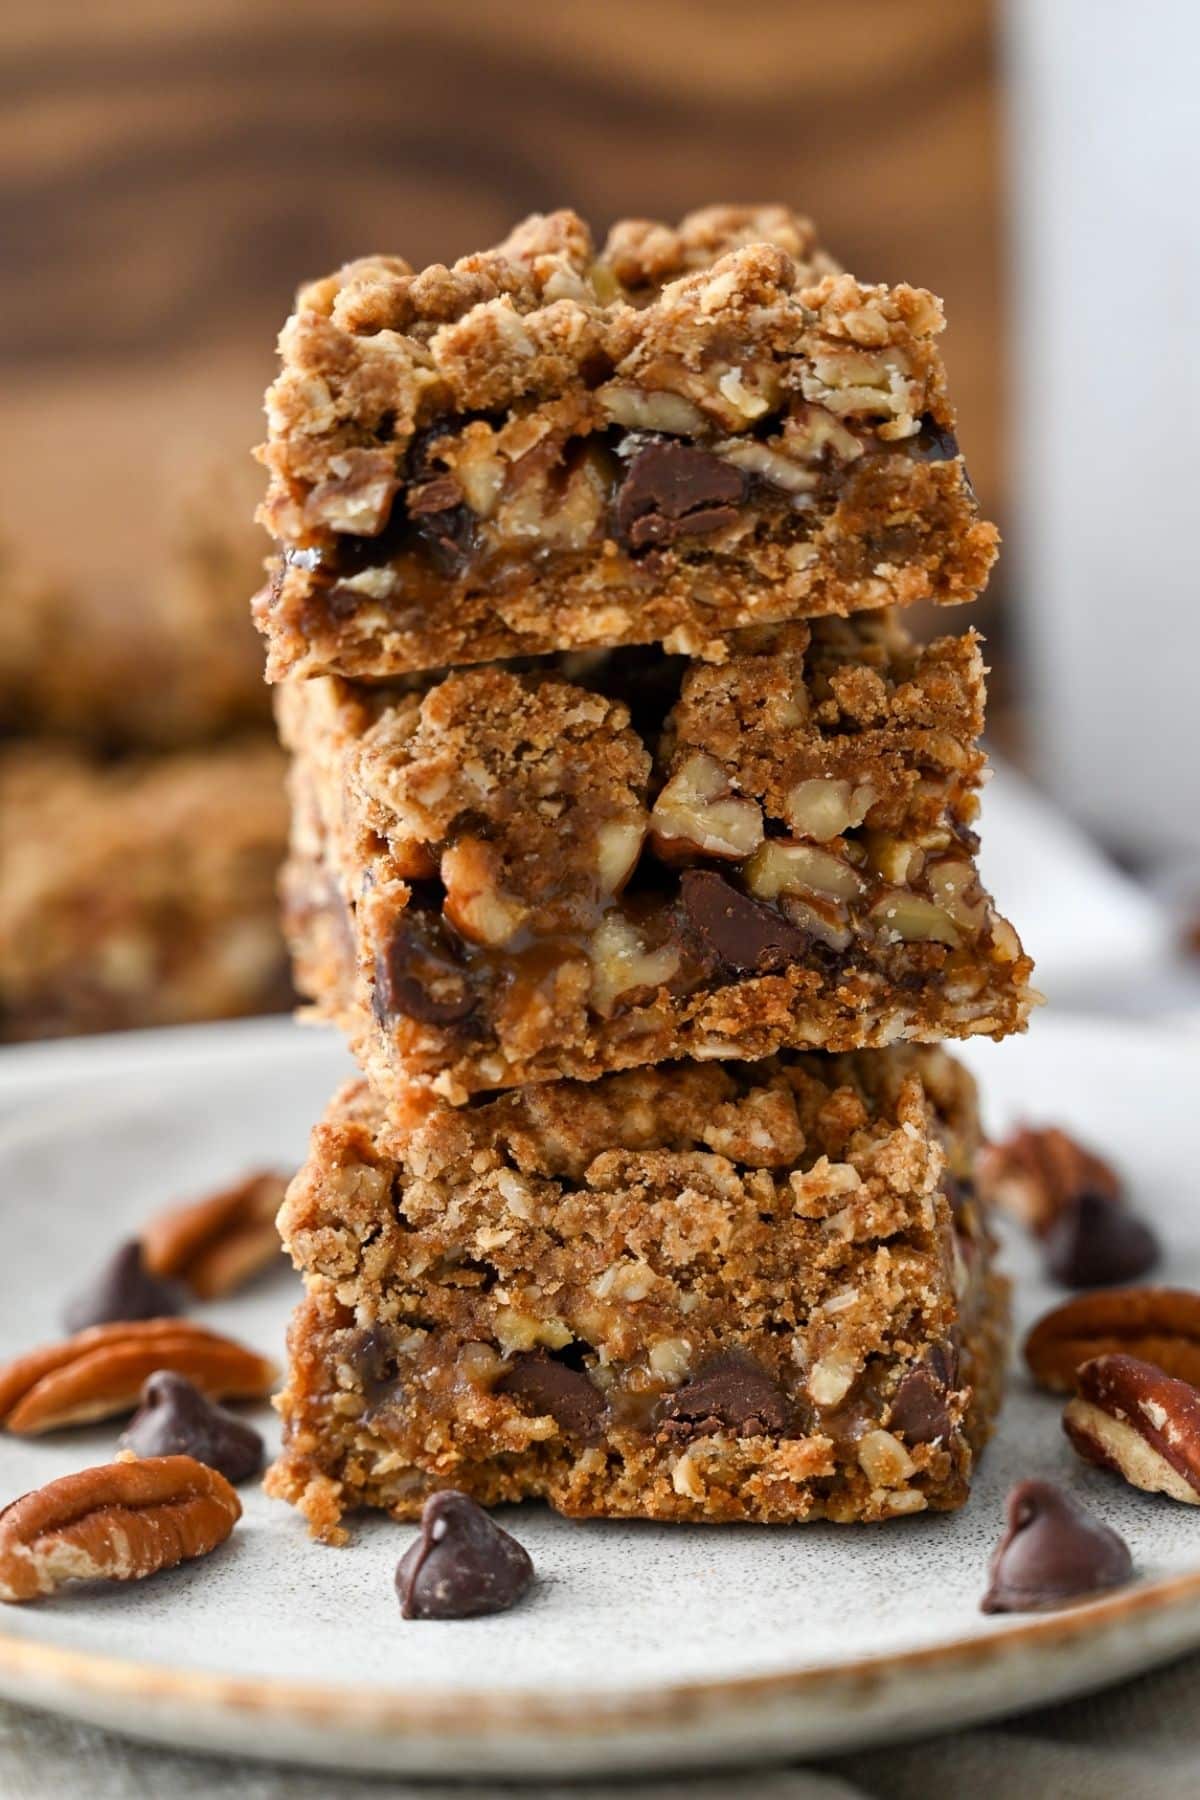
If you’re craving something sweet, crunchy, chewy, and oh-so-gooey, I think you’ll love these gluten-free oatmeal carmelita toffee bars! I’ve adapted my original recipe with a quick-and-easy short-cut version based on reader feedback, and it’s just as good as the OG version without all the fuss. Whether you make the salted caramel sauce from scratch or grab a jar from the store, these bars are super easy to make and delicious!
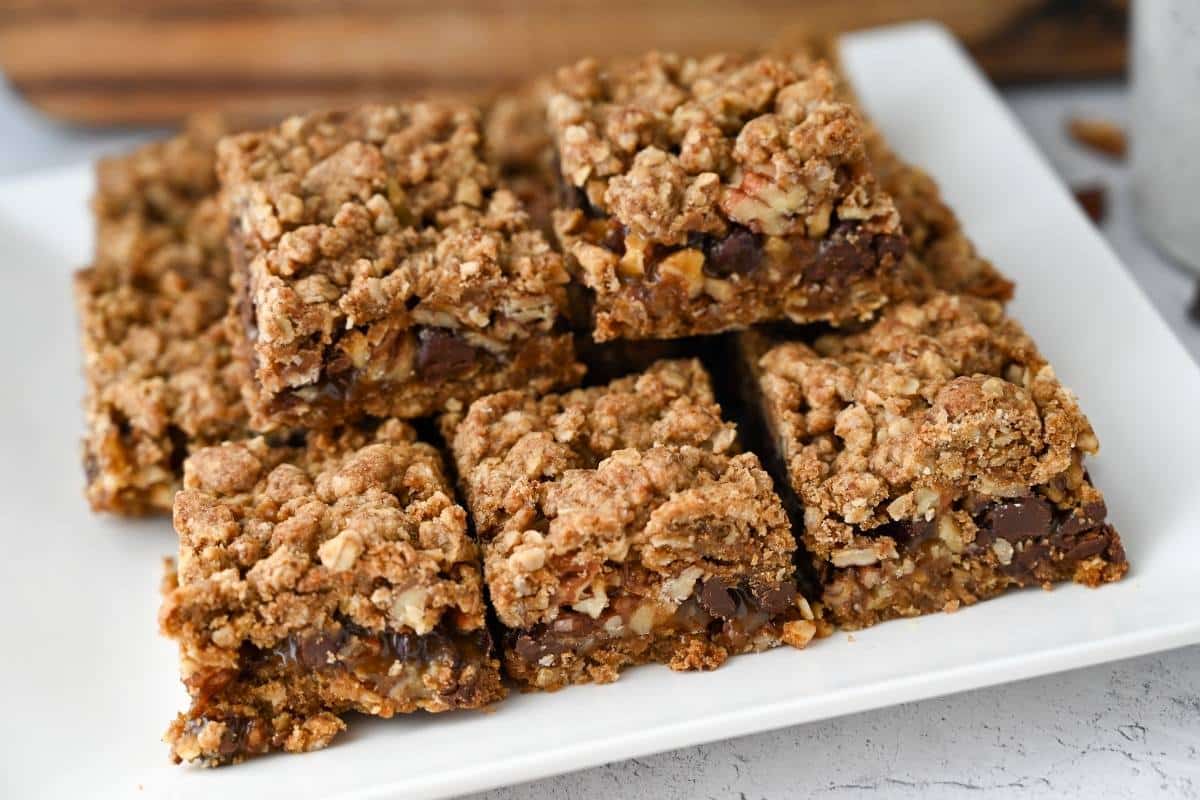
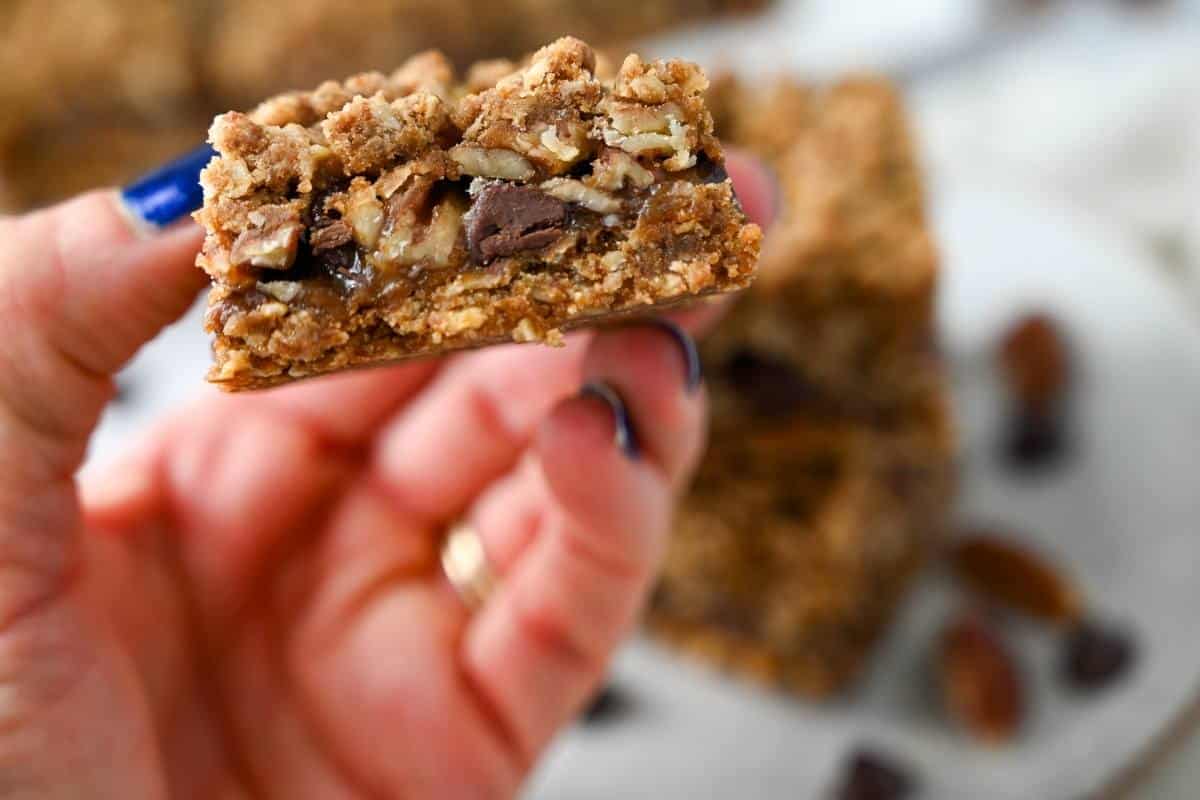
These decadent dessert bars combine gluten-free quick oats, creamy salted caramel sauce, melty chocolate, and crunchy pecans or walnuts to create a golden crust and heavenly filling.
What are Carmelitas, anyway?
If this is your first Carmelitas experience, you’re in for a satisfyingly chewy, sweet treat! Traditionally, Carmelitas are rich, gooey bars made with layers of oats, chocolate, and caramel sauce. Think of them as the love child between an oatmeal cookie and your favorite caramel candy!
The original version includes all-purpose flour, but I wanted to make them suitable for those with gluten sensitivities. So, I simply swapped in gluten-free all-purpose flour and found it beautifully mimics that signature taste and texture!
Here are the top three reasons why you absolutely MUST make this gluten-free version:
- Deliciously sweet and chewy. The combination of decadent chocolate, salted caramel, chewy oats, and crunchy nuts will keep you coming back for more!
- Easy to make gluten-free dessert. With fuss-free gluten-free ingredients and straightforward steps, these bars are perfect for bakers of all skill levels.
- Versatile snack bars. Great for an after-school snack, grab-and-go dessert, or to share with loved ones at your next gathering –everyone will love them!
Ingredients you’ll need
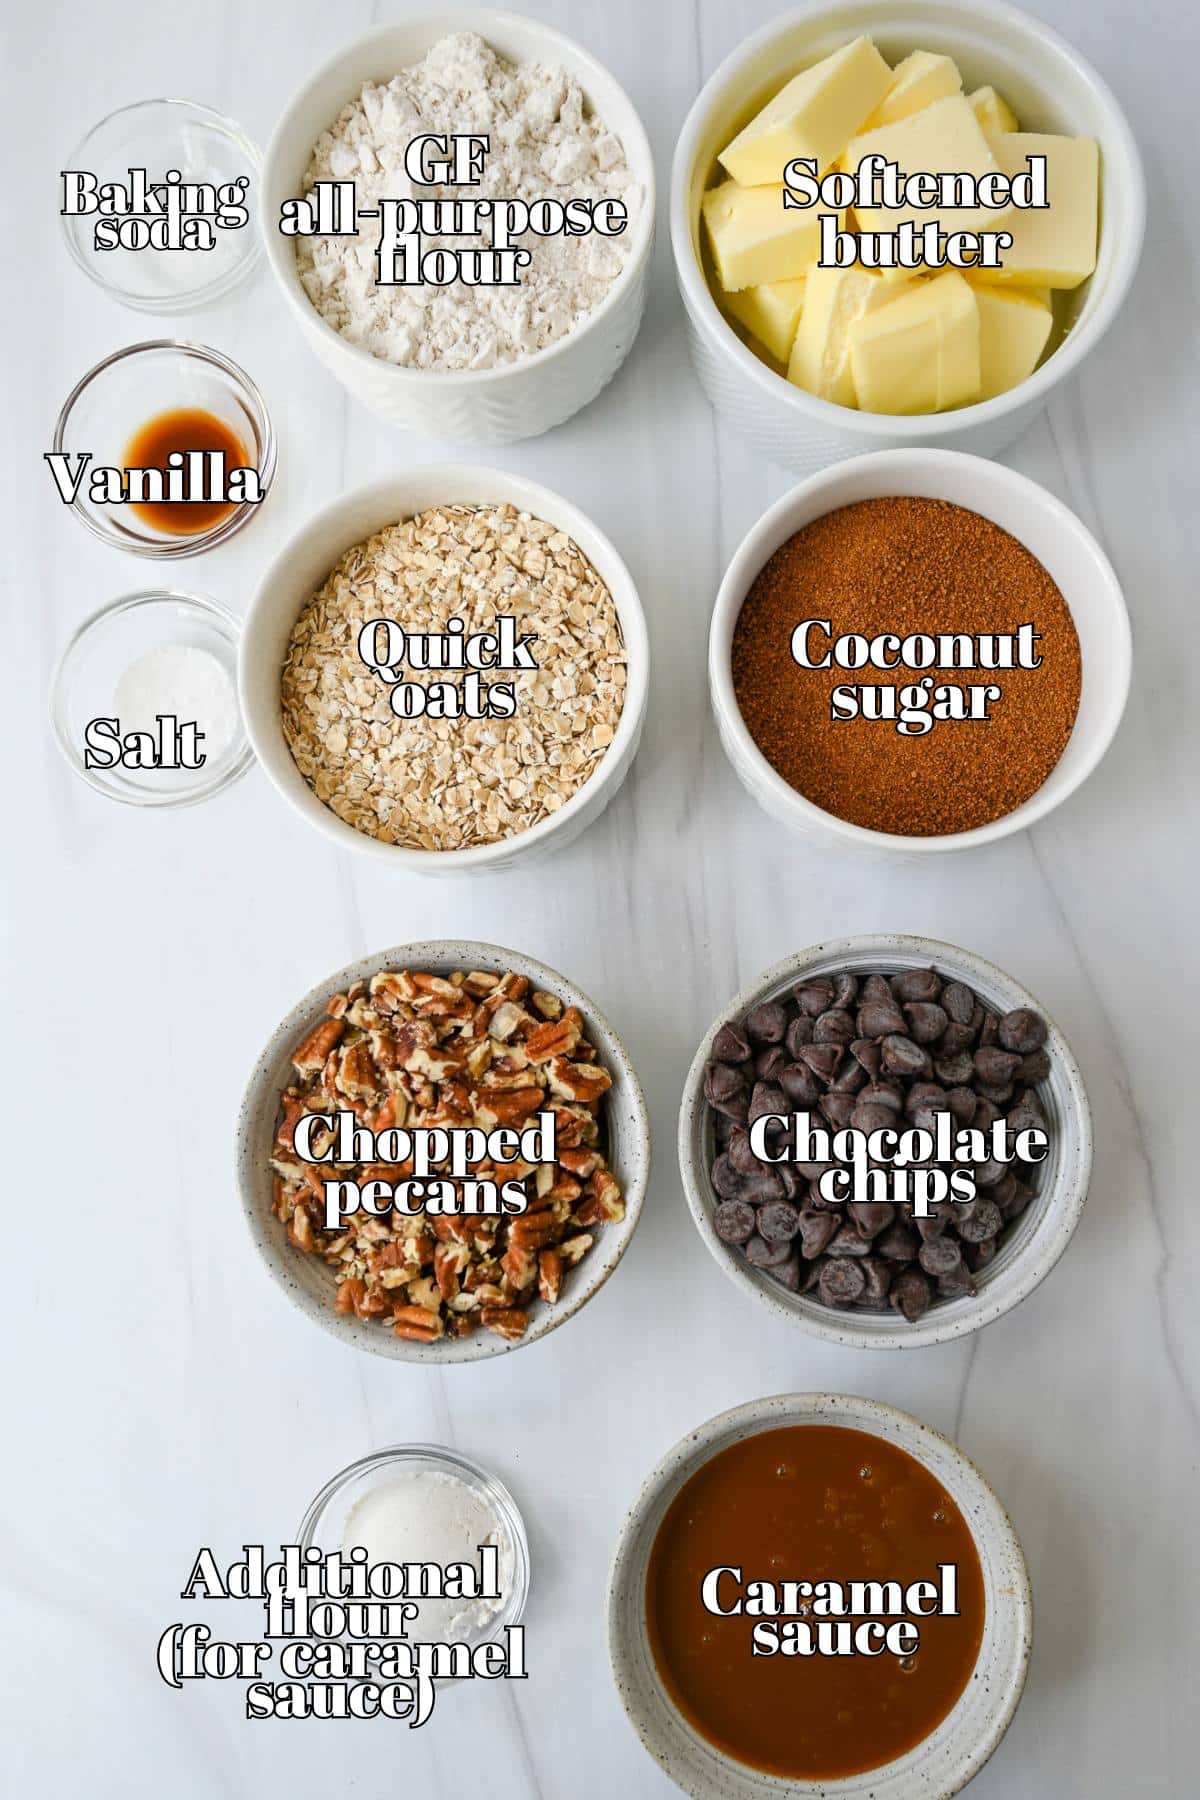
- Salted caramel sauce. Adds a rich, sweet, and salty flavor. You can use homemade salted caramel sauce (recipe below). Or, if you’re short on time, a store-bought option works just as well. I love using Smucker’s Simple Delight Salted Caramel Topping.
- Gluten-free all-purpose flour. For the crust and topping. I highly recommend the King Arthur brand. If you use another one, ensure the blend contains xanthan gum or a similar binding agent for the best results.
- Quick oats. Help create the classic chewy texture. Ensure they’re gluten-free to keep the recipe safe for those with gluten sensitivities –Bob’s Red Mill has an excellent gluten-free option.
- Coconut sugar. Adds moisture, natural sweetness, and a slightly caramel-like flavor. Brown sugar also works if preferred.
- Salted butter. Helps create the flavorful crumbs that form the base and topping. Allow the butter to sit at room temperature until soft to make mixing easier.
- Baking soda. Helps the crust and topping rise slightly.
- Sea salt. Use fine sea salt for the best results. If using a different type of salt (like kosher salt), adjust the quantity to taste, as other salts have different intensities.
- Vanilla. Adds a lovely depth of flavor and complements the caramel and chocolate. Use pure vanilla extract for the best taste.
- Chopped pecans. Add a delightfully nutty crunch! Both pecans and walnuts work well, so use whichever you prefer or have on hand. For added flavor, toast the nuts lightly before adding them to the bars.
- Chocolate chips. I prefer semi-sweet chocolate chips, but you can use dark or milk chocolate chips. Enjoy Life and Nestle Toll House both offer gluten-free options.
How to make oatmeal carmelitas
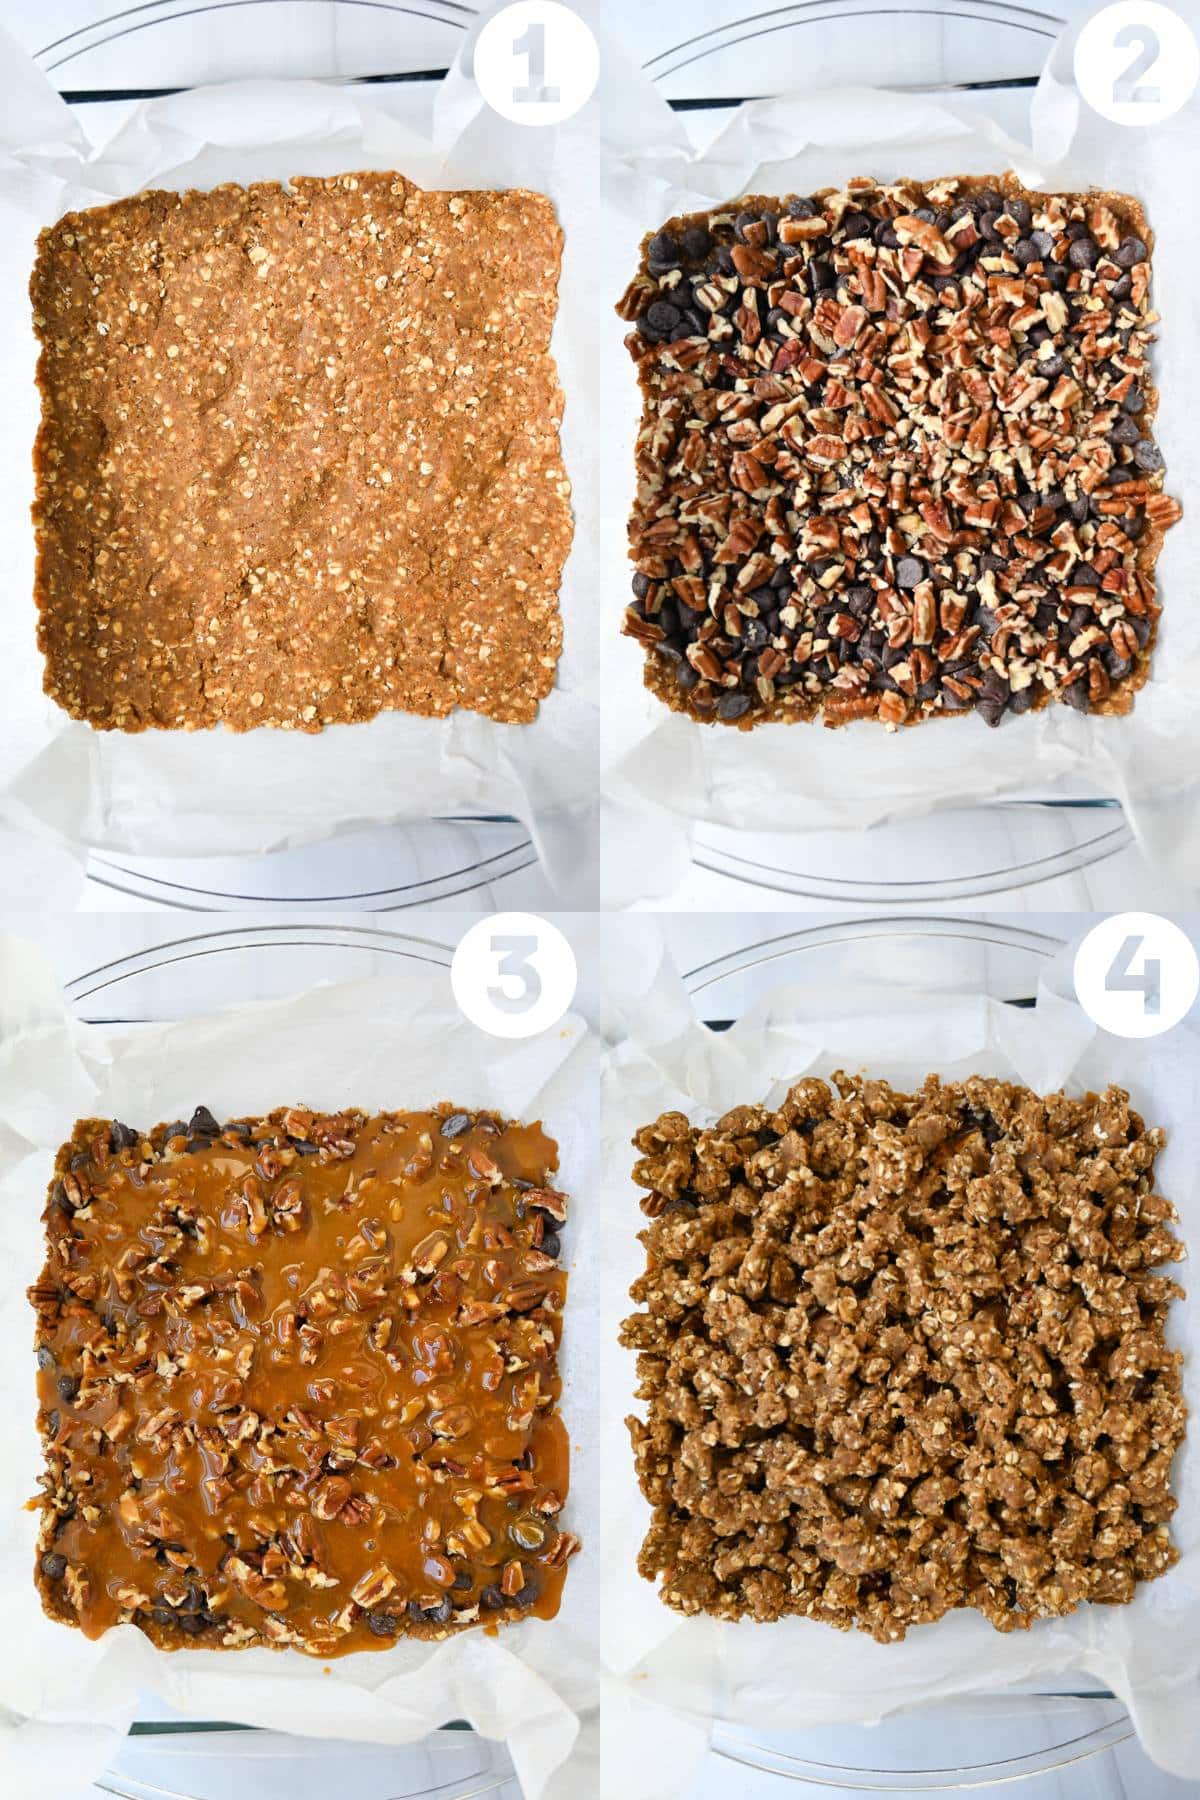
Step 1: Preheat and prepare. Preheat your oven to 350°F (175°C). Line an 8-inch square baking dish with parchment paper, letting the edges hang over.
Step 2: Mix the base. In a stand mixer, mix the gluten-free flour, oats, coconut sugar, softened butter, baking soda, salt, and vanilla extract on low speed until the mixture turns into coarse crumbs.
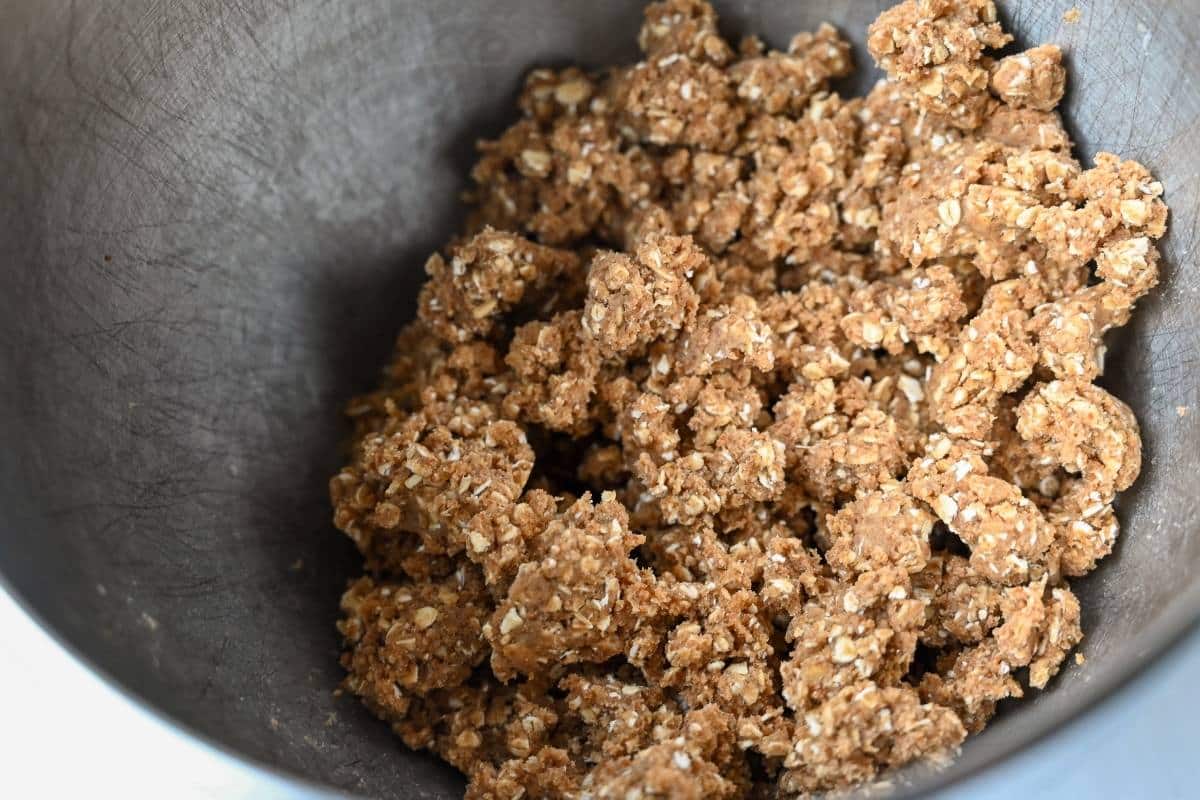
Step 3: Press and bake. Press half of the crumb mixture firmly into the bottom of the prepared baking dish. Reserve the other half for the topping. Bake for 12 minutes or until lightly golden.
Step 4: Add toppings. Once the base is baked, remove it from the oven and sprinkle the chopped nuts and chocolate chips evenly over the top.
Step 5: Prepare caramel layer. Whisk together caramel sauce and 1 tablespoon of gluten-free flour in a small bowl until smooth.
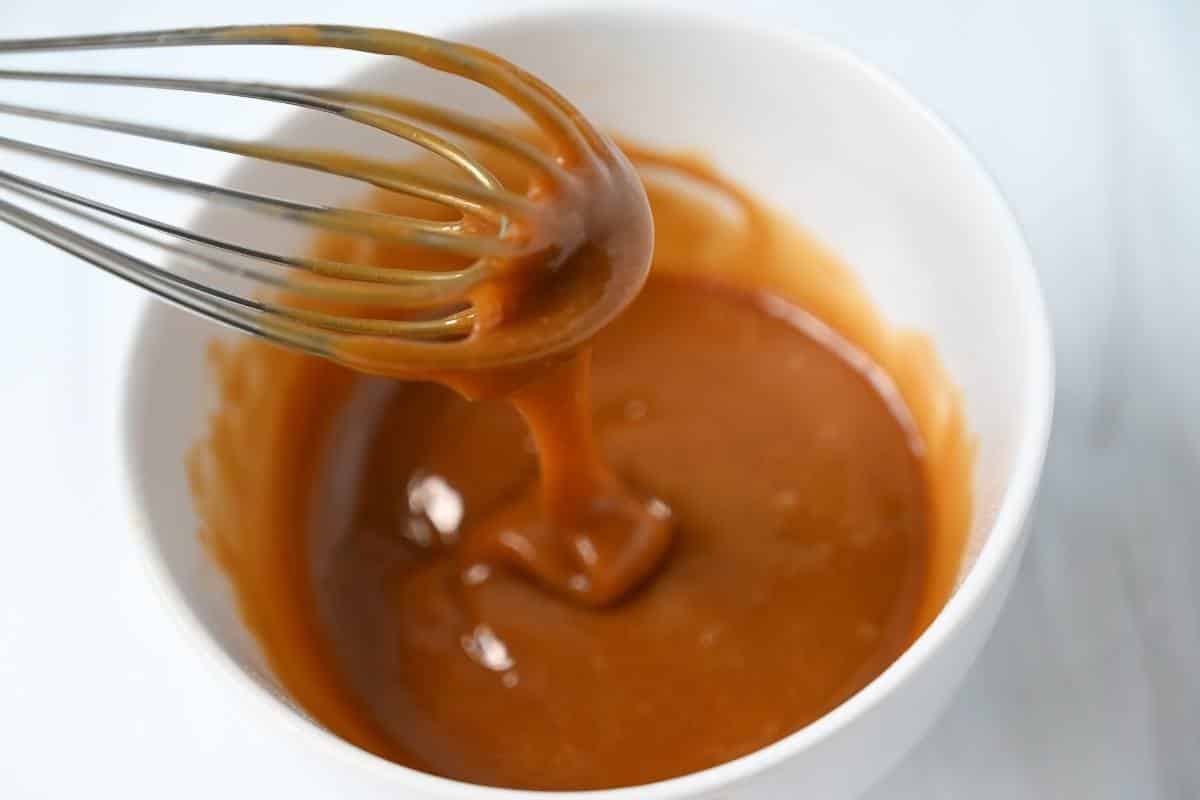
Drizzle this caramel mixture evenly over the nuts and chocolate chips. Sprinkle the reserved crumb mixture over the caramel layer.
Step 6: Bake again. Bake for 18-22 minutes until the top is golden brown. The edges will look slightly more done than the center, which is perfect.
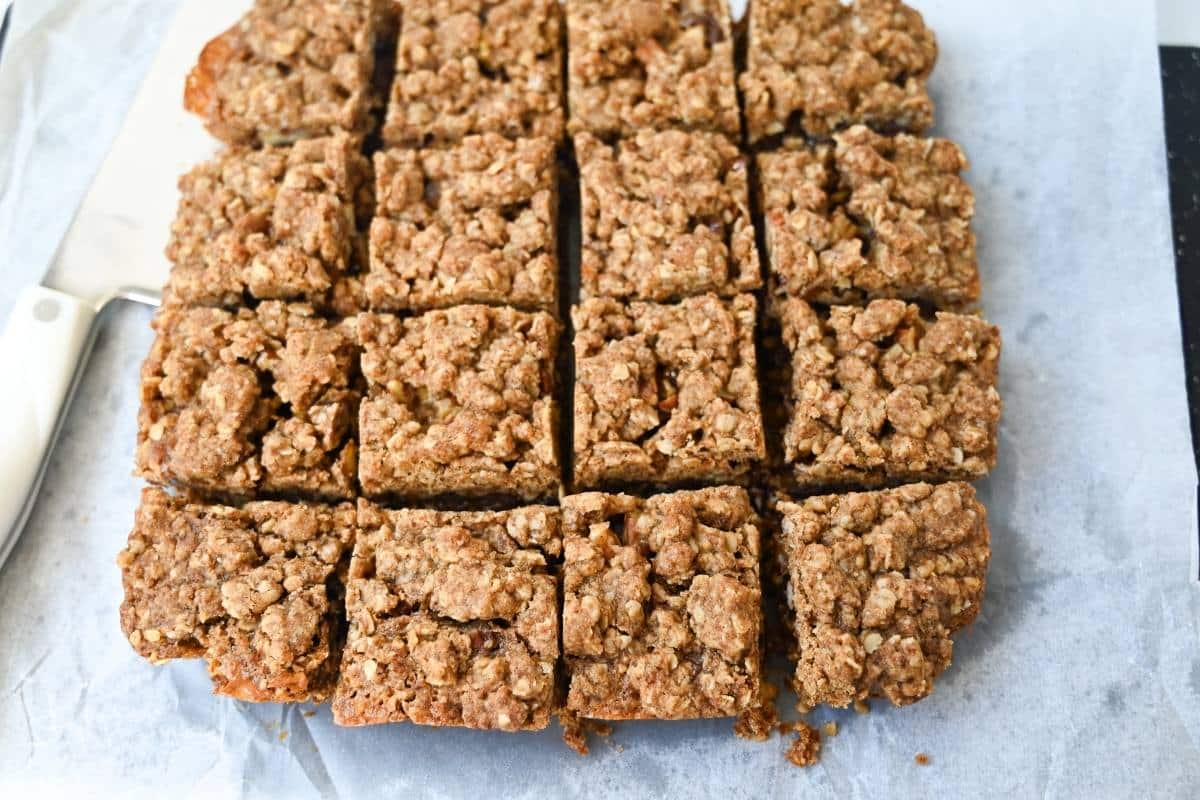
Step 7: Chill and serve. Let the bars cool completely in the baking dish, then chill in the refrigerator for 1-2 hours. Once chilled, lift the bars out using the parchment paper, slice, and enjoy!
How to make the salted caramel sauce from scratch
If you’re up for a little extra love, making your rich, velvety salted caramel sauce from scratch is totally worth it. Here’s how to do it:
- Combine. Combine 1 cup of granulated sugar and ¼ cup of water in a heavy-bottomed saucepan over medium-low heat. Stir until the sugar is completely dissolved.
- Boil. Increase the heat to medium-high and bring the mixture to a boil. Let boil undisturbed until it turns a light amber color (6-7 minutes). Gently swirl the pan and use a metal spoon to scrape down the sides periodically, if needed.
- Add butter. Remove the saucepan from the heat and immediately whisk in 3½ tablespoons of room-temperature butter. Be careful –the mixture will bubble up vigorously!
- Incorporate cream. Gradually whisk in ¾ cup of room-temperature heavy cream and 1 teaspoon of sea salt until the mixture is smooth and well combined.
- Cool the sauce. Transfer the sauce to a bowl and allow it to cool completely before using it in this Carmelitas recipe.
Recipe tips and FAQs
- Quality counts! Good-quality chocolate melts better and offers a richer flavor, while fresh, high-quality nuts add a delightful crunch, so go for the good ones!
- Always line your baking dish. Line it with parchment paper, leaving an overhang on the sides so it’s easier to lift the bars out of the pan once they’re cooked and cooled.
- Chill before slicing. Allow the Carmelitas to cool completely in the baking dish, then let them chill in the fridge for 1-2 hours before slicing. This helps them set properly, making clean slices much more manageable instead of turning into an ooey-gooey mess!
Tips for making the caramel sauce from scratch
- Use room-temp ingredients. Before you start the caramel sauce, bring the butter and cream to room temperature. If added cold, the sauce may seize and clump up. Add these ingredients gradually and whisk constantly to incorporate them smoothly.
- Patience! When dissolving the sugar and water, whisk constantly over medium-low heat until the sugar is fully dissolved. Rushing this step can cause the sugar to crystallize. Patience is key!
- Color watch. Keep a close eye on the color as the sugar boils. It should turn a light amber. If it gets too dark, it can become bitter. Gently swirl the pot occasionally to ensure even cooking.
- Cool completely and store. Allow your homemade sauce to cool completely before using it for oatmeal carmelitas. This ensures it’s thick enough not to ooze from the bars when baked.
- Make it ahead. You can also make the salted caramel sauce and store it in an airtight container in the refrigerator for up to two weeks. Just let it come to room temperature before using it in this recipe.
Variations
Here are some personal touches to consider for your Carmelitas:
- Nuts – Swap out the pecans or walnuts for nuts like almonds, hazelnuts, or macadamia nuts.
- Dried fruit – Mix dried fruits like cranberries, cherries, raisins, or shredded coconut into the crust or topping mixture for a burst of natural sweetness and pleasant chewiness in every bite.
- Nut butter – Drizzle melted peanut butter, almond butter, or Nutella over the crust before adding the caramel sauce for an extra decadent blend of tastes and textures.
FAQ
Yes! You can substitute the gluten-free flour with an equal amount of regular all-purpose flour if you don’t need these toffee bars to be gluten-free.
You can easily make dairy-free carmelitas by swapping the butter with plant-based butter. For the salted caramel sauce, grab a non-dairy/vegan store ready-made option from the store. If making it from scratch, use coconut cream or a non-dairy heavy cream substitute for the caramel sauce.
Storing and freezing
Storing: Store leftover gluten-free carmelitas in an airtight container at room temperature for up to three days. Or, for longer storage, keep them in the refrigerator for up to a week.
Freezing: To freeze, wrap each bar individually in plastic wrap or parchment paper, place them in a freezer-safe bag or container, and freeze for up to 3 months. Thaw in the refrigerator and let them come to room temperature before enjoying.
More gluten-free dessert bars
Here are more delicious gluten-free handheld treats you’ll love:
If you love this gluten-free carmelitas recipe, I would be so grateful if you could leave a 5-star 🌟 rating in the recipe card below. I love reading your comments and feedback!
Stay posted on my latest cooking adventures through social media @ Instagram, Pinterest, and Facebook. Also, don’t forget to tag me when you try one of my recipes!

Gluten-Free Oatmeal Carmelita Bars
Ingredients
For the crust:
- 1 cup gluten-free all-purpose flour I use and recommend King Arthur brand
- 1 cup gluten-free quick oats
- ¾ c coconut sugar -or brown sugar
- ¾ cup salted butter softened
- ¼ tsp sea salt
- ½ tsp baking soda
- ½ tsp vanilla
For the filling:
- ¾ cup semi-sweet chocolate chips -or dark chocolate chips (go with your favorite gluten-free brand)
- ¾ cup chopped pecans or walnuts
- ½ cup caramel sauce *I used Smuckers Salted Caramel sauce (can also use homemade caramel sauce-recipe in post, or sugar-free *see notes)
- 1 tbsp gluten-free all purpose flour *for combining with the caramel sauce
Instructions
- Mix the cup of flour, quick oats, coconut sugar, softened butter, baking soda, salt, and vanilla in a stand mixer on low speed until it forms crumbs.
- Press half of this mixture into the bottom of an 8" square baking dish lined with parchment paper (you need to reserve half of this mix for the topping.) Bake at 350 degrees for 12 minutes.
- Sprinkle chopped nuts and chocolate chips over crust as soon as it comes out of the oven.
- Combine ½ cup of salted caramel sauce and 1 tbsp gluten-free flour with a whisk. Drizzle over nuts and chocolate chips. Sprinkle remaining crumbs over the top and bake for 18-22 minutes more, until lightly golden.
- Let the bars cool completely in the baking dish, then chill in the refrigerator for 1-2 hours. Once chilled, lift the bars out using the parchment paper, slice, and enjoy!
Notes
-
- Sugar-free caramel sauce option. I have tested these bars using Torani’s sugar-free caramel sauce and it works if you need a lower sugar option. It has a good consistency for the caramel filling. Just be sure to follow the recipe step of mixing in the GF flour to thicken it a bit more.
- Quality counts! Good-quality chocolate melts better and offers a richer flavor, while fresh, high-quality nuts add a delightful crunch, so go for the good ones!
- Always line your baking dish. Line it with parchment paper, leaving an overhang on the sides so it’s easier to lift the bars out of the pan once they’re cooked and cooled.
- Chill before slicing. Allow the Carmelitas to cool completely in the baking dish, then let them chill in the fridge for 1-2 hours before slicing. This helps them set properly, making clean slices much more manageable instead of turning into an ooey-gooey mess!
Nutrition
- Cheesy Chicken Fajita Casserole - February 18, 2026
- Easy Chicken Spinach Casserole - February 9, 2026
- Mini Biscoff Cheesecakes (High Protein!) - January 26, 2026


Too many ingredients results very disappointing. I’m a seasoned cook and baker. I should have trusted my instincts.
Hi Lucy! I’m sorry that you didn’t like the recipe. Caramel sauce can be tricky and making it from scratch does create more ingredients and more work for this recipe. I posted this one 10 years ago, so I think I’ll retest this one with a store-bought caramel sauce for an easier version and see how it turns out. I appreciate the feedback.
So glad i stopped over at your blog before heading out to the grocery store. Getting ingredients to make these tonight Yumm