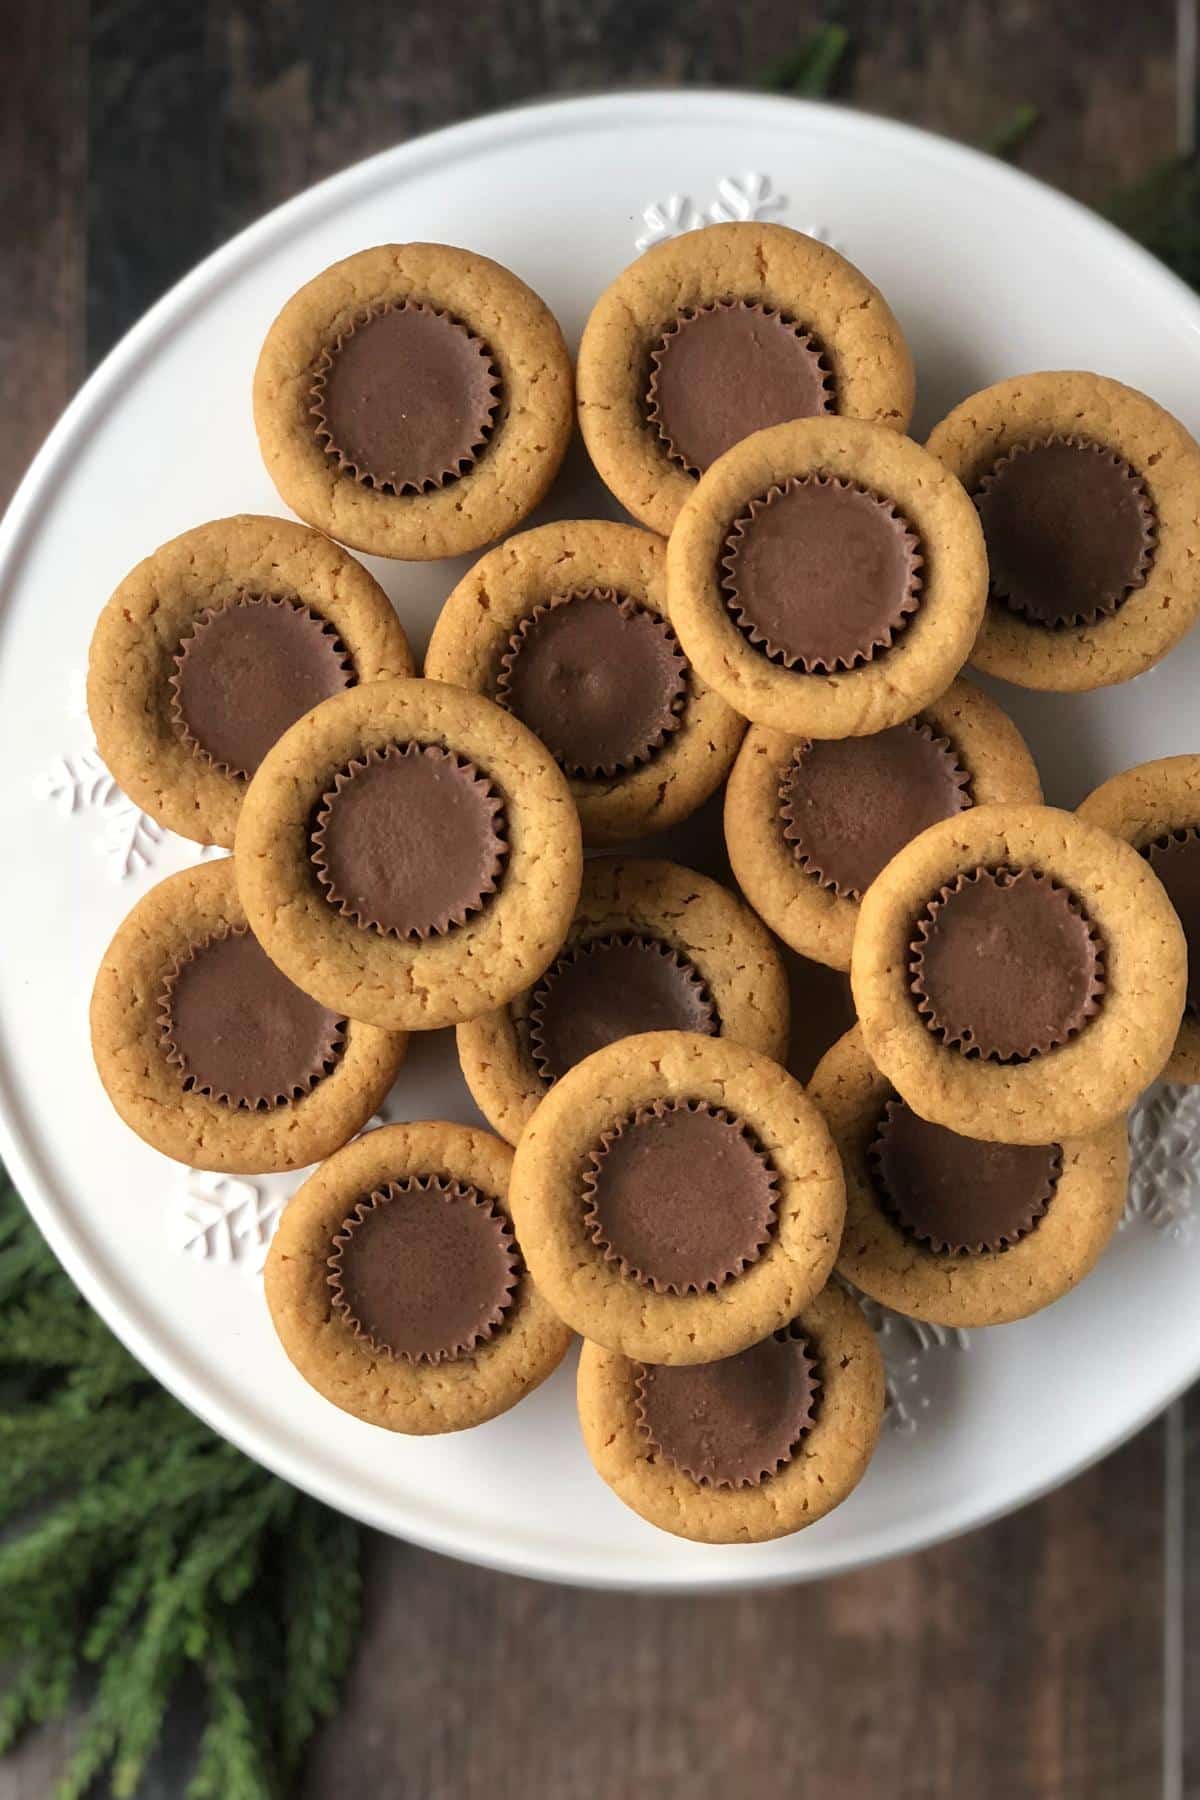
Reese’s Peanut Butter Cookie Cups
This post may contain affiliate links. Please read my disclosure policy.

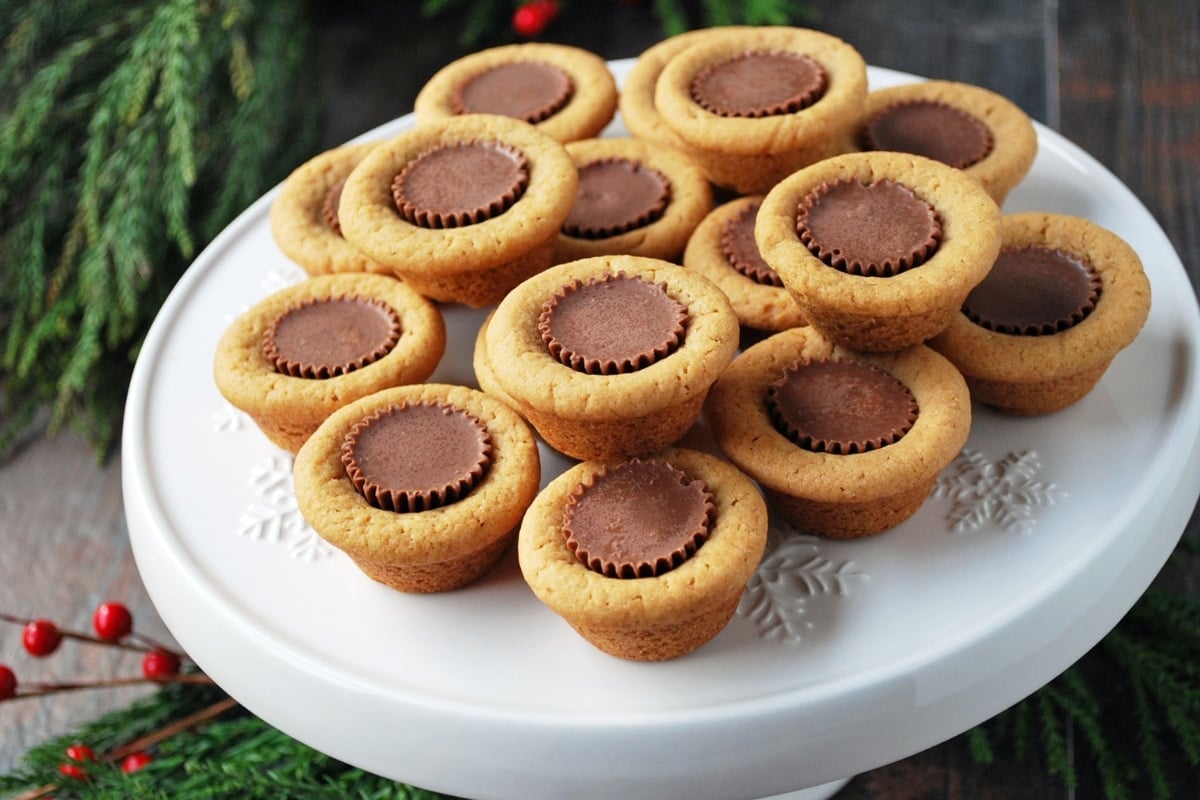
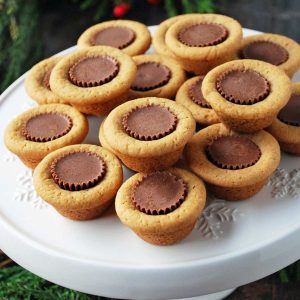
These Chocolate Peanut Butter Cup Cookies feature a soft, buttery peanut butter cookie tartlet shell with a gooey mini chocolate peanut butter cup in the middle. They’re easy to make from scratch or with a store-bought cookie mix – perfect for your next Christmas cookie exchange!
Love Reese’s? Then welcome to your cookie dream come true! These chocolate peanut butter cookie cups are a holiday staple in our house. This recipe draws inspiration from both Joy of Baking’s Peanut Butter Cup Cookies and a Betty Crocker version I discovered years ago.
After a little trial and error, I got the peanut butter cookie dough for the tartlet shells just right. It bakes up soft and tender with crisp edges and rich peanut butter flavor. The warmth of the freshly baked peanut butter cookie cup melts the chocolate peanut butter cup just enough so it stays put in the center.
That said, I’ve also made the peanut butter cookie cups with a bag of peanut butter cookie mix, and they turned out just as amazing, so I’m sharing both options. Use what works best for you! Either way, the trickiest part is unwrapping all those Reese’s. I recruited my daughter to assist with this part. Kids love helping out with this task, just make sure that they don’t eat them all in the process. 😉.
Why You’ll Love these Cookies
- From-scratch or semi-homemade. Stick with the DIY version for a classic, hands-on experience, or use store-bought cookie mix for a foolproof shortcut.
- Delicious & decadent. Imagine a soft, buttery, perfectly nutty peanut butter cookie shell with a melty mini chocolate peanut butter cup in the center.
- Great for holidays & gifting. The portion-friendly cookie cups are ideal for cookie exchanges, bake sales, parties, or just cause!
Ingredients you’ll need
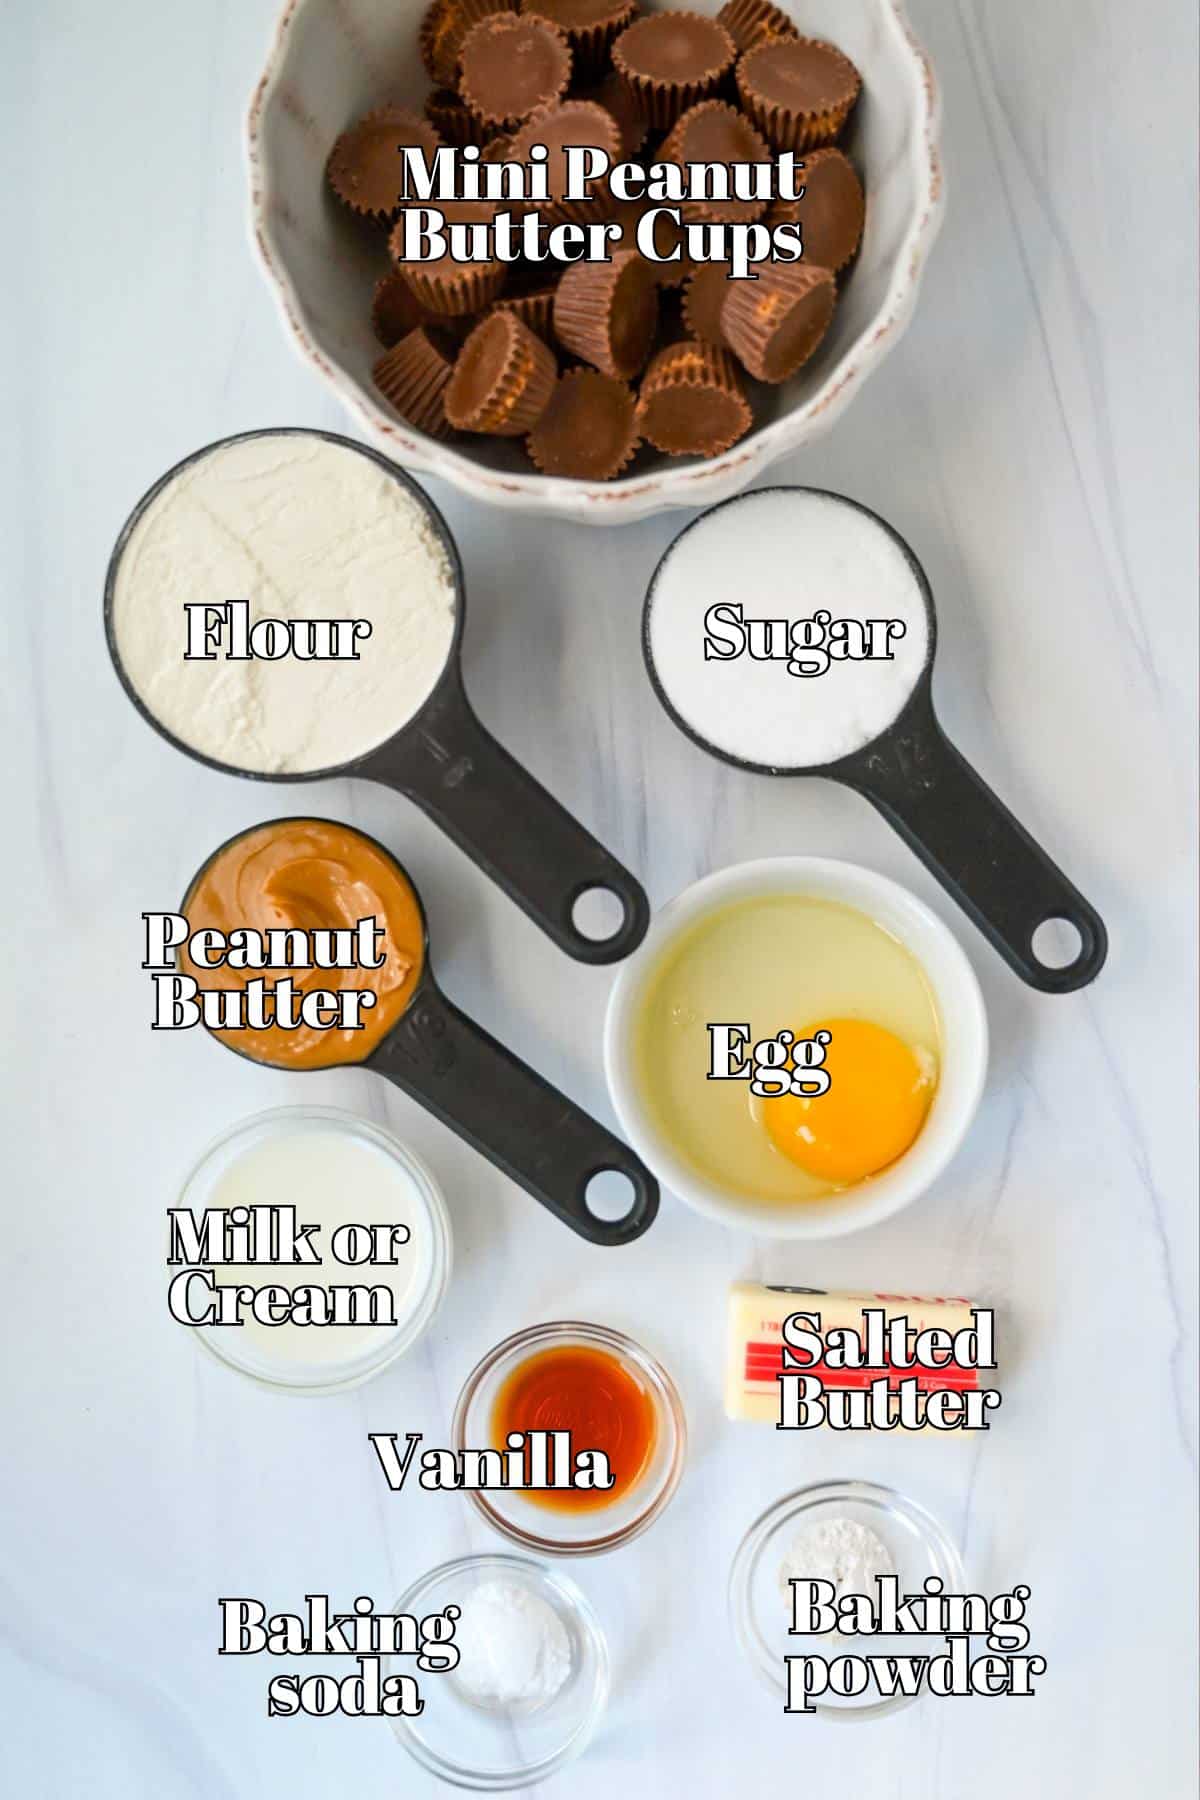
- Flour. I use unbleached all-purpose flour, nothing fancy. A 1:1 gluten-free baking blend usually works here, too.
- Baking soda + baking powder. These two leaveners team up to help the dough puff slightly and hold its shape in the mini muffin cups. Expired leaveners are one of the sneaky reasons cookies fall flat, so make sure they’re fresh.
- Sugar. I like using cane sugar to sweeten the dough, but granulated white sugar works exactly the same, if that’s what you have on hand.
- Peanut butter. The creamier the better here, as it blends seamlessly into the dough and creates a soft, melt-in-your-mouth cookie. Avoid natural peanut butter. The oil tends to separate, which can make the dough greasy. Stir the peanut butter well before adding it to the batter.
- Salted Butter. I take the butter out of the fridge about 30 minutes beforehand, so it’s perfectly softened. This helps it cream properly and gives the cookie cups a soft, tender crumb.
- Egg. The egg binds the dough and adds richness. I pull it out of the fridge along with the butter, so it also comes to room temperature.
- Milk. For moisture, I use whole milk, but you can sub heavy cream for a slightly more indulgent cookie.
- Vanilla extract. To round out the richness, I always recommend pure vanilla extract over imitation, but either will work in a pinch.
- Mini peanut butter cups. You can use any brand, but I think we can all agree that nothing compares to Reese’s. Whatever you choose, make sure they’re mini-size so they fit snugly.
How to Make Reese’s Peanut Butter Cookie Cups
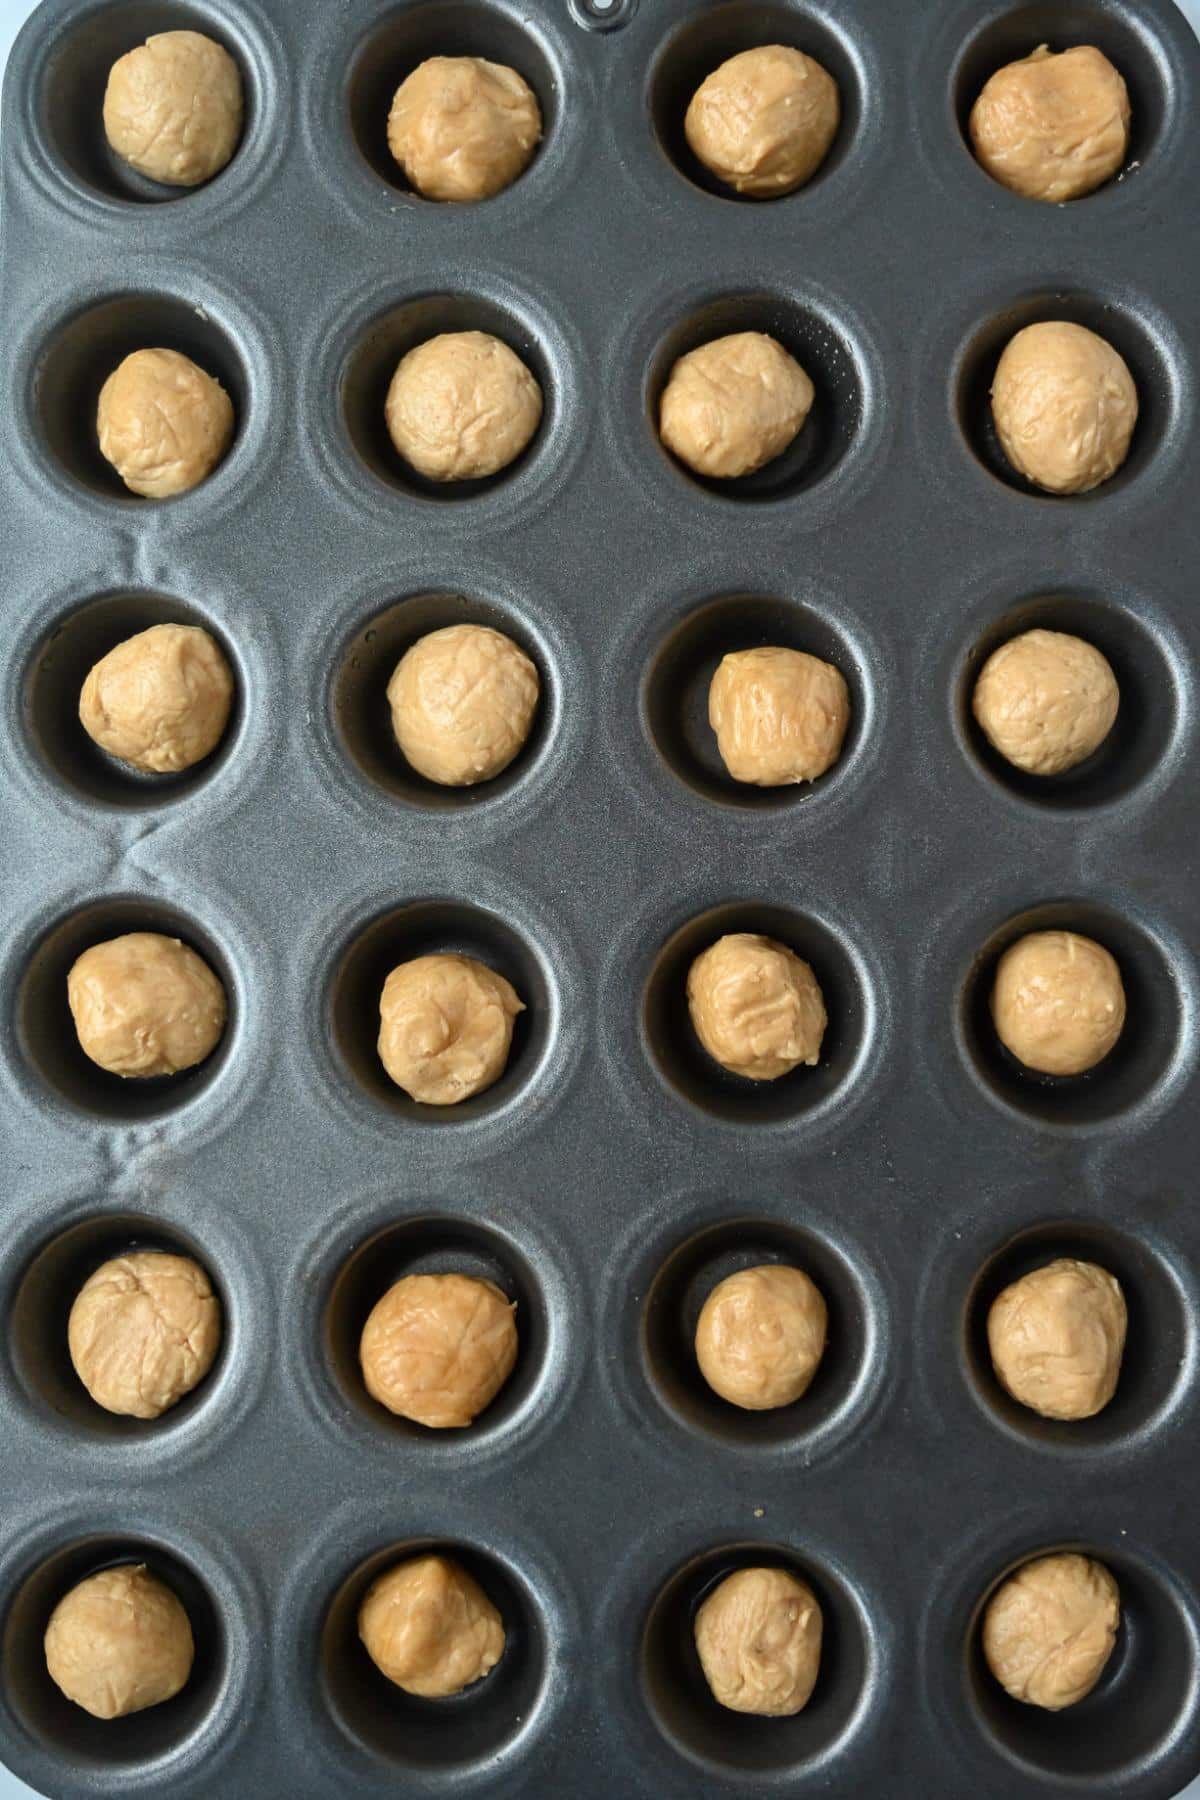
Step 1: Prepare for baking. Preheat your oven to 350°F and lightly grease 36 mini muffin cups with cooking spray.
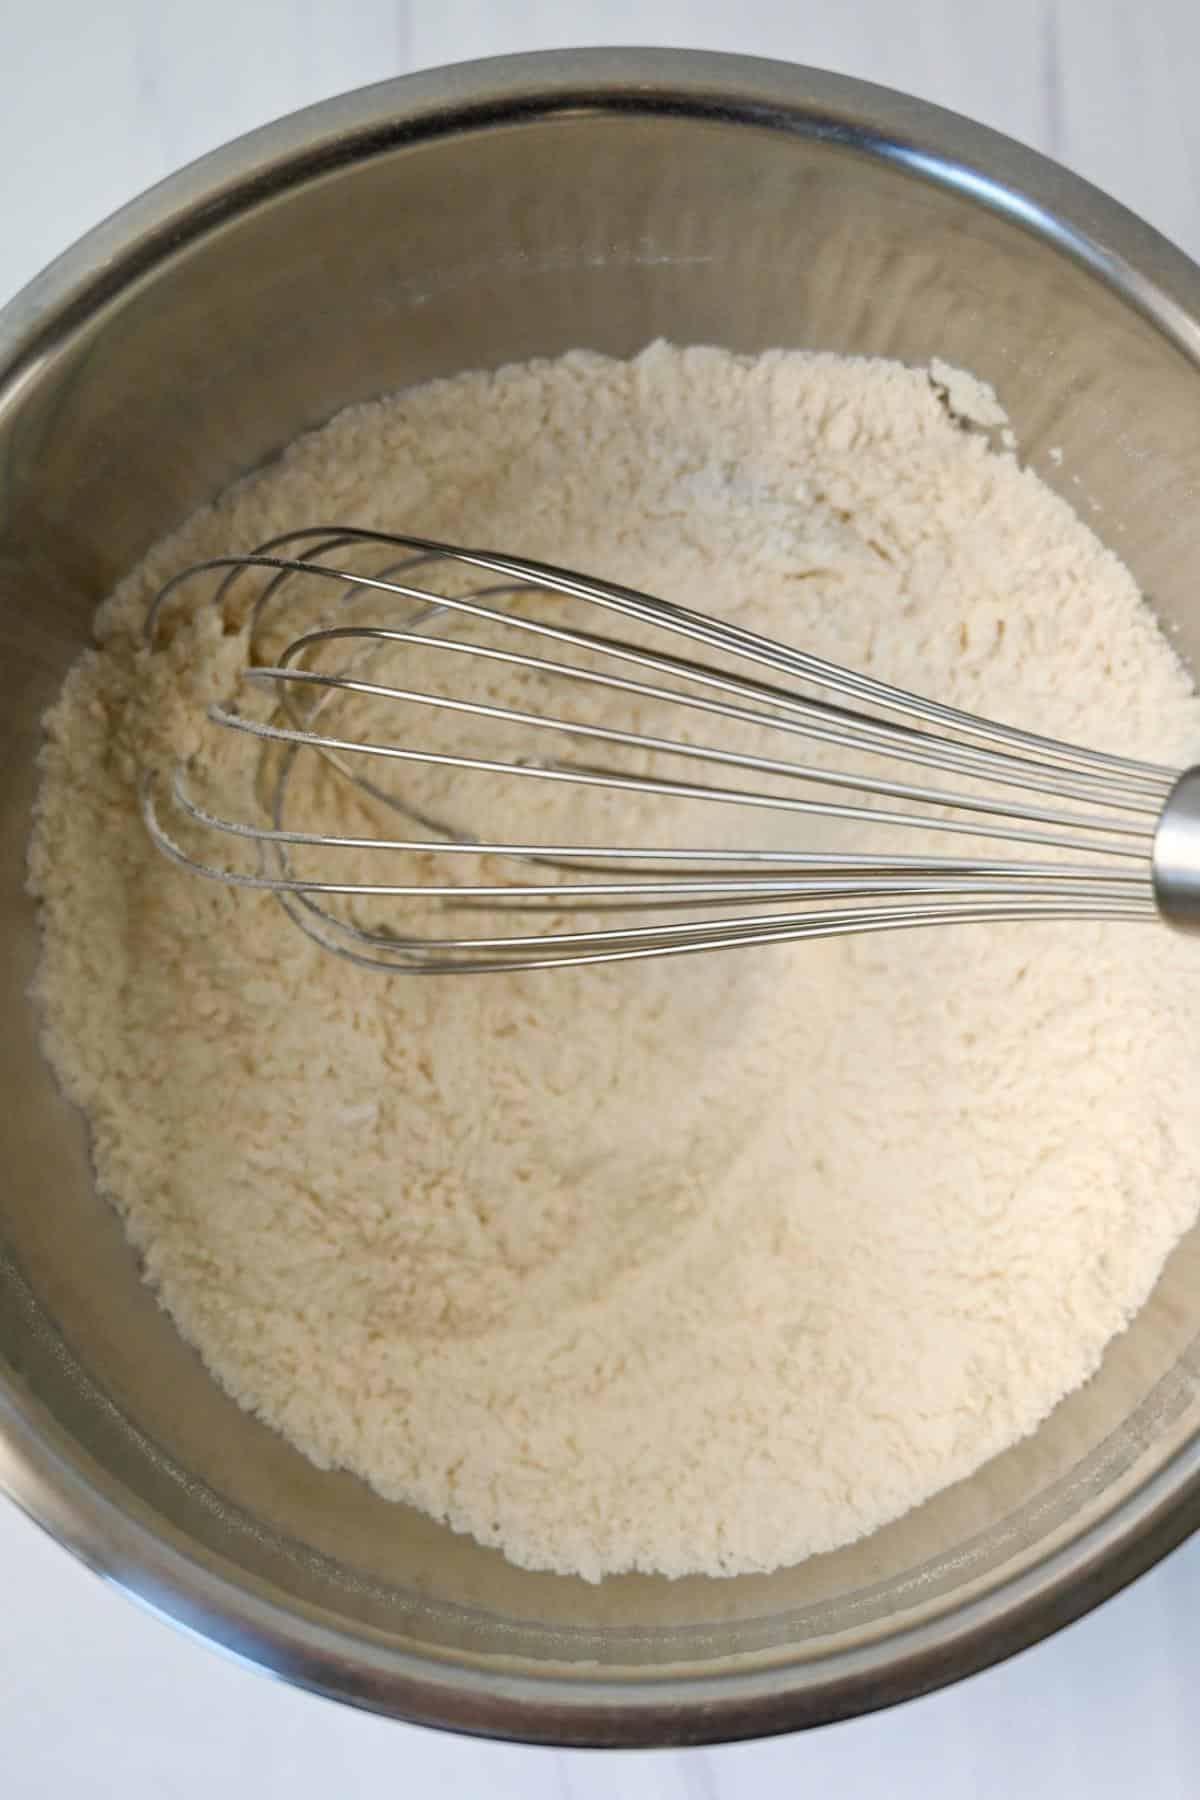
Step 2: Combine dry ingredients. In a medium bowl, whisk together the flour, baking soda, and baking powder.
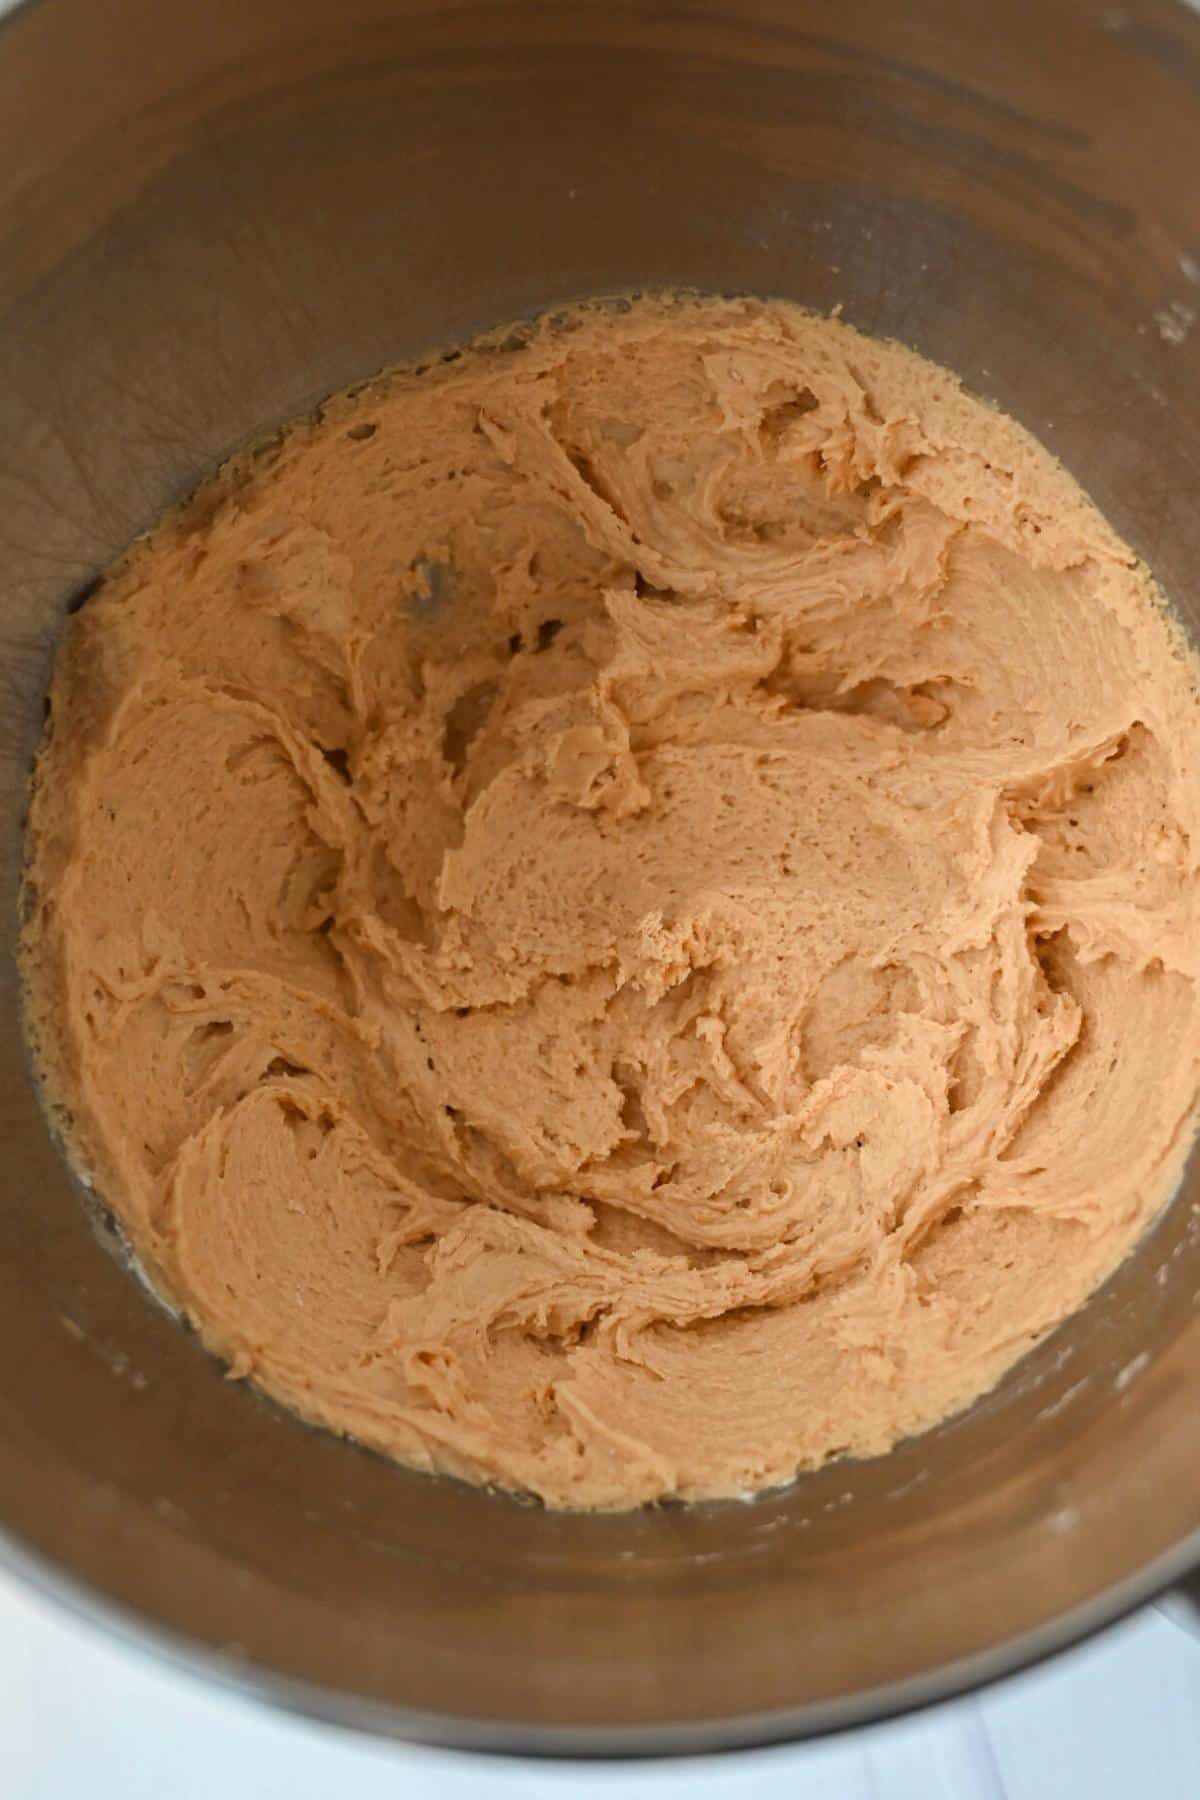
Step 3: Cream the fats & sugar. In the bowl of a stand mixer, cream the butter, peanut butter, and sugar for about 2 minutes, until the mixture looks light and fluffy.
Step 4: Add the wet ingredients. Beat in the egg, milk, and vanilla until smooth. Stop and scrape down the bowl as needed.
Step 5: Incorporate the dry ingredients. With the mixer on low, slowly blend in the flour mixture just until the dough comes together. Chill the dough for about an hour.
Step 6: Shape the dough. Roll the dough into ¾-inch balls and place one in each muffin cup. You’re working with soft dough, so use a little flour for your hands, if needed. Using a tart tamper, press into the center of each ball to create a little well.
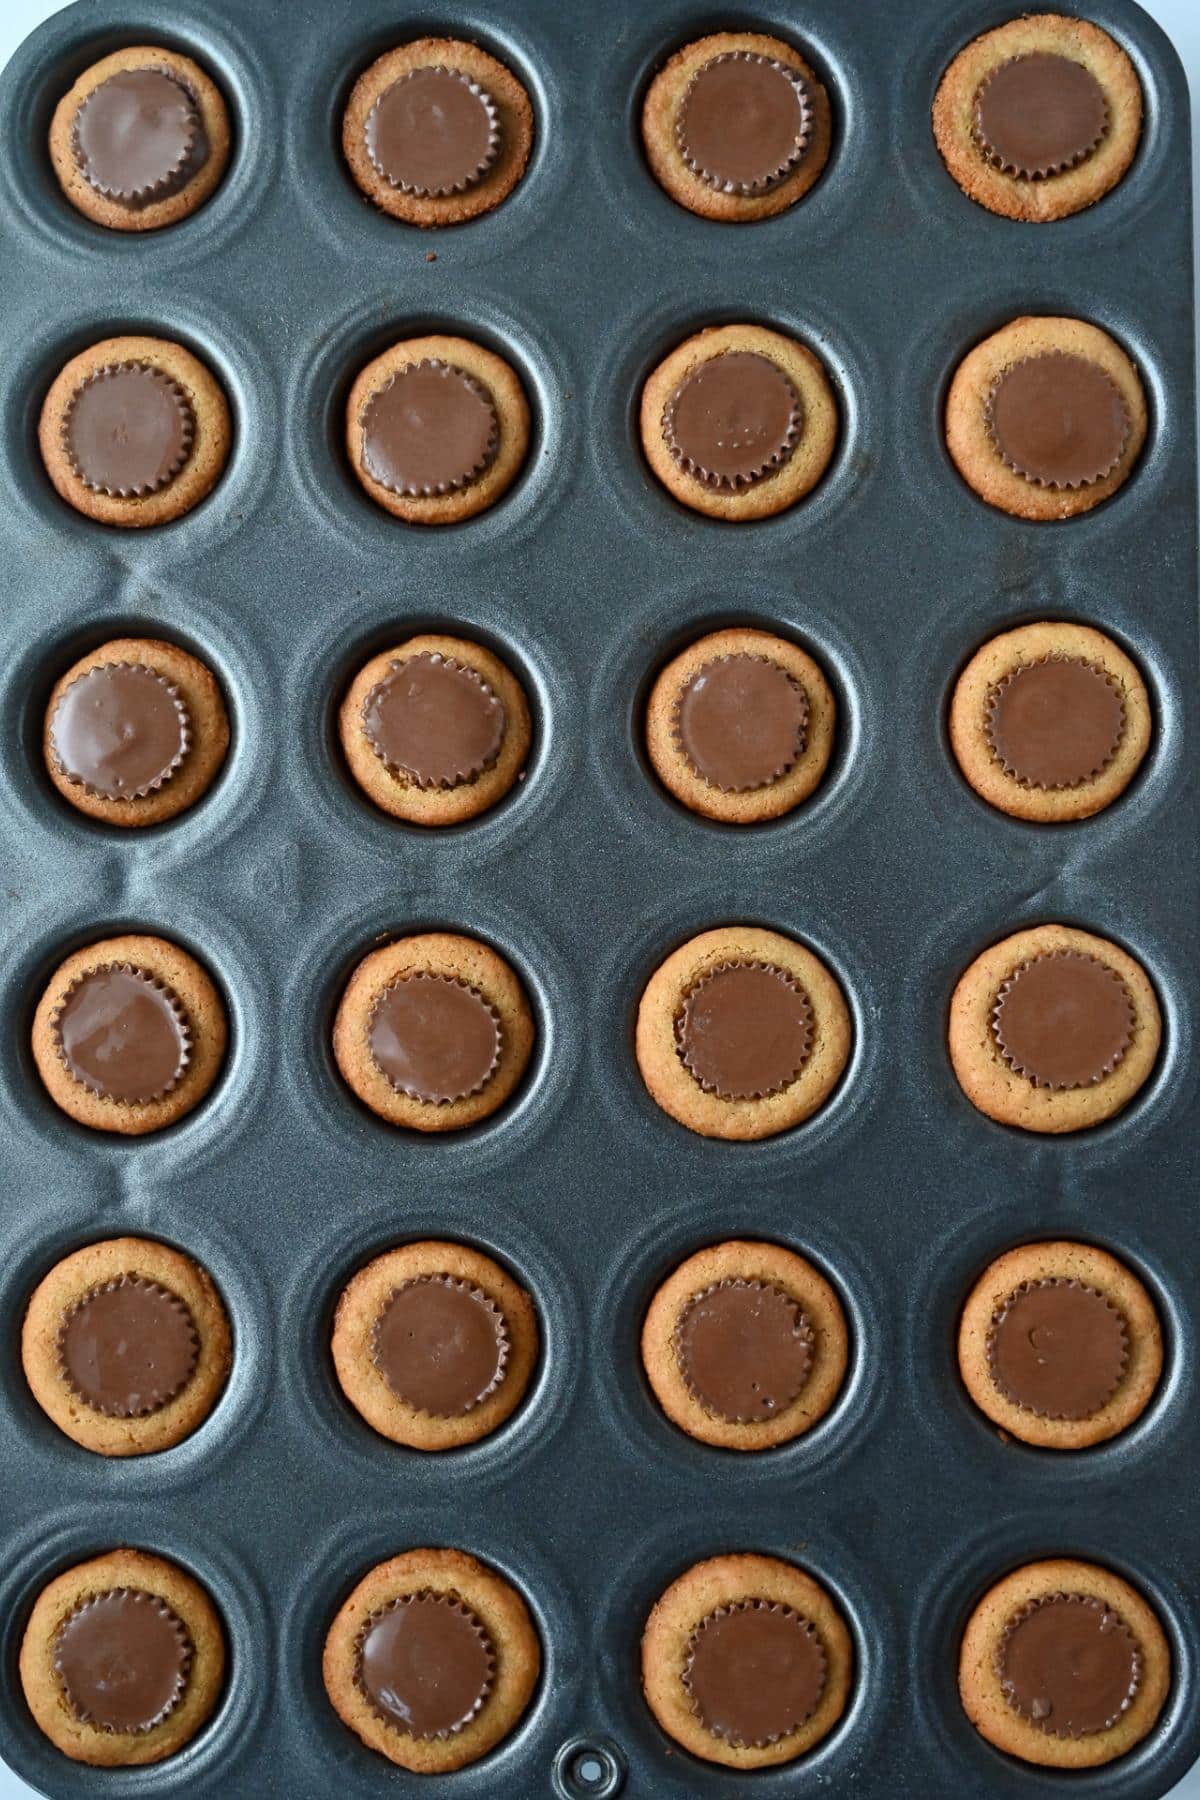
Step 7: Bake the cookie cups. Bake for 8-12 minutes (dark pans bake faster), or until the edges look lightly golden and the centers still look soft – they’ll continue to set as they cool. Check them early so they don’t overbake.
Step 8: Add the peanut butter cups and cool. Remove the pan from the oven and immediately press a peanut butter cup into the center of each cookie. Let the cookies cool completely in the pan on a wire rack before removing.

Baking Tips, Tricks, and FAQs
- Grease the mini muffin pan well. It helps the cookie cups release cleanly once cooled and prevents any breakage. Even nonstick pans benefit from a light spray.
- Avoid over-mixing. When you add the dry ingredients, mix slowly and gently, stopping as soon as the dough comes together. Over-mixing at this stage can make the cookies tough instead of soft and tender.
- Chill the dough. If your dough feels too sticky to roll into balls, pop it in the fridge for 30 minutes to an hour. This will firm it up a bit and make it easier to work with.
- No tart tamper? Anything with a round end, approximately 1 inch in diameter, like the back of a spoon, a 2-liter soda bottle cap, or even a shot glass, works great for pressing that little well into each dough ball.
- Press the Reese’s into the cookies right out of the oven. The heat helps the chocolate settle into that perfect gooey center. If you wait too long, they won’t adhere as smoothly.
- Let the cookies cool completely. Letting them cool fully in the muffin cups on a wire rack helps them firm up so they pop out of the tin flawlessly. To pop them out, just give them a little twist, and they should easily lift out of the pan.
Semi-Homemade Hack (Using Store-Bought Cookie Mix)
If you’re short on time, you can absolutely use store-bought peanut butter cookie dough mix. Just prepare the dough according to the package instructions, then follow my recipe steps for rolling the dough into balls and bake according to the package directions (always check them a little early since bake times can vary).
I’ve had great results with Betty Crocker Peanut Butter Cookie Mix and Krusteaz Double Peanut Butter Cookie Mix. One note: most packaged mixes yield closer to 48 cookie cups than 36, so be sure you have enough mini peanut butter cups on hand.
Variations
For the center, classic Reese’s Peanut Butter Cups aren’t your only option. Check out the options below to create a peanut butter cookie tartlet that’s all your own.
- White chocolate – I’ve also made these with Reese’s White Chocolate Mini Cups. Perfect if you love white chocolate and peanut butter together!
- Dark chocolate – Use Reese’s Dark Chocolate Mini Cups if you prefer slightly less-sweet desserts.
- Nut-free version – Swap the peanut butter and peanut butter cups for sunflower seed butter and sunflower butter cups – different but still delicious!
Mini muffin tins make perfect cookie cups, but if you don’t have one, you can try a mini tart pan or even silicone candy molds. Just watch the baking time. Larger molds may need a few extra minutes in the oven.
Yes! You can prepare the dough in advance and store it in the fridge for up to 2 days, or freeze it for up to a month. When you’re ready to bake, simply thaw the dough in the fridge, roll it into balls, press the wells, and bake as directed. I often do this with several types of cookie dough to streamline holiday baking.
Storing and freezing
Storing: Once cooled, store your cookies in an airtight container at room temperature for 3-4 days.
Freezing: To freeze, place fully cooled cookies in a single layer on a baking sheet and freeze until firm. Then transfer them to a freezer-safe container or bag. They’ll keep for up to 2 months.
More Christmas Cookie Recipes
- Chocolate Crunch Cookies
- Easy Walnut Crescent Cookies
- Maple Shortbread Cookies
- Peanut Butter Thumbprint Cookies
- Peppermint Icing Thumbprint Cookies
If you love this Chocolate Peanut Butter Cookie Cup recipe, I would be so grateful if you could leave a 5-star 🌟 rating in the recipe card below. I love reading your comments and feedback!
Stay posted on my latest cooking adventures through social media @ Instagram, Pinterest, and Facebook. Also, don’t forget to tag me when you try one of my recipes!
Chocolate Peanut Butter Cookie Cups
Ingredients
- 1 cup unbleached all-purpose flour packed
- ½ tsp baking soda
- ½ tsp baking powder
- ½ cup cane sugar or granulated sugar
- ⅓ cup no-stir creamy peanut butter *I use Jif Naturals
- ¼ cup salted butter softened
- 1 large egg
- 2 tbsp whole milk or heavy cream
- 1 tsp vanilla extract
- 36 mini peanut butter cups unwrapped
Instructions
- Preheat oven to 350 degrees F and grease 36 mini muffin cups with cooking spray
- Whisk baking soda, baking powder and flour together in a medium bowl.
- Using a stand mixer, mix butter, peanut butter and sugar for about 2 minutes.
- Beat in egg, milk, and vanilla. Slowly add the flour mixture until well blended. Chill the dough for 1 hour.
- Roll into 3/4 inch balls and place a ball into each muffin cup. Using a tart tamper (dust with a little flour if needed, shaking off any excess), press into the center of each ball to form a tart.
- Bake 8-12 minutes (shorter time for dark metal pans). Check them early so they don't overbake. The edges should be lightly golden and the centers soft- they will continue to set as they cool.
- Remove from oven and immediately press a peanut butter cup into the center of each cookie.
- Cool completely on wire rack before removing.
Notes
Nutrition

- Toasted Reuben Wrap Sandwich - May 20, 2026
- Low-Carb Spicy Tuna Bowl with Canned Tuna (High Protein) - May 17, 2026
- Lightened-Up Tiramisu Parfaits - May 11, 2026